The Psychology of Online Learning: How to Make Tutorials That Stick

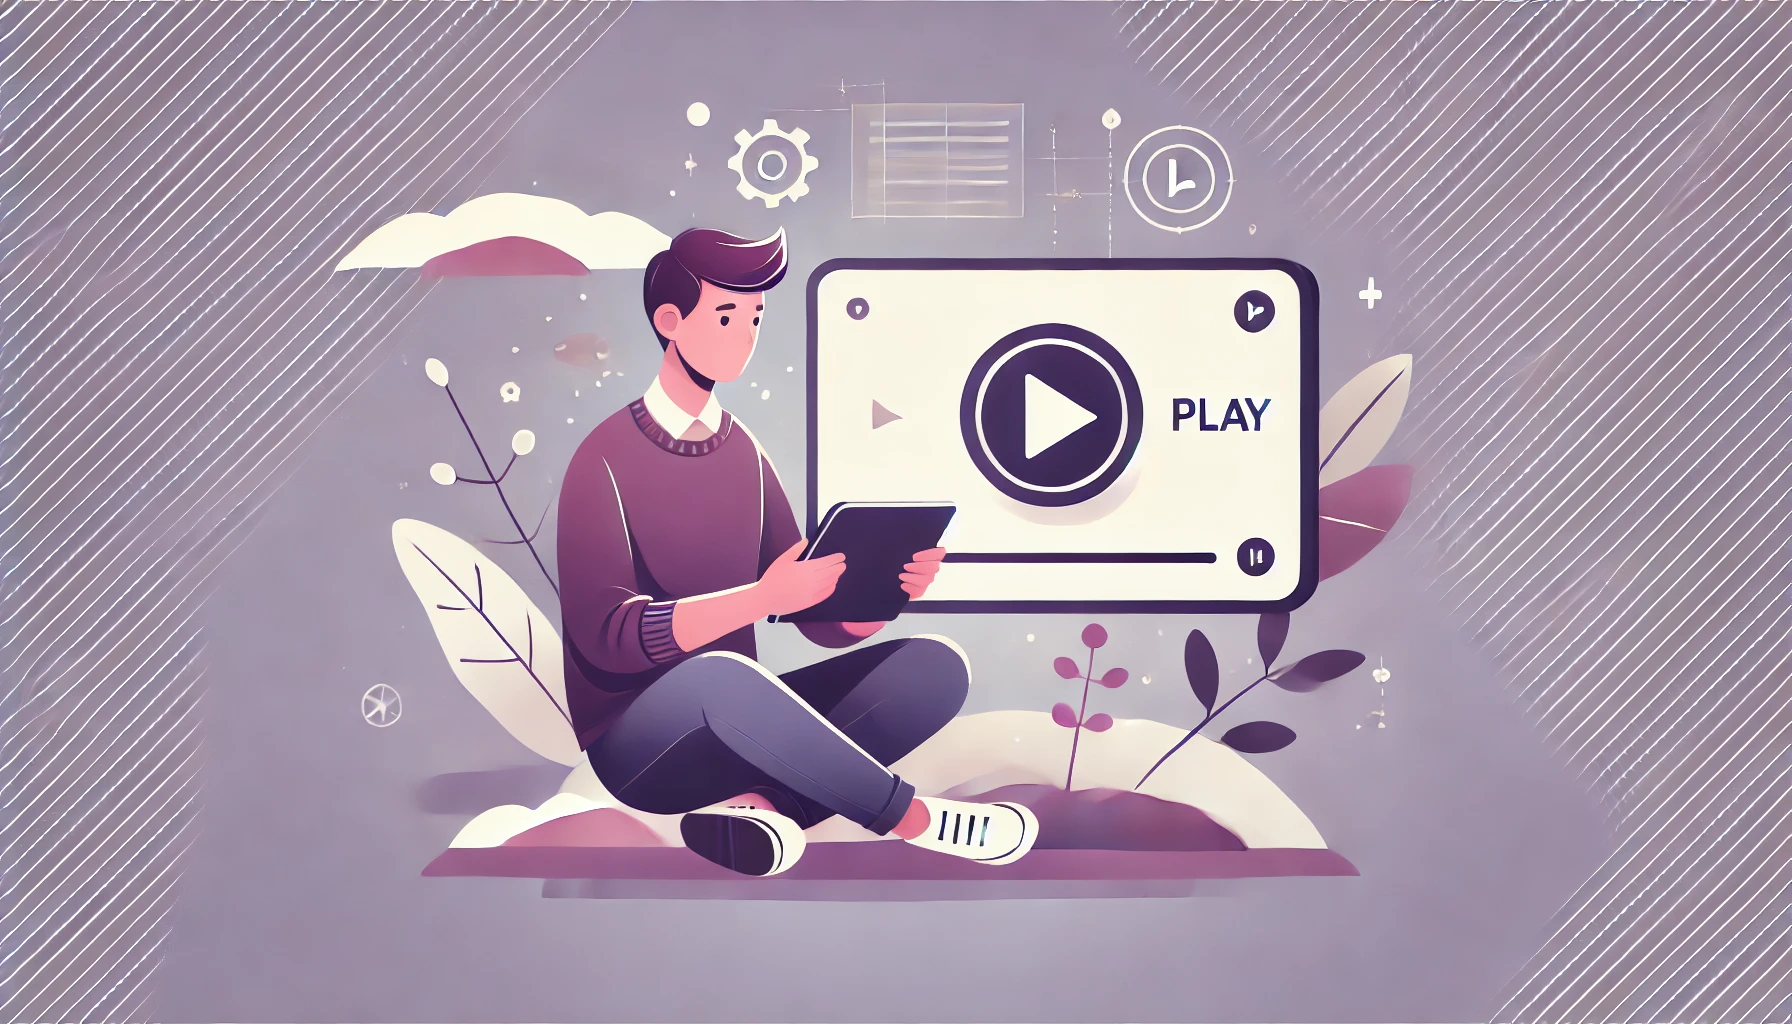
You might think creating an online tutorial is all about the technical side—recording software, editing tools, or maybe eye-catching visuals.

But the psychology of learning plays an even more significant role in making tutorials that resonate deeply and truly stick in the minds of your audience.

When you understand the cognitive principles that shape how people learn online, you gain the superpower of designing content that not only grabs attention but also holds it for the long haul.

This post explores why certain tutorials spark genuine “aha!” moments and how you can replicate that magic.

By tapping into proven research on active learning, chunking, and retrieval practice, you can transform an otherwise dry “instructional video” or “step-by-step guide” into an engaging, educational experience.

It’s the difference between viewers quitting halfway through a video and them finishing excited to put their newfound knowledge into action.


Why the Psychology of Online Learning Matters

Plenty of content creators focus on the “how” of making tutorials—how to record a screen, how to structure slides, or how to improve audio. But there’s often less emphasis on the “why” of it all.

Why does someone’s brain latch onto certain tutorials while treating others like background noise?

When you dive into the cognitive underpinnings of learning, you discover that online tutorials are most effective when they leverage the way people naturally process, store, and retrieve information.

By aligning your tutorial structure with these mental processes, you help your audience not just learn but also remember.

For example, imagine you’re watching two tutorials on the same topic. One simply rattles off facts.

The other breaks information into digestible chunks, encourages you to solve mini-challenges along the way, and reminds you to revisit key concepts later.

That second tutorial taps into active learning, spaced repetition, and other proven techniques, ensuring the content stays with you. And that’s exactly what you want your tutorials to do—stick.

Core Cognitive Principles That Shape Effective Tutorials

1. Active Learning

Active learning makes your audience do more than just passively watch or read. It turns them into participants rather than spectators.

Examples of active learning in tutorials might include quizzes, practice exercises, or even quick moments to pause and reflect. This approach engages a learner’s brain by making them think, apply, or question what’s being taught.

Why does this matter? Because the more mental energy someone invests in your tutorial, the more committed they become to understanding and retaining the information.

A well-timed question—like, “How would you apply this concept in a real project?”—forces viewers to connect new information to their own experiences.

That mental “wiring” is powerful. It helps them forge stronger neural pathways, making the information more memorable.

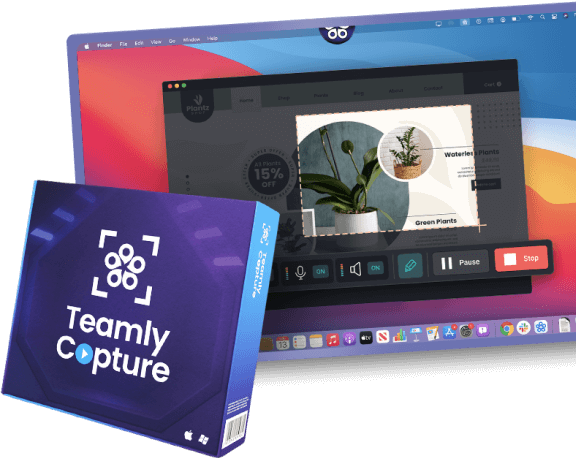
If you’re guiding people on how to use Teamly software, for instance, don’t just demonstrate menu clicks.

Ask them to pause and think about how they’d organize their own project within the platform. That moment of reflection cements knowledge far more effectively than a simple, “Click here, then click there.”


2. Chunking

Ever felt overwhelmed by a giant wall of text or a long-winded video with no breaks? You’re experiencing the lack of chunking.

Chunking groups related information into smaller, cohesive segments. In an online tutorial, this could mean subdividing your lessons into mini-modules, each dealing with a specific concept or skill.

Your audience’s working memory can only handle so much at once. By chunking, you’re reducing cognitive load, which is a fancy way of saying you’re minimizing the mental fatigue your audience experiences.

Instead of struggling to keep track of everything at once, learners can tackle one concept, absorb it, and feel good about their progress before moving on.

Picture a tutorial on color theory for graphic design. Instead of a 30-minute monologue discussing the color wheel, color psychology, complementary schemes, triadic schemes, and so forth, break it down.

Handle the color wheel in one chunk. Then transition to color psychology in a separate chunk. When done well, chunking boosts comprehension and ensures people don’t drop off because their brains are overloaded.

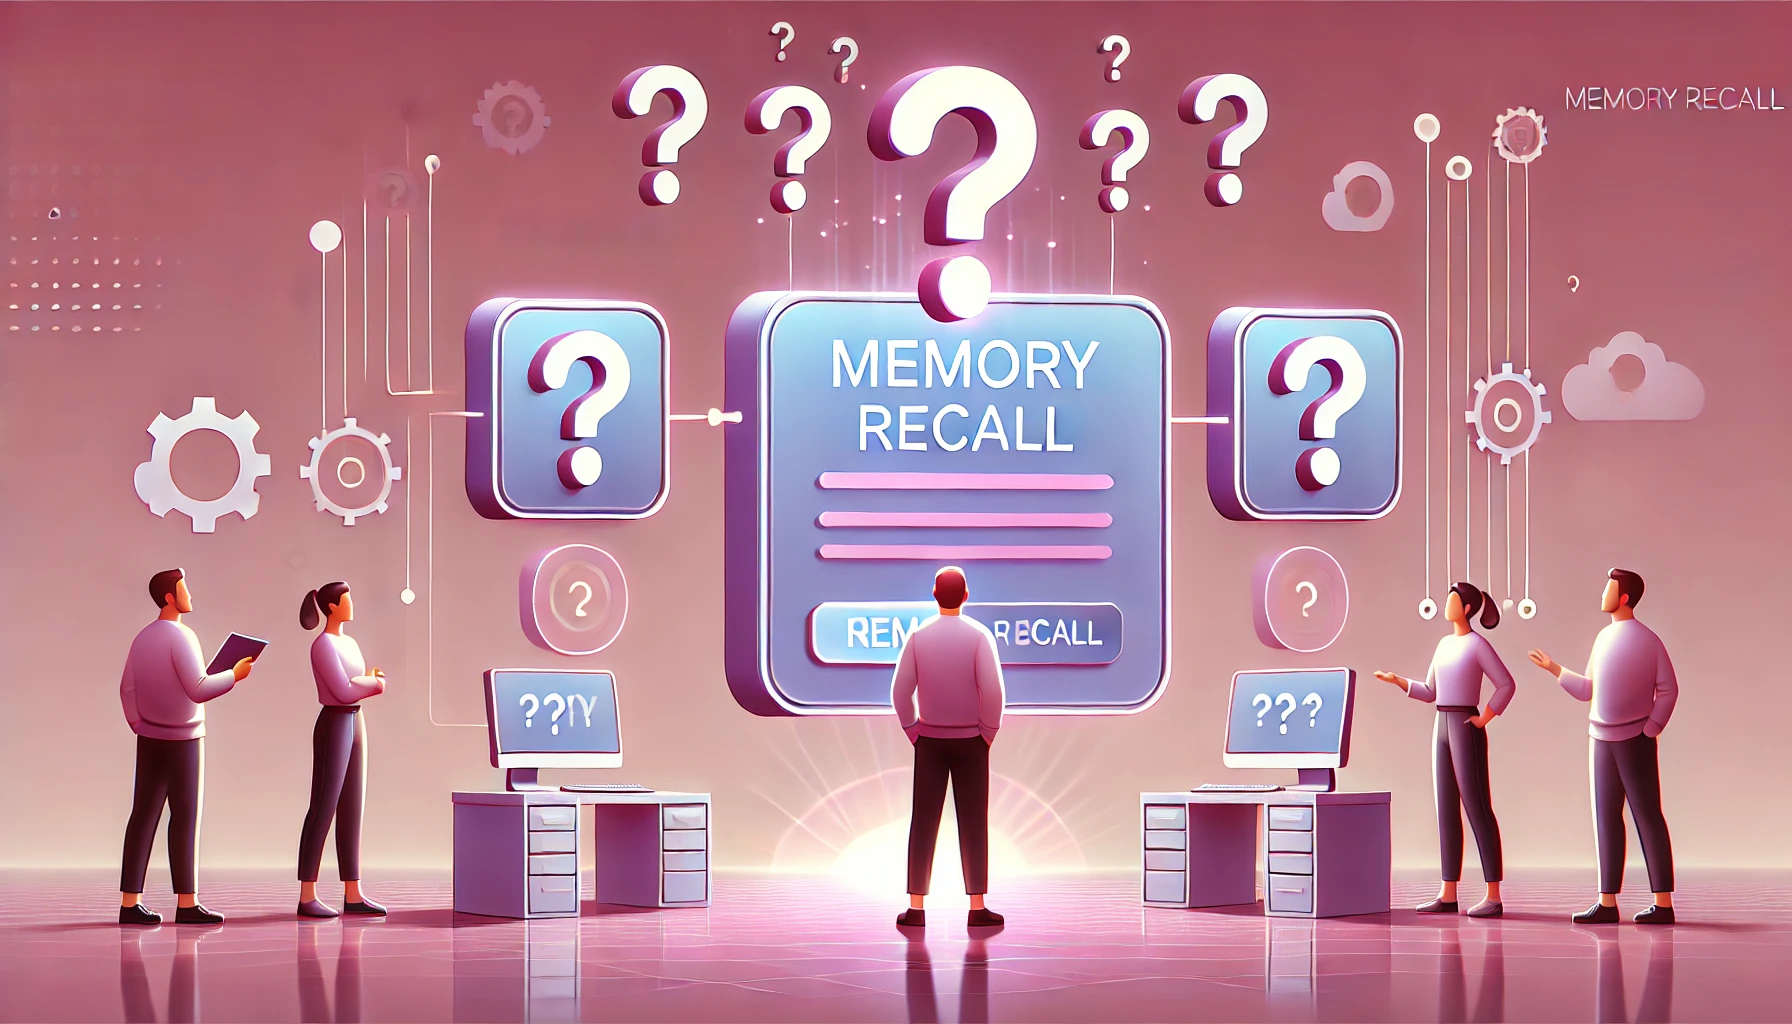
3. Retrieval Practice

Retrieval practice is about bringing information back to mind after you’ve learned it.

The act of retrieving knowledge strengthens its place in the memory. For online tutorials, this means including built-in recalls—questions, short tests, or challenges—designed to make viewers recall key points.

Why not just show them the answers right away? Because the effort to remember is where the magic happens. Even if learners struggle or make mistakes during retrieval practice, that process ironically helps them remember better in the future.

One easy way to implement retrieval practice is to add a short quiz at the end of each tutorial segment.

Even simple questions like, “Name two benefits of active learning” can do wonders. Learners actively search their memory for the answer, and that mental exercise cements the concept.


4. Spaced Repetition

Spaced repetition is a close cousin of retrieval practice. It’s the strategy of revisiting material at increasingly spaced intervals.

Think of it like gardening: you water plants at the right frequency so they don’t dry out or drown. In learning, spacing out review sessions works similarly: it lets knowledge grow roots without overwhelming the learner.

Online tutorials often end the moment the final slides fade out or the last bullet point is covered. But that’s a missed opportunity.

If you’re doing a series, consider recapping past lessons briefly at the start of each new module. Remind viewers of the top points from your previous video. You can also embed practice questions that prompt them to pull out details from past segments.

Some creators send reminder emails to learners, encouraging them to revisit a topic after a few days. That gentle nudge helps your audience fill in any gaps. And because spaced repetition aligns with how your brain naturally remembers (by reinforcing neural pathways gradually), it’s one of the best ways to ensure long-term retention.

5. Feedback Loops

Feedback loops matter more than you think. Whether it’s direct feedback through quizzes and community discussions or indirect feedback through analytics and viewer comments, these loops close the learning cycle.

Learners need feedback to understand what they got right, where they went wrong, and how they can improve.

From a psychological standpoint, timely feedback solidifies correct answers and corrects misunderstandings before they snowball. Y

ou don’t want your learners confidently believing something incorrect, only to discover much later they’ve misunderstood the concept. Quick, clear feedback helps them recalibrate and stay motivated.

For your tutorials, think about offering a mini “check for understanding” at strategic points. If your content is asynchronous, encourage learners to share their progress in a discussion forum or comment section. When they see answers or get clarifications, it builds trust and engagement.

Practical Tips for Applying These Principles

Design Interactive Elements

Turn passive watchers into active doers wherever possible. Embed challenges, short quizzes, or reflection prompts. Even a quick poll or puzzle can spark the kind of mental engagement that fosters deeper understanding.

Segment Content with Clear Labels

Use headings, bullet points, and short paragraphs to create visual breaks. If you’re filming a video, outline your segments with on-screen titles that mark new sections. You can even provide timestamps or chapter markers so viewers can pause, reflect, and revisit specific parts as needed.


Encourage Learners to Recall

Push your audience to recall key concepts. After explaining an idea, pause. Give them a short moment to recall and mentally restate what they’ve just heard. You might say, “Take ten seconds to repeat the key points in your own words.” This brief pause nudges them toward active retrieval.

Drip Out Content Gradually

If you’re running a tutorial series, space out release dates and pair new content with a short recap of the last session. This tactic makes sure your audience doesn’t watch everything in a single binge, only to forget half of it later. The key is pacing that aligns with how humans learn best: in measured steps.

Offer Immediate and Ongoing Feedback

Feedback isn’t just about getting a pat on the back. It’s about guidance. If you have a platform that allows comments or community interaction, respond to learners’ questions quickly.

This two-way communication helps them feel supported and ensures they’re not walking away with faulty assumptions.

When possible, provide mini-assessments or checklists that detail next steps. If a user has completed a basic tutorial on how to edit videos, for instance, point them to a more advanced course where they can refine transitions or animations. This approach builds momentum and confidence.

Beyond the Basics: Applying Psychology for Maximum Impact

Online tutorials thrive when you seamlessly weave cognitive research into the learner’s journey.

But there are extra nuances that take your tutorial from good to exceptional. One way is to incorporate multisensory elements—visuals, short demonstrations, or even background audio cues that highlight important moments.

When the brain receives information through multiple channels, it can form richer memories.

Another underutilized approach is storytelling. Don’t just present facts—wrap them in stories or real-world anecdotes.

If you’re teaching about photography composition, you might tell a quick story of a time you or someone else captured an unexpected moment that illustrated the rule of thirds perfectly.

Storytelling activates emotional centers in the brain, making the lesson more memorable.

Finally, consider including collaborative or social aspects. Yes, people can learn alone, but social learning theory suggests we gain a deeper understanding when we discuss or demonstrate new skills within a group.

Encourage group projects, peer reviews, or community forums. That sense of shared learning amplifies motivation and accountability.


Common Missteps to Avoid

A few common pitfalls can undermine even the most thoughtfully designed tutorial. One is overloading your learner with too many steps, too quickly.

Another is failing to engage the learner at all, delivering a monologue without pausing for interaction. And of course, skipping feedback opportunities is a sure way to lose audience interest.

Additionally, avoid ignoring production quality. A scratchy microphone, disorganized slides, or confusing navigation disrupts the learning flow and can break immersion.

Give your tutorial a professional touch, both aesthetically and structurally.

Finally, make sure to review your own content from a learner’s perspective.

Ask: “Would I be able to follow these steps? Are there clear milestones? Do I feel motivated to keep going?” If any answer is “not quite,” then you know what to refine.

Where to Go from Here

The beauty of leveraging psychology in your online tutorials is that each principle—active learning, chunking, retrieval practice, spaced repetition, and feedback loops—feeds into the others.

Think of them like puzzle pieces that fit together to form a robust, learner-centric approach.

As you plan your next tutorial, start by chunking your material into segments, then look for opportunities to make those segments interactive.

Sprinkle in retrieval practice, space your lessons out to encourage repetition, and wrap everything in timely feedback. Once learners see how much they’re actually retaining, they’ll be more invested in coming back for more.

Ultimately, a psychologically sound tutorial is one that prioritizes the learner’s perspective every step of the way. That includes designing with short attention spans and real-world application in mind.

It means letting your audience take an active role and ensuring they get guidance when they stumble. It also means inviting them to reflect, recall, and integrate the knowledge into their day-to-day lives.

By paying close attention to these cognitive details, you boost not only the educational impact of your tutorials but also their reputation. Word spreads about well-crafted, engaging tutorials that consistently deliver results. And that’s exactly the legacy you want for your content.


Learning doesn’t have to be a dull chore—particularly when you’re armed with the psychological insights that make it unforgettable. Embrace these principles, and watch as your online tutorials stick with your audience, propelling them forward in their quest for knowledge.


How to Optimize Your Online Tutorials for SEO and Discoverability

You’ve poured hours into crafting a high-quality online tutorial—scripted it out meticulously, recorded footage, edited with flair, and packaged it all up in a user-friendly format.

But here’s a question: how will anyone find it amid the vast sea of online content? That’s where search engine optimization (SEO) and discoverability come in.

By applying smart SEO strategies, you can boost your tutorial’s visibility in search results, attract more viewers, and ensure your target audience gets the help they’re looking for.


The Vital Role of SEO in Tutorial Creation

At first glance, SEO might sound technical or overwhelming. You’re likely thinking it involves keywords, meta tags, and endless algorithm hacks.

While there’s some truth to that, effective SEO is simply about making your content more accessible to both search engines and real people.

When your tutorial is properly optimized, you’re not just courting web crawlers; you’re also providing a better experience for your viewers.

At its core, SEO means you’re framing the tutorial in a way that people can effortlessly find and understand. You’ll be creating logical structures, using relevant keywords, and making sure your content is tailored to match the intent of those searching for solutions.

Why Discoverability Matters

If SEO is about positioning your tutorial to rank high in search results, discoverability is about extending those efforts beyond search engines alone.

It encompasses all the ways people might come across your tutorial—like social media platforms, community forums, and recommended videos on YouTube.

The goal is to make sure that if someone wants to learn a particular skill or solve a specific problem, your tutorial has a strong chance of popping up right when they need it.

Begin with In-Depth Keyword Research

Think of keywords as the tiny beacons guiding your tutorial content to the right audience. When you identify what specific terms or phrases your audience uses, you’re effectively bridging the gap between “great content” and “the right viewers.”

Use tools like Google’s Keyword Planner, Ubersuggest, or SEMrush to find the phrases that match your topic. Aim for a balance between relevance and search volume.

For example, a broad keyword like “online tutorials” might have high search volume but also fierce competition. Instead, consider long-tail keywords that drill down more specifically—like “online guitar tutorials for beginners” or “advanced SEO tutorials for e-commerce.”

These phrases might have fewer searches, but the viewers who use them are typically ready to dive deeper into your content.


Optimize Your Tutorial Content for On-Page SEO

Once you’ve identified your target keywords, the next step is weaving them seamlessly into your tutorial content. This is where on-page SEO comes into play, ensuring that search engines can clearly grasp the focus and value of each piece of content you publish.

Here are the essentials:

  1. Title and Headings: Make sure your focus keyword or phrase appears in the main title and at least one subheading. This signals to search engines that your tutorial is relevant to a specific query.
  2. Meta Descriptions: Write concise yet enticing meta descriptions. A well-crafted snippet encourages people to click on your tutorial link, boosting your click-through rate and potentially improving your search rank.
  3. Keyword Placement: Insert your primary keyword in the first 100 words of your text. Beyond that, naturally incorporate it throughout your content, ensuring it fits contextually rather than feeling crammed.
  4. Supporting Keywords: Don’t just rely on the main keyword. Use synonyms or closely related phrases for a more comprehensive approach.
  5. Readable URLs: If you can customize your URL, keep it short and descriptive. Include the relevant keyword or topic in the URL path so search engines and users can understand what your tutorial covers at a glance.

Balance Clarity with Keyword Usage

A key part of SEO success is nailing that sweet spot where you use enough relevant keywords without making your text awkward or repetitive.

If your tutorial focuses on how to master Photoshop, for instance, you should naturally reference “Photoshop” throughout—but not so much that it feels forced. Write in a clear, engaging style and place keywords where they fit organically. Search engines are smart, and they reward content that genuinely helps readers.

Structure Tutorials for Maximum Engagement

Search engines pay attention to user signals like time on page and bounce rate. If people quickly leave your tutorial, that’s a sign it might not be delivering the promised value.

On the flip side, a well-structured, engaging tutorial can keep visitors on your page longer, signaling search engines that your content is worth ranking.

Here’s how to structure your tutorial in a compelling way:

  • Introduction: Tell viewers exactly what they’ll learn or accomplish by the end of your tutorial.
  • Step-by-step Approach: Break complex tasks into smaller, digestible steps. This makes your content scannable and easier to follow.
  • Illustrative Examples: Show, don’t just tell. Use screenshots, images, or brief demos that clarify important points.
  • Summary or Recap: Wrap up with a quick overview and mention the next steps or additional resources they can explore.

A logical and user-focused structure not only improves viewer retention, but also helps search engines parse your content more effectively.


Video SEO: Optimizing Tutorials for YouTube and Beyond

If your tutorial has a video component—perhaps hosted on YouTube or Vimeo—optimizing for those platforms can significantly broaden your reach. YouTube, in particular, functions like a secondary search engine, where the same principles of keyword optimization and user engagement apply.

For YouTube:

  1. Titles and Descriptions: Use targeted keywords early in your title and repeat them naturally in your description. This alignment will help you rank for those queries.
  2. Tags: Add relevant tags, including both broad and niche terms, to give YouTube a clear understanding of your content’s subject matter.
  3. Captions: Always include accurate captions or transcripts. Not only is this crucial for accessibility, but it also gives YouTube additional text to analyze for relevance.
  4. Engagement Signals: Encourage viewers to like, comment, and subscribe. High engagement shows YouTube’s algorithm that your content is valuable, pushing it higher in search and recommendation feeds.

Outside of YouTube, the same general principles apply. If you host on Vimeo or a self-hosted platform, be sure to optimize titles, descriptions, and any associated tags or categories.

Off-Page SEO: Boosting Credibility Through Links and Social Shares

Search engines see external links pointing to your tutorial as votes of confidence. If authoritative sites share or reference your tutorial, it signals that your content is trustworthy and valuable. This is known as off-page SEO.

Strategies to build these all-important backlinks include:

  • Guest Blogging: Contribute articles to reputable sites in your niche and link back to your tutorial.
  • Community Engagement: Participate in forums, discussion boards, or social media groups. Offer expert insights and share your tutorial when it genuinely helps the conversation.
  • Influencer Collaboration: Partner with influencers or thought leaders. If they like your content, they may share it with their network, driving new viewers to your tutorial.
  • Resource Lists: Many websites compile lists of top tutorials or must-read resources. Pitch your content as a worthy inclusion.

Additionally, encourage people to share your tutorial on social media by including clear share buttons and calls to action. The more your link gets circulated, the greater chance you have of climbing those search rankings.

Leverage Analytics to Refine Your Strategy

SEO isn’t a one-and-done exercise; it’s an ongoing process. You’ll want to monitor how well your tutorial ranks, which keywords are driving traffic, and where viewers tend to drop off. Tools like Google Analytics and Google Search Console provide valuable insights into what’s working and what needs tweaking.

Ask yourself questions like: Are people engaging with the entire tutorial or leaving halfway through? Are certain keywords generating more organic traffic than others? By analyzing these metrics, you can fine-tune your approach. Maybe you need to restructure the pacing, add more visuals, or improve your video thumbnail to increase click-through rates.

Highlighting the Power of Teamly

When you’re juggling multiple tasks—researching keywords, collaborating with influencers, testing new video optimization tactics—staying organized is essential.

That’s where a platform like Teamly can come into the picture. Teamly helps coordinate projects with your team, track progress, and ensure everyone is working in sync. By streamlining your workflow, you free up more time to create engaging content and experiment with innovative SEO strategies.


Putting It All Together: A Holistic View of SEO and Discoverability

Optimizing your online tutorials for SEO and discoverability demands a blend of art and science.

It’s about being strategic with keywords, but also maintaining authenticity in how you educate and guide your audience. It’s about studying analytics to evolve your tactics, but also remembering the human connection your content should foster.

From well-structured tutorials and targeted keywords, to backlink building and social sharing, every part of the puzzle fits together to boost your online presence.

Your final goal is to make your tutorials easily found by those who are searching for exactly the expertise you offer.

By applying these optimization strategies, you establish yourself as a reliable source, encourage positive engagement, and ultimately help more people achieve their learning goals.

So take a close look at your tutorials and ask: are they structured, keyword-focused, and user-friendly?

Are you leveraging video platforms like YouTube with strong titles, descriptions, and captions? Have you created shareable content that sparks conversation and invites engagement? If the answer is “not quite,” then you now have the roadmap to bring everything up to speed.

In the ever-evolving world of online content, SEO and discoverability aren’t just nice extras; they’re the difference between a hidden gem and a tutorial that reaches the masses.

Embrace these strategies, refine them over time, and watch as your tutorials take center stage in the digital spotlight.


Essential Tools and Software for Creating Professional Online Tutorials

You’re probably aware that online tutorials have become a major driver of learning and skill-building around the globe.

Whether you’re coaching budding entrepreneurs, teaching academic subjects, or guiding new hires through company processes, effective tutorials give you a vital platform to share your expertise.

But here’s the secret to going from an amateur to a real pro: you need the right tools in your digital toolbox. In other words, cutting-edge content can’t just happen without the proper screen recording, editing, and content management software at your fingertips.


Why the Right Tools Matter

You may wonder: why does it matter which screen capture or editing program is used, as long as a video gets created? The truth is that viewers quickly pick up on the production value of a tutorial.

Even if you have the most insightful message, sub-par editing or muddy audio will distract your audience and may undermine trust in your brand. Plus, the digital tools you choose affect not only your workflow but also the final look and feel of your tutorials.

When you invest in reliable software, you gain a professional edge that resonates with learners.

Clear visuals, crisp sound, intuitive navigation—these elements keep people engaged and encourage them to see your content through to the end.

And if you’re hoping to monetize your tutorials down the line, higher production quality often justifies a premium price. In essence, the tools you use to create your tutorials lay the foundation for the reputation you build.

Choosing the Right Screen Recording Software

Screen recording software is the backbone of most online tutorials, especially when you’re teaching a skill that involves navigating a website, using an application, or demonstrating digital workflows.

Imagine trying to explain how to create a pivot table in Excel without showing the actual steps on screen—it becomes a lot harder for learners to visualize.

When selecting your software, look for features such as high-definition capture, easy editing tools, and minimal lag.

You want to be able to capture cursor movements, highlight clicks, and maybe even add annotation in real time. Some standout options include:

  • Camtasia: A favorite for many tutorial creators, Camtasia combines straightforward screen capturing tools with a robust built-in editor. Its library of annotations, transitions, and effects lets you transform raw footage into a polished presentation.
  • Screencast-O-Matic: Known for its simplicity, Screencast-O-Matic offers quick recording features and a user-friendly editing suite. It also lets you add captions easily, a big plus for accessibility.
  • OBS Studio: Completely free and open-source, OBS Studio is popular with gamers but also widely used by educators. It provides powerful streaming and recording capabilities, although its complexity might have a slight learning curve for beginners.

Video Editing Software for Polished Results

Recording might capture everything you need, but editing transforms your raw clips into a cohesive narrative. Strong editing helps you spotlight your main points, eliminate fluff, and keep your audience glued to the screen.

For instance, well-placed transitions and smooth cuts can maintain a professional vibe. Thoughtful text overlays and callout boxes guide learners’ focus.

Consider these popular editing platforms:

  • Adobe Premiere Pro: A top-tier software used by pros, it supports multi-track editing, advanced color correction, and extensive effects. While the learning curve can be steeper, you can produce cinema-level tutorials once you grasp the basics.
  • Final Cut Pro: This macOS-exclusive editor is lauded for its speed and efficiency. Its Magnetic Timeline and optimized performance on Apple hardware can drastically reduce editing time, giving you the edge in productivity.
  • Filmora: Great for beginners, Filmora offers a clean interface and a plethora of built-in effects and filters. It’s an excellent balance between user-friendly operation and robust editing features, perfect for someone just moving beyond free editors.

Whichever editor you choose, ensure that it can handle at least basic color correction, text overlays, transitions, and potentially motion graphics. Even short tutorials can benefit from the extra flair that subtle visual cues bring to the table.


Professional-Grade Audio Recording and Editing

If you want your tutorials to stand out from the usual home recordings, pay attention to audio quality. People are far more likely to tolerate a slightly grainy video than crackling, echo-ridden sound. Whether you’re recording voice-overs, interviews, or real-time narration, quality audio ensures your audience remains immersed in the learning experience.

A decent microphone is the first step, but choosing the right audio software can also make a big difference. Here are a few to consider:

  • Audacity: This free, open-source software is a go-to for both beginners and experienced producers. It allows you to record, cut, and clean up audio, even if you’re on a tight budget.
  • Adobe Audition: Part of the Adobe Creative Cloud, Audition provides a highly sophisticated toolset for mixing, editing, and mastering audio tracks. This software is perfect if you foresee using advanced audio techniques, like multi-track mixing or noise reduction.
  • GarageBand: Pre-installed on most Apple devices, GarageBand might seem too basic, but it’s more than enough if you want crisp narration and some light music integration. It’s particularly handy for first-time users who are not ready for advanced apps.

When recording, consider controlling your environment, too. Soft furnishings and rugs reduce echoes. If possible, record in a quiet room to minimize background noise. Clean up your tracks in post-production by trimming silences, removing stutters, and balancing volume levels. The aim is to create an inviting, distraction-free sound that underscores your valuable content.

All-in-One Content Management Solutions

After you capture your screen, edit your clips, and perfect your audio, the next step is delivering it all in a professional, organized manner. Content management systems (CMS) designed specifically for e-learning can streamline distribution, student engagement, and monetization.

While you can certainly upload your tutorials to YouTube or Vimeo, specialized e-learning platforms let you manage courses, track learner progress, and even collect payments in a single spot. Here are some top picks:

  • Thinkific: Known for its user-friendly interface, Thinkific allows you to host unlimited courses and enroll unlimited students on certain plans. Its built-in tools for quizzes, surveys, and completion certificates make it ideal for structured learning paths.
  • Teachable: With Teachable, you can customize your course pages, set up automatic payments, and engage with your students through discussion boards. It’s a holistic approach to transforming your tutorials into full-fledged courses.
  • LearnWorlds: This platform stands out for its emphasis on interactive content. You can create interactive videos, e-books, and even embed gamified elements, which may keep learners highly motivated.

When your tutorials are organized under a dedicated platform, learners are more likely to stick around for multiple modules or courses.

A well-curated content library means your audience has a clear path from one lesson to the next, a factor that can significantly impact their overall engagement and satisfaction.


Project Management and Collaboration Tools

You’re not just creating a tutorial—you’re orchestrating an entire production. Even if you’re a one-person show, chances are you’re juggling multiple tasks: brainstorming, scriptwriting, recording, editing, and distributing. Now imagine collaborating with a video editor, a graphic designer, or a subject matter expert. Having a structured workflow becomes crucial.

Teamly software is an excellent option for centralizing your communication and tasks when you have a team working together on the same tutorial project. Keeping track of to-dos, deadlines, and revisions in one platform minimizes confusion and helps you meet your publishing goals without last-minute chaos.

Here are some additional collaboration tools that can smooth out the process:

  • Trello: Uses a card-based system to organize tasks in different columns (“To Do,” “Doing,” “Done”). Perfect for smaller teams or individual creators who like visual task boards.
  • Asana: Offers more advanced project management features, including timeline views, dependencies, and team workload overviews. If your workflow is complex, Asana’s structure can keep everyone aligned.
  • Slack: While not a project manager in the traditional sense, Slack is fantastic for real-time communication. Integrations with other project management tools let you centralize notifications and chat.

Organizing your tasks means you have more time for creating meaningful content and less time spent rifling through endless emails or searching for that file you saved three days ago. Whether you’re working solo or managing a large team, having a reliable system keeps every aspect of your tutorial production in check.

Additional Tools to Elevate Your Production

Beyond the core elements of recording, editing, and managing content, some supplementary software can further enhance your tutorial quality and user experience:

  • Graphic Design Tools: Tools like Canva or Adobe Photoshop help you create attractive thumbnail images, slides, and infographics that can be woven into your tutorial. Visual aids are especially useful for breaking down complex concepts.
  • Subtitle or Closed-Caption Generators: Accessibility and broad reach matter. Services or tools that auto-generate captions, such as Rev or even YouTube’s built-in captioning, can expand your content’s appeal and compliance.
  • Music and SFX Libraries: Subtle background music or well-placed sound effects can elevate the professionalism of your videos. Sites like Epidemic Sound or Artlist offer a range of royalty-free tracks.


Mastering the End-to-End Workflow

A professional tutorial creation process often follows a predictable sequence:

  1. Plan Your Content: Outline your topic, target audience, and the learning objectives. Knowing precisely what learners should get from your tutorial helps guide tool selection.
  2. Script and Storyboard: Even a rough script can keep you on track while recording. A storyboard ensures that each segment is visually compelling and aligns with your educational goals.
  3. Record Footage: Capture your screen actions using your chosen software. Make sure your workspace is tidy, notifications are off, and your microphone is functioning well.
  4. Edit and Refine: Use your video editing and audio tools to polish the raw material. Add helpful graphics, slice out unnecessary pauses, and ensure a consistent volume level.
  5. Package and Distribute: Upload finished tutorials to your CMS or preferred hosting platform. Update your video titles, descriptions, and metadata to boost discoverability.

Throughout each phase, remember that attention to detail is what differentiates an “okay” tutorial from an outstanding one. Even small things—like adjusting lighting levels or trimming a half-second of dead air—can greatly enhance the viewer experience.


Conclusion

You now have a comprehensive overview of the essential tools needed to create professional online tutorials.

From screen recording apps like Camtasia and OBS Studio to sophisticated editing software such as Adobe Premiere Pro and audio-focused platforms like Audacity, each stage of production demands specialized expertise and reliable technology.

Content management systems can then help you present your work with a clean and structured layout, while project management tools like Teamly software keep your entire production cycle on schedule.

Your tutorials deserve the best possible treatment, not only because you’ve poured energy and time into planning and recording, but also because your learners deserve high-quality instructional content.

In an era where online learning is increasingly competitive, a solid toolkit can give your tutorials the edge they need to stand out. And once you’ve nailed down a workflow that harnesses these resources effectively, you’ll be on the fast track to producing content that resonates with learners across the globe.

Elevate every lesson, amaze every viewer, and build a reputation for consistently top-notch tutorials—starting with the right set of tools and software. Go forth and craft those captivating, professional tutorials that leave viewers hungry for more.


How to Monetize Your Online Tutorials: From Free Content to Paid Courses

When it comes to turning your expertise into a steady income stream, there’s no shortage of creative possibilities.

Online tutorials have the potential to grow into sustainable revenue sources if you plan and execute them strategically. By blending free and premium options, you can expand your audience and turn casual viewers into loyal subscribers who are excited to invest in what you offer.

This guide breaks down various monetization strategies—from launching memberships to experimenting with paid sponsorships—to help you build the right path for your unique goals.

1. Embrace the Foundation: Free Content That Builds Trust

Free content might not sound like the first step in a monetization strategy, but it’s often the most crucial. Creating valuable, no-cost tutorials allows you to connect with learners who are new to your topic.

Consider short videos, blog posts, or quick guides that address common pain points. When viewers sense genuine value, they are much more likely to consider paying for advanced or in-depth material later.

A focus on quality is non-negotiable. Even if you’re offering your content for free, ensure it’s well-structured, visually appealing, and packed with engaging takeaways.

Great free content also serves as a gateway to your brand: it’s the starting line where curious learners discover your teaching style and your knowledge base.

As you build this library of freebies, you’re paving the way for long-term relationships with followers who trust you enough to invest in your paid offerings.

Additionally, free content doubles as an effective marketing tool. Whenever you share a tip or technique, word-of-mouth promotion can kick in.

Loyal viewers and readers become your unofficial ambassadors, sharing your content within their personal or professional circles. The result: organic expansion of your audience, which sets the stage for monetization down the line.

2. Transition to Paid Memberships

After you’ve established credibility with free content, consider launching a membership or subscription model.

Memberships can take many forms—monthly subscriptions that grant access to premium tutorials, a private forum, or even live Q&A sessions. Some creators also bundle exclusive perks, such as downloadable resources or direct feedback on student projects.

When it comes to paid memberships, variety in pricing and features is key.

Offer a tiered system, so casual learners can opt for a more affordable basic package, while dedicated fans can access a higher tier featuring live mentoring, bonus videos, or early access to new tutorials.

Keeping multiple membership levels fosters inclusivity and nurtures a sense of belonging for different budget ranges.

Remember that successful memberships rely on consistent value delivery. Regularly update your premium content library and highlight the unique benefits of joining.

Launch monthly webinars or group discussions that members can’t find anywhere else. You don’t just want subscribers—you want dedicated learners who will stay invested in your educational journey.

3. Offer One-Time Purchases and Bundles

Not everyone in your audience will be ready for a recurring monthly or annual commitment.

That’s where one-time purchases and course bundles can shine. You can create an in-depth masterclass or workshop around a specific topic and sell it as a standalone product. This approach provides a convenient option for those who prefer to pay once and then access the content whenever they like.

You might break down large subjects into smaller modules to make them more accessible.

Alternatively, bundle multiple modules into a premium package that covers a wide array of related topics in a single purchase. This strategy works especially well if your tutorials are project-based or skill-based—people love the idea of walking away with a tangible outcome.

Offering these types of purchases helps diversify your revenue streams. By combining memberships with one-time sales, you reduce dependence on just one income source.

Your audience can pick and choose the format that aligns best with their needs, and you benefit from flexible monetization methods that keep earnings steady throughout the year.

4. Explore Sponsorships and Brand Partnerships

If you’ve developed a sizable following or operate in a niche industry, sponsorships and brand partnerships can open up significant revenue opportunities.

Think of featuring a relevant product or service within your tutorials in exchange for a fee or commission. The trick is ensuring that any sponsorship aligns with the core values of your tutorials.

Authenticity matters: your followers should never feel like they’re being “sold” something irrelevant.

Approach potential sponsors with a well-defined proposal. Outline how their product will be showcased, whether through a quick demo, short segment, or full integration into your tutorial content.

Demonstrate genuine enthusiasm and clarify what your audience will gain from the collaboration. Sponsors look for engaged communities and content creators who can convey their brand effectively.

Paid collaborations can also work as a form of affiliate marketing, where you provide a special link or code for viewers to purchase a recommended product.

Each sale then generates a small commission for you. This approach is most fruitful when your recommendations are sincere and valuable, rather than forced. It also offers your audience a chance to test out tools or resources you genuinely believe in.

5. Convert Loyal Followers Into Coaching or Consulting Clients

A certain percentage of your audience will crave more than just tutorials. They’ll want personalized instruction, critiques, or one-on-one time to dive deeper into your subject matter.

By offering coaching or consulting services, you can transform a free viewer or basic subscriber into a high-value client.

This can take many shapes. Perhaps you choose to schedule private video calls or set up group coaching sessions with limited seats. You might even include these sessions as part of a top-tier membership plan.

The big draw here is personalization—followers who see genuine results from your tutorials often jump at the chance to receive direct feedback, step-by-step guidance, or real-time troubleshooting for their problems.

Keep in mind that coaching and consulting require a different skill set than creating pre-recorded tutorials.

You’ll need to hone your ability to work live with students, adapting to their particular pace and questions. However, if you’re up for that challenge, the potential revenue—and the level of connection with your audience—makes it a standout monetization path.

6. Tiered Pricing and Upsells: Build a Ladder for Your Content

One often-overlooked strategy is laddering your offerings with tiered pricing. Picture each level of your content as a rung on a ladder.

The first rung might be free videos or tutorials—what you release on social media or your blog. The next rung could be an affordable entry-level course. Following that, you might list a more advanced course or membership option. Finally, the highest rung could be exclusive one-on-one coaching.

By curating a clear progression, you guide your learners through a well-defined journey. Each tier promises deeper insights and more personalized attention.

This model reduces friction in moving from free to paid content because your audience understands exactly why a premium offering is worth the upgrade.

Don’t overlook upsells. After someone buys a single course, gently present them with a time-sensitive discount for your coaching package or membership. When learners have just had a positive experience with your entry-level product, they’re more likely to consider a higher-level option.

7. Leverage Premium Content for Dedicated Fans

Premium content can take many forms, such as in-depth video series, detailed eBooks, or specialized software tools that support the learning process.

The main goal is to deliver substantial value that justifies a higher price point. Beyond simply lengthening your videos, think about the unique advantages a premium product can offer. Can you incorporate interactive elements, downloadable worksheets, or real-world case studies?

Your premium materials should solve a more complex or nuanced problem that your audience faces.

If your free tutorials focus on the basics, the premium content can delve into intermediate or advanced topics. By structuring content in this way, you attract and retain learners who are continually expanding their skills—while also encouraging those on the fence to develop enough confidence to invest in your deeper knowledge offerings.

You might also experiment with limited releases or seasonal promotions. Scarcity can be a powerful motivator, prompting learners to act quickly if they know a discounted price or exclusive bonus is available for a limited time.

But be mindful not to overuse artificial deadlines, as this can erode trust if it feels like a sales tactic rather than a genuine opportunity.

8. Don’t Forget the Right Tools

Creating, hosting, and marketing your tutorials require not just knowledge but also an efficient workflow.

This is where collaboration tools like Teamly can prove invaluable. It helps you streamline team coordination, manage tasks, and track deadlines if you’re working with designers, editors, or co-instructors. Staying organized has a direct impact on the quality and consistency of your tutorials, which then feeds back into your monetization success.

Beyond Teamly, explore various learning management systems (LMS) that allow you to publish courses, track student progress, and handle payment processing.

Look for built-in tools that enable quizzes, certificates, and community features. The easier it is for your audience to engage with your content, the more value you’ll deliver, which in turn supports your paid offerings.

9. Promote, Refine, and Evolve

Simply creating multiple revenue streams won’t guarantee success. You have to market your tutorials effectively and keep them updated.

Utilize email marketing, social media campaigns, and even live events to spread the word. Cross-promotion with other creators in your niche can also expand your reach to new audiences.

Feedback is a goldmine. Actively encourage your learners to share their thoughts, whether it’s through private messaging, comment sections, or surveys.

Listen to what they like, and especially note what they say needs improvement. Use these insights to refine your tutorials, add new modules, or launch entirely fresh offerings.

Monetization strategies shouldn’t stay static. As you learn more about your audience, market trends, and your own teaching style, be open to making shifts.

Perhaps you realize your coaching sessions are in higher demand than you anticipated, or your sponsorship collaborations aren’t resonating with viewers. Adapt quickly and keep moving forward with strategies that align with your core mission.

Conclusion: Choose the Path That Fits Your Vision

Ultimately, successful monetization of online tutorials is as much about authenticity as it is about generating revenue.

Viewers pick up on genuine passion and expertise, which makes them more willing to invest. Whether you offer free content to build trust, design multiple membership tiers, or pair your lessons with thoughtful sponsorships, the crucial factor is consistently delivering value.

By combining clear revenue strategies with a focus on learner satisfaction, you set the stage for long-term growth.

This journey might start with a single free tutorial, but the possibilities are endless once you establish that strong foundation.

Keep refining, keep exploring, and keep your audience’s needs at the forefront of every decision. That’s the secret to building not just a profitable tutorial platform, but a thriving, engaged community that’s excited to learn from you again and again.


Video vs. Text Tutorials: Which Format Works Best for Online Learning?

Imagine this, you’re all set to create an online tutorial…

You’ve got an exciting topic, a boatload of helpful tips, and a burning desire to share your expertise with the world.

One question lingers—should the tutorial be in video format or text format? That single decision can shape how effectively your content connects with learners. It might even make or break their experience entirely.

So how do you figure out which format best suits your ideas? Some educators swear by video for its visual flair, while others champion text for its clarity and flexibility.

The answer isn’t always black-and-white. Online learning thrives when you tailor content to the needs of your audience, and sometimes the best option even combines multiple formats. Ready to explore all that video and text have to offer?

Let’s dive into some real-talk about how each format works, where each format shines, and how you can decide what format will give your tutorials that winning touch.

How Did We End Up with These Two Options, Anyway?

You’re probably thinking: “Aren’t there more than two ways to teach online?” Absolutely! There are podcasts, interactive quizzes, webinars, and so many other learning experiences.

But when it comes to bread-and-butter tutorials, educators and instructors tend to lean on two big contenders: video-based explanations and text-based walkthroughs.

Video tutorials let you leverage visuals to demonstrate complex tasks step-by-step, show real-time screen captures, or present lively animations that keep viewers glued to their screens.

Text tutorials, on the other hand, offer a neat, scannable block of instructions that learners can refer back to at their own pace—perfect for those who love a good read or have limited bandwidth to stream videos.

In reality, the choice isn’t just about packaging. It’s about matching the right teaching style to the learner’s journey.

If you’re trying to show someone how to assemble a piece of furniture or demonstrate advanced software skills, a video might be a no-brainer. If the learner simply needs to glance at a list of important settings or instructions, text might be all the clarity they need.

Understanding these nuances can help you craft tutorials that not only look good but also deliver results that stick.

The Magic of Video: Why It’s So Engaging

Why does video grab so much attention? It’s not just that moving pictures are more fun to watch.

A well-produced tutorial video can show something happening in real time, which is invaluable if you’re trying to model a hands-on process. Viewers can watch your every click, gesture, or demonstration. It’s like having an instructor right there, showing you exactly what to do.

But that’s only half the story. Human brains are wired to respond to motion and sound; it’s how our senses get stimulated. Video’s combination of visual and auditory elements can create an immersive experience that pure text often can’t match.

By seeing a demonstration instead of just reading about it, learners are more likely to retain and recall the information later. If you choose to appear on camera, you can also build rapport through facial expressions, tone of voice, and personality. That sense of connection can keep people watching until the very end.

On the flip side, producing quality video tutorials can take a fair amount of time, effort, and equipment.

You’ll need a camera (or screen-capture software), a microphone, and editing tools to cut out all the “umms” and awkward silences.

You may also need decent lighting to keep viewers from squinting at dark, grainy footage. If your on-screen presence isn’t engaging or your audio is muffled, the magic of video can fizzle out faster than you can say “Let’s hit record!”

  • Pro: Great for step-by-step demonstrations and visual engagement.
  • Pro: Helps build a personal connection with the audience.
  • Con: Requires more time, equipment, and editing savvy.
  • Con: Not always easy to revise or update if something changes.


The Power of Text: Words That Work Wonders

Some might say words pack just as big a punch as visuals—sometimes even bigger. Text-based tutorials offer clarity and convenience. You can outline steps in a simple bullet-point format or an in-depth article, and learners can refer back to any section whenever needed.

There’s no fuss with pausing or rewinding a video to find that crucial piece of information. One quick scroll or a Control+F (Find) search, and you’re back on track.

Text-based content can also be easier to produce and maintain. Maybe you want to share a process that changes frequently—like a piece of software that gets regular updates.

It’s far less time-consuming to rewrite a few lines or add a screenshot than to reshoot a video and edit it all over again.

Plus, text tutorials often rank well in search engines, making them fantastic for SEO. Learners who prefer reading can absorb the material more quickly, especially if your writing style is straightforward and your layout is clean.

However, text lacks the immediacy and immersive appeal that a video offers. If a tutorial is highly complex or visually oriented, words may not cut it by themselves.

A purely text-based approach can sometimes feel monotonous, especially if the subject matter is dense or technical. And for topics that rely on nuance or tone—like learning a new language or mastering a cooking technique—you might miss out on key elements that video can capture effortlessly.

  • Pro: Quick and convenient to produce and update.
  • Pro: Easy for learners to scan, search, or reference anytime.
  • Con: May not be engaging enough for complex, interactive topics.
  • Con: Lacks the personal connection that video can establish.

What About Interactive or Hybrid Tutorials?

Who says you have to pick just one format? In many cases, a hybrid approach featuring both text and video—or even interactive elements—can truly level up your online tutorial game.

Imagine a text-based outline for quick reference combined with short video clips demonstrating crucial steps. Or perhaps an embedded quiz that tests learners on what they just read or watched, reinforcing the lesson in real time.

Interactive tutorials that weave in clickable elements, branching scenarios, or gamified quizzes give learners the chance to practice skills as they go. Instead of passively reading or watching, they’re actively engaging with the material, which can skyrocket retention.

This interactive component often works wonders for topics like coding, design software, or even cooking. There’s a reason so many popular online course platforms have started integrating interactive features. They’re not just a gimmick; they add real value.

Keep in mind that interactive tutorials also require more planning and potentially more resources to create.

If you decide to provide a video demonstration, an embedded quiz, and downloadable text-based materials, you’ll be juggling multiple project elements. That effort can pay off in spades for the learner, but you’ll want to confirm you have the tools and time to pull it off effectively.

How to Decide Which Format Fits Your Topic

You’ve learned the pros and cons of video, text, and even interactive tutorials. Now comes the big question: which one fits your topic like a glove? The answer often depends on your audience and your subject matter. Start by asking yourself these questions:

  1. Is the content highly visual?
    If you’re explaining a hands-on skill like painting or using a complicated software interface, a video tutorial can be invaluable. But if it’s something more abstract, like a theoretical concept or a set of guidelines, text might suffice.
  2. Does your audience have time for a video?
    Busy professionals might not have the luxury to watch a 20-minute tutorial. A concise text guide could serve them better. Alternatively, you can create short video snippets they can consume on breaks.
  3. What’s your budget and timeline?
    Videos generally require more production resources—recording devices, editing software, lighting, and so on. Text-based tutorials can be produced quickly with minimal equipment. You’ll want to factor these into your decision.
  4. Will the tutorial content change frequently?
    A text-based tutorial can be updated in minutes, while redoing a video takes more time. If your topic is something that evolves fast—like a software tool that gets regular updates—text (or a mix of text and shorter video clips) might be the practical choice.
  5. Do you want to leverage SEO?
    While videos can be optimized for YouTube searches, text-based tutorials can still claim a strong advantage on standard search engines. If your strategy is to drive organic traffic, a well-structured text post with targeted keywords might be your best friend.

If your answers to these questions seem to straddle both lines—perhaps your content needs a little bit of everything—then a hybrid approach is your cue. Include short embedded videos in a text tutorial, or augment a video with a downloadable text summary.

That way, viewers can watch you in action and also refer to a concise set of steps later. You’ll cover multiple learning styles in one go, which can broaden your reach and help your audience remember and apply what they learn.

Practical Tips for Creating Video Tutorials

If you’ve decided to go the video route, awesome! Here are some pointers to get started on the right foot:

  • Plan your script or outline.
    Even if you prefer an off-the-cuff style, having a basic outline prevents rambling. You’ll save editing time and keep your tutorial focused.
  • Invest in decent audio.
    Clear audio often matters more than high-quality visuals. A simple microphone upgrade can transform your tutorial’s overall impact.
  • Keep it concise.
    Viewers tune out if things drag. Break long tutorials into smaller segments if you have a lot to cover.
  • Use visual aids and captions.
    Whether it’s on-screen text, animations, or diagrams, these cues help reinforce learning and keep people engaged.
  • Test your final product.
    Make sure everything is easy to follow, from the pacing to the volume levels. Gather feedback from a few test viewers before releasing it to the world.

Practical Tips for Creating Text Tutorials

If text-based content feels like a better fit, here are a few best practices:

  • Structure with headings and bullet points.
    Make it simple to skim. Readers often prefer to jump to the section they need the most.
  • Use visuals wisely.
    Screenshots, diagrams, or infographics can help illustrate steps, especially if you’re explaining a process.
  • Be conversational but clear.
    Keep sentences straightforward. This is especially crucial for technical or complex tutorials.
  • Edit ruthlessly.
    Unnecessary words or repetitive points will lose readers fast. Trim the fluff to keep people engaged.
  • Include a quick summary or checklist.
    Sometimes a one-page summary is all someone needs to refresh their memory on a key task.

Wrapping It Up: Choose Your Format with Confidence

When you’re weighing the merits of videos vs. text tutorials, the most crucial factor is alignment with your learners’ needs.

If they have limited time or need a quick refresher, a text-based tutorial can be a life-saver. If you’re walking through a highly visual, intricate process, video tutorials can bring those steps to life. And if you can’t decide? Go hybrid.

Whichever path you choose, consider integrating software solutions like Teamly to coordinate your tutorial creation process, especially if you have a team. It’s easier to maintain a coherent production schedule, store files, and streamline updates when everyone has the right tools at their fingertips.

Ultimately, you’re the curator of your own digital teaching universe. By drawing on the strengths of either (or both) formats, you set the stage for an engaging, effective online learning experience.

Whether you go all-in on video, stick to a text-based guide, or experiment with a little bit of both, your audience stands to gain. After all, the best tutorials aren’t just about knowledge transfer—they’re about creating an environment where learners feel empowered, informed, and genuinely excited to learn more.

So, go ahead, fire up your camera or open that blank document—your next tutorial is waiting to shine. And who knows? You might end up becoming that go-to expert people rely on every time they need clear, engaging, and unforgettable online instruction.


How To Create a Step-by-Step Online Tutorial That Keeps Learners Engaged

Ready to turn a complex topic into an engaging, bite-sized learning journey? You’re in the right place.

When you create an online tutorial, you’re not just presenting information—you’re leading learners through a carefully mapped-out experience that helps them build new skills.

The key is to guide them step-by-step and keep them excited about their progress. By balancing structure with flexibility, you’ll ensure that each stage of the tutorial feeds into the next, creating a smooth path for your audience.

Let’s look at exactly how to do that, starting with how to pinpoint your audience’s needs and moving on to concrete methods for boosting retention.


Why a Step-by-Step Format Resonates

Have you ever attempted to learn something new only to give up halfway because the information felt too chaotic or overwhelming?

That reaction is common. Learners want to feel confident that they can tackle a subject without drowning in details. By breaking a tutorial into smaller, logical segments, you build trust.

Each section offers a small win, encouraging learners to move on to the next step.

A step-by-step format serves as a roadmap, showing exactly where to start and where you’re heading.

Think of it as a treasure map with an “X” marking the final goal—every step gets you closer to that prize. This approach taps into a natural human desire: people love incremental progress.

They like to see that they’re making headway, and a clearly defined structure gives them that sense of accomplishment.

Setting Clear Goals

Before you draft a single line of text or record any video, take a moment to pinpoint the goals of your tutorial.

Are learners aiming to master a new software feature? Build a personal brand online? Bake a flawless sourdough loaf?

Clarity around these objectives not only keeps you focused as you create the tutorial, it also lets learners know what they’ll gain if they stick with you.

In the world of online learning, clarity is your ally. When you label each step with a clear outcome—like “Setting up your blog platform” or “Understanding color theory basics”—you make it easy for learners to see how each unit builds on the last.

This helps them gauge their progress and fuels motivation. No step stands alone; each one supports the broader goal.


Mapping Out Your Topic

Once you’re crystal clear on your objectives, the next move is to outline the content. Imagine you’re planning a trip.

You need to decide the major stops, rest points, and the final destination. In a tutorial, those stops become lessons or modules. Start by brainstorming every piece of information you might want to include, then organize those ideas into logical groups or stages.

Don’t be shy about chunking bigger segments into smaller sub-sections.

The concept of “chunking” is key in instructional design: people absorb information more readily when it’s delivered in bite-size units. Each chunk should feel substantial enough to justify its own segment, yet not so large that it intimidates or bores your learners.

Choosing the Right Format for Each Step

Online tutorials can take many forms: text-based instructions, recorded screen shares, slideshows, or even interactive quizzes.

One of the best strategies is mixing media to cater to different learning styles. For instance, you might rely on videos when visuals are vital, such as demonstrating a hands-on process. Meanwhile, text or bullet points can shine for quick summaries or lists of equipment needed.

When selecting the format, consider the nature of the skill or knowledge you’re teaching.

If you’re showing how to use Teamly software for better business management, you might screen-record your process and guide viewers through each function. If your tutorial involves creative writing, textual explanations and examples might suit your audience perfectly. Blend formats so that each step reinforces the content and offers variety.


Maintaining Engagement Throughout

Creating a step-by-step plan is one thing; keeping learners engaged all the way through is another.

Engagement hinges on two fundamental aspects: interest and interactivity. The more relevant and interesting your content is, the more learners will pay attention.

But to truly keep them hooked, you need to allow room for interaction—opportunities for them to reflect, apply, or even experiment with what they’re learning.

Action Breaks and Mini-Assignments

Introducing brief activities after each chunk of content offers a powerful way to keep learners on board. For example, after explaining a new concept, prompt them to try it out.

If your tutorial is on web design, have them tweak a section of their personal website right away. If your tutorial is about cooking, get them to experiment with a foundational recipe technique in their own kitchen. By turning theory into practice, you make knowledge stick.

These mini-assignments should be simple enough that they’re not overwhelming, but robust enough that your learners genuinely apply what they’ve learned.

Invite them to ask questions or share their experiences in a community forum if you have one. Even responding to quick quizzes at the end of each lesson can offer a sense of achievement and reinforce the material.

Encouraging Progress Tracking

One surefire way to maintain engagement is to show learners where they stand in the big picture of your tutorial.

Think of it like a progress bar on a video. When you see that you’re 50% of the way in, there’s a sense of momentum to keep going. The same principle works for any type of lesson plan.

Encourage learners to keep a checklist or a simple notes page so they can see how far they’ve come. You might even create a simple PDF they can print out and mark each completed milestone. This kind of tangible progress indicator can work wonders for motivation.


Nailing the Flow of Information

One of the biggest challenges in creating a step-by-step tutorial is determining the sequence of those steps. It’s worth spending extra time arranging your content in a way that feels logical and intuitive. Start with the basics, then build upon them gradually.

Avoid jumping ahead to advanced ideas too soon, or you risk losing beginners. Yet resist the urge to drag out introductory material for too long—you don’t want more advanced learners to get bored.

It often helps to share an overview of the upcoming steps right at the start. This birds-eye view sets expectations and shows that every piece of information will eventually fall into place.

As you move through the content, let learners know how each segment connects to the overall objective. Context is key.

Personalizing the Learning Journey

Not everyone learns at the same pace. Some people love diving into deeper details, while others just want a quick how-to.

Offer resources for further exploration without overwhelming your main audience. This might look like optional readings, links to related articles, or bonus materials in advanced sections.

Offering these options is a thoughtful touch that acknowledges the variety in your audience.

Learners who want to go beyond the basics can explore additional materials, while those who need just the essentials can stick to the main path without feeling bogged down by extra content. This approach helps everyone move at a comfortable speed.


Helping Learners Overcome Common Sticking Points

It’s easy to lose momentum if learners encounter a roadblock and don’t see a clear way to push forward.

That’s why it’s smart to anticipate potential challenges and include strategies to overcome them in your tutorial design. Are you teaching a skill where beginners often get confused around Step 3? Make sure Step 3 includes extra support, like clarifying graphics, real-world examples, or references to frequently asked questions.

These extra touches serve as a safety net. When you acknowledge that a certain step could be tough, you build empathy and show learners that you understand their experience.

This nurtures a sense of connection that encourages learners to persevere.

Providing Ongoing Support

If your tutorial is part of a larger platform, consider creating an online forum or community group. This hub of interaction lets learners ask questions, share tips, and offer encouragement.

Peer support can be incredibly effective. Often, people who have just mastered a new concept are the best at explaining it in relatable terms to those who are still struggling.

If a community forum isn’t an option, regular email updates or check-ins can do the trick. Send a quick note with tips, motivational quotes, or further reading. It’s a small gesture that reminds learners they’re not alone, especially if they’re tackling a tough or lengthy topic.

Wrapping Up and Moving Forward

A well-structured tutorial that steps learners through each stage builds excitement and confidence.

When the final section is complete, think about how you can set learners up for further growth. A bonus project or next-level mini-course might be the perfect send-off, especially if your audience has developed an appetite for learning more.

You’ve broken down a complex subject and kept your audience on track, engaged, and empowered—mission accomplished! But don’t forget to solicit feedback.

A short survey at the end of your course can reveal what worked and what didn’t. This input will help you fine-tune future tutorials to be even more streamlined and impactful.

Your Next Steps

By now, you’re equipped with a blueprint for structuring an online tutorial that doesn’t just talk at learners, but actually walks them through each concept.

The process can be fine-tuned to fit almost any subject, from marketing skills to coding basics.

And if you’re organizing teams or looking for a streamlined approach in the business realm, Teamly software can be your perfect partner to keep projects on track and ensure everyone is aligned with the learning objectives.

At its heart, a great tutorial speaks directly to your audience’s needs, clarifies each stage, and offers tangible ways to practice.

Learners are more likely to finish, retain the information, and—best of all—put those new skills into practice. Every step counts, and by paying attention to each moment of the learning journey, you’re setting up your tutorial for resounding success.


Your Ultimate Guide to Creating High-Converting Online Tutorials

Online tutorials are more than just a way to share knowledge. They are opportunities to captivate, inspire, and convert your audience into dedicated learners or loyal customers.

You might have fantastic ideas or expertise, but to make an impact, your tutorials need to be strategic, well-crafted, and engaging.

This guide explores the essential steps to help you plan, structure, and optimize your online tutorials so they deliver maximum value—and convert casual visitors into committed followers.


1. Start with a Clear Objective

Every successful tutorial begins with a clear objective that aligns with your audience’s needs.

Your goal might be to teach a new skill, guide users through a product feature, or introduce an advanced concept.

Defining this objective gives you a compass for all decisions that follow, from your tutorial’s length to the multimedia you will include.

Setting a precise objective helps shape how your content flows. If your audience is relatively new to the subject, your tutorial should start with foundational principles before tackling complex topics.

Conversely, if your learners already have basic knowledge, you can move quickly to intermediate or advanced material. Clarity in purpose will ensure you create a logical progression that keeps learners on board and eager to take the next step.

A clear objective also sets the stage for measuring your tutorial’s success. If you want viewers to master a specific software technique, for example, you can include a short quiz or practical exercise at the end.

Observing how well learners perform will reveal whether your materials are truly effective. This data then becomes valuable feedback to refine future tutorials or upgrade existing ones.

2. Know Your Audience Inside and Out

Before typing a single word or hitting the record button, invest time to understand your audience’s challenges, their learning preferences, and the devices they commonly use.

By doing this, you can tailor your tutorial style to help them absorb information quickly and stay engaged.

Try to answer questions such as: What are your learners’ pain points? Are they searching for quick wins or comprehensive deep dives? How comfortable are they with related technologies or jargon? This insight lets you craft content at the right difficulty level.

If your audience includes absolute beginners, you might want to break down industry-specific terms or clarify steps in extra detail. If learners are more advanced, you can move swiftly and emphasize optimization or best practices instead.

When you truly understand your audience’s daily reality, your tutorial transforms from a generic guide into a conversation that resonates on a personal level.

You are not just sharing knowledge—you are providing solutions and removing obstacles they regularly face. Your audience, in turn, feels seen and respected, which is a key factor in converting casual viewers into loyal subscribers or customers.

3. Craft an Outline That Flows Naturally

Think of your tutorial as a journey. You want to lead learners from Point A, where they have limited knowledge, to Point B, where they feel confident applying what you have taught.

A thoughtful outline is your roadmap. Arrange your major topics and subtopics in a way that builds progressively from introductory concepts to more complex techniques.

One effective strategy is the “chunking” technique: break your information into digestible sections.

Each chunk should cover one main idea and include relevant examples or practical tasks. This structure reduces cognitive overload, making it easier for viewers to stay focused. It also allows them to revisit specific segments if they need a refresher later on.

Wrap up each section with a mini-recap that highlights key takeaways or encourages self-assessment.

This acts as a mental checkpoint, prompting learners to confirm they have understood the material before progressing.

By providing a logical path forward, you enhance retention and build the confidence necessary for learners to see your tutorial through to the end.


4. Decide on the Right Format

Text-based guides, screencasts, live webinars, interactive demos—there’s no shortage of ways to present your content.

The best format often depends on what you are teaching and your target audience’s preferences. Software tutorials generally benefit from video or screencasts because seeing real-time demonstrations can shorten the learning curve.

Meanwhile, theoretical or conceptual topics might be just as effective in text format, especially if your learners need to reference specific information later.

Consider mixing media to enrich the learning experience. You can combine short video clips with written explanations and interactive quizzes.

Learners who prefer to watch will appreciate the video segments, while those who absorb information more effectively through reading can rely on text-based materials. By catering to multiple learning styles, you increase the odds of reaching a broader audience and boosting overall engagement.

Also think about whether you should host your tutorials on your own platform, a third-party course provider, or even social media.

Each avenue has its advantages: a private platform offers complete control over branding and monetization, while platforms like YouTube provide massive built-in audiences. Weigh your options based on your specific goals and the resources you have at your disposal.

5. Optimize Production Quality

Good lighting, clear audio, and legible visuals can be the difference between a one-time viewer and a new subscriber.

Even if your content is brilliant, poor production quality can lead to frustration and high dropout rates. Fortunately, you do not need an expensive studio setup to achieve this.

A decent microphone, a stable camera or screen recorder, and simple editing software can significantly elevate your tutorial’s professional feel.

If your tutorials are video-based, pay extra attention to clarity. Use an uncluttered background and ensure your screen recordings are crisp. When text or code is displayed, zoom in enough so it remains easily readable even on smaller devices.

Additionally, include captions to accommodate viewers who may be watching in noisy environments—or those who simply prefer reading along.

Avoid unnecessary complexity in your visuals. Keep your slides or on-screen assets clean and straightforward.

A streamlined look helps the learner focus on the information rather than get distracted by flashy or irrelevant animations. Remember: the fewer distractions, the faster learners can grasp the core message.


6. Engagement Tactics That Convert

High-converting tutorials are more than just informational. They engage learners through storytelling, examples, and interactive elements.

You could begin with a compelling scenario that resonates deeply with your audience—perhaps a common challenge they face or a success story from someone who followed your teaching.

Interactive components can range from quick polls to small tasks learners complete before moving on.

This type of engagement keeps people active in the learning process and boosts retention. Quizzes, for example, can reinforce key concepts while signaling how much progress learners are making.

If you notice drop-off rates after a certain quiz question, that can be a sign to review the complexity of the material or re-explain a tricky concept.

Do not forget to create a sense of community around your tutorials. Encourage viewers to comment, ask questions, or share their experiences.

If feasible, you can even host live Q&A sessions. Feeling part of a broader learning community fosters loyalty. When learners see your tutorials as a supportive network, they are far more likely to recommend your content to others, thus expanding your reach.

7. Streamlining Your Process with the Right Tools

Productivity and organization tools can make a world of difference in your tutorial-creation workflow.

That is where a platform like Teamly comes in handy. By using Teamly, you can plan, assign tasks, and keep track of deadlines—all in one place. This ensures you are never scrambling at the last minute to prepare assets, record voice-overs, or finalize scripts.

There are also specialized tools for recording, editing, and hosting. Screen-capture software (e.g., Camtasia or OBS) allows for creating polished video demos.

Post-production tools like Adobe Premiere Pro or Final Cut Pro help refine audio levels, add transitions, and integrate graphics. If you prefer simpler editing processes, tools like Filmora or iMovie can also get the job done without a steep learning curve.

On the hosting side, you can opt for YouTube, Vimeo, or a dedicated platform like Teachable or Thinkific. Each solution offers unique advantages, such as integrated analytics and customizable learning paths, so choose the one that aligns best with your budget, audience, and branding needs.


8. Measure, Analyze, and Iterate

Once your tutorial is live, the real work begins. Monitoring analytics such as watch time, click-through rates, and quiz performance can shed light on what resonates with your audience—and what does not.

Do certain sections lead to spikes in drop-off rates? That might signal confusion or boredom. High engagement points, on the other hand, reveal which topics or presentation styles truly capture attention.

Encourage feedback by inviting viewers to share their thoughts or ask questions in the comments.

While positive feedback can validate your efforts, negative or critical feedback can be equally (if not more) valuable. It points you toward blind spots or areas for improvement.

Perhaps your explanations are overly complex, or your pacing is too fast. By making timely tweaks based on this input, you continually refine your tutorial so it resonates more effectively with each new viewer.

Regularly updating your content is also essential, particularly for tutorials covering software or technology.

If the tool you are demonstrating changes, or if you discover a more efficient method, you can keep your tutorials evergreen by adding a supplemental video or text-based note. This practice builds trust, as your audience sees you are committed to offering the best and most up-to-date guidance.

9. Boost Visibility with Strong Promotion

Great tutorials do not achieve high conversions if people never see them. Social media platforms, email newsletters, and SEO-friendly blog posts can put your content on the radar of potential learners.

Optimize your video titles and descriptions with relevant keywords. Craft compelling thumbnails that give a quick sense of what the tutorial covers.

And do not overlook forums or online communities relevant to your niche—just ensure you follow community guidelines to avoid spamming.

Collaborations can also expand your reach. Partner with influencers or subject-matter experts who share your passion. Host a joint webinar or create a co-branded tutorial series.

This tactic introduces your content to new audiences and adds credibility to your tutorials. When learners see you teaming up with experts they already trust, they are more likely to stick around and take your suggestions to heart.

Remember: promotion is not just about attracting new eyes; it is also about re-engaging past viewers.

A well-timed follow-up email or social media post can notify your audience that you have updated an existing tutorial or released a brand-new one. Regular engagement keeps your content fresh in your followers’ minds, making them more inclined to become repeat visitors.


10. Wrap-Up: Continual Improvement Is Key

Creating high-converting online tutorials is a dynamic process that involves planning, iteration, and an unwavering focus on your audience.

Every facet—from clarifying objectives to choosing the best format and refining your production quality—contributes to an experience that either wins over learners or pushes them away.

By putting in the effort upfront and adapting as you gather insights, you position your tutorials for long-term impact.

Keep refining your craft by staying updated on emerging trends and technologies.

Explore new tools for content creation, experiment with different engagement tactics, and never shy away from feedback.

Over time, you will develop an intuitive understanding of your audience’s needs and how best to meet them. This responsiveness ultimately transforms your tutorials into a growth engine for your brand, expertise, or business—especially when supported by robust project management tools like Teamly.

Trust in the process, continually adapt to feedback, and watch as your tutorials evolve into powerful assets.

Your learners will appreciate the care and dedication you put into every step of the journey. And as their understanding deepens, so does your credibility, influence, and reach.

Chapter 6 Insights: 10x Is Easier Than 2x

Entrepreneurship is rarely an overnight triumph. It often involves a journey of incremental learning and bold mindset shifts.

In the pursuit of growth, business leaders commonly move from doing everything themselves to orchestrating bigger visions through effective delegation.

This shift requires letting go of lower-impact tasks and embracing the potential of a dedicated team.

Dan Sullivan’s 10x is Easier Than 2x explores these stages of entrepreneurial evolution in detail.

Chapter 6, in particular, highlights how moving from a “rugged individualist” mindset toward a “self-multiplying” leadership model can spark exponential gains.

The journey is not merely about scaling up one’s hours or to-do list. Instead, it is about identifying, recruiting, and empowering the right people—enabling a more strategic focus on activities that genuinely produce 10x outcomes.


Four Levels of Entrepreneurial Progression

Entrepreneurs often start at Level 1, doing everything single-handedly—handling sales, accounting, marketing, and more.

This “go it alone” style can be both resourceful and exhausting. Eventually, necessity demands a shift to Level 2: leaders begin delegating effectively by applying the core principle of Who Not How, which poses the question: “Who can help achieve this goal?” rather than “How can it be done alone?”

As leaders continue to scale, they enter Level 3, creating what Sullivan calls a “Self-Managing Company.”

At this stage, a founder replaces themselves with leaders whose strengths surpass their own in specific roles.

The focus shifts from day-to-day operations toward high-level innovation, vision expansion, and brand stewardship. Rather than dictating tasks, an entrepreneur invests time cultivating a culture of empowerment and autonomy.

Finally, Level 4 is the pinnacle of a “Self-Multiplying Unique Ability Team.” Everyone in the organization concentrates on the top 20 percent of their highest-value activities.

Tasks that do not fit these core strengths are handed off to new Whos. This approach leads to near-effortless scaling: the energy that once went into micromanaging or filling operational gaps is refocused on strategy, relationship-building, and new opportunities.

Embracing the Who Not How Mindset

Delegation is often viewed as a luxury, when in fact it is a necessity for real growth.

The most significant barrier is the thought that one “cannot afford” to hire someone or trust them with mission-critical tasks.

This chapter emphasizes that the cost of doing everything oneself is much higher in the long run. By bringing in someone else’s expertise, a founder or leader frees up bandwidth to channel focus into uniquely valuable strengths.


A Case Study in Explosive Growth: Tim Schmidt of USCCA

One of the chapter’s most compelling examples is Tim Schmidt, founder of the U.S. Concealed Carry Association (USCCA).

Schmidt started out, like many, as an engineer with a drive to build something transformative.

Yet his first decade in business yielded only minimal growth; his revenue plateaued around $300,000, and he struggled to break through. Personal grit alone did not achieve the results he hoped for.

The turning point came around 2011, when Schmidt embraced the principle of Who Not How. Rather than managing every function, he expanded his leadership team, raised membership fees, and zeroed in on psychographic alignment with his target audience.

By shifting to high-value customers who shared USCCA’s deeper mission, the organization soared. In a little over a decade, revenues shot up from $3–4 million to well over $250 million. The team now comprises over 600 employees, and the membership surpasses 700,000.

One of Schmidt’s boldest moves was increasing annual membership from $47 to $200, losing a significant portion of his existing customers overnight.

Yet the remaining members had a stronger affinity for USCCA’s vision, paying more for the experience and fueling far greater profitability. While it felt like a risk, the shift demonstrated the power of focusing on the right customers rather than a broad set of lukewarm prospects.


Seven Principles of Transformational Leadership

Tim Schmidt’s success underscores a broader set of leadership values that are deeply rooted in Transformational Leadership Theory. Seven interconnected principles emerge:

  1. The Story: A powerful origin story can position customers as the true heroes on a quest. The leader and the organization play the role of the wise guide, amplifying the customer’s journey.
  2. An Ideology: Instead of pushing politics, successful companies anchor themselves in core principles. For USCCA, this meant championing safe, responsible gun ownership across all party lines.
  3. A Symbol: A strong identity—such as a compelling name or logo—fosters unity. The USCCA logo ties members to a cohesive, recognizable brand that resonates deeply.
  4. Shared Rituals: From membership cards to special gatherings, consistent rituals reinforce community and brand loyalty.
  5. The Enemy: Shared opposition can strengthen bonds. In this context, the “enemy” is not a group of people, but a mindset of 2x thinking: settling for incremental growth rather than aiming for tenfold leaps.
  6. The Language: Insider terms such as “Who Not How,” “VOTA,” and “DOSS” create an inclusive culture where members feel like part of a unique movement.
  7. The Leader: Transformational leaders view themselves as facilitators, not omniscient heroes. They empower teams and customers alike, guiding them toward their best possible results.

These principles go beyond typical corporate mission statements. They are designed to create a “psychographic identity”—a sense of shared values, language, and purpose. When done well, this identity resonates so strongly that external competition becomes almost irrelevant.


The Core Traits of Transformational Leadership

Hand in hand with the seven principles are four core attributes associated with Transformational Leadership:

  1. Idealized Influence: Leaders become role models, displaying dedication to values and vision in every action. This consistency inspires others to aim higher, rather than simply conforming to instructions.
  2. Inspirational Motivation: The most effective leaders articulate compelling goals that rally individuals to overcome obstacles. It is not just about hitting a financial target, but aligning with a purpose that ignites passion.
  3. Intellectual Stimulation: Collaborative exploration and healthy conflict allow a team to break out of conventional thinking. Entrepreneurs who foster open dialogue end up with better products, services, and overall strategies.
  4. Individualized Consideration: Transformational leaders recognize that each team member has unique strengths—a “Unique Ability” that flourishes when given the right responsibilities and mentorship.

By combining these traits, a leader can spark self-directed momentum within an organization. No longer must growth hinge on a single charismatic founder or strict hierarchy. Instead, responsibility is distributed among individuals who take genuine ownership of their roles.


Self-Managing Companies and the “Right Who”

Creating a business that manages itself does not happen overnight. It begins by identifying the initial Who—often a digital or administrative assistant—who can reclaim 20 or more hours each week for high-level thinking.

This process moves forward with each new hire, so the founder focuses solely on areas that yield the greatest long-term impact.

It is natural to question affordability. However, taking on tasks that limit strategic thinking is what actually proves most costly over time.

The wrong hire may slow progress temporarily, yet each mismatch is an opportunity to refine the process and become better at identifying those who align with the company’s purpose.

For businesses seeking to streamline their operations, adopting a platform like Teamly can help simplify team management and enhance collaboration.

Once organizational leaders learn to effectively delegate, the path to 10x growth opens up. By the time a company reaches self-management, the founder’s personal involvement becomes more optional, and the potential for expansion skyrockets.

Where the 2x vs. 10x Mindset Fits In

Many entrepreneurs strive for a modest 2x improvement: double the revenue, twice the client base, or a slight uptick in efficiency.

But the real magic described in this chapter lies in daring to imagine a bigger leap—multiplying growth by ten.

Achieving a 10x target forces a leader to reconsider fundamental assumptions: which customers to serve, what roles are truly indispensable, and how to foster a culture of creative synergy.

In his own experience, Tim Schmidt realized that drastically altering membership prices was the correct step once he fully understood his audience.

He did not settle for incremental gains or cling to a broader, lower-paying customer base for guaranteed revenue. Instead, he doubled down on those who valued the organization’s deeper mission, making room for a transformative leap.

Putting It All Together

The chapter’s overarching message is that real growth requires letting go of the 80 percent of tasks that produce minimal returns.

By refocusing on the 20 percent that amplify impact, entrepreneurs free themselves to think and act at a 10x level.

Though there is a necessary risk involved—saying no to some people, projects, or approaches—this recalibration aligns a business with its most loyal and profitable opportunities.

Transformational leadership not only inspires teams but also liberates founders from the tethers of incremental thinking.

Embodying the seven principles creates a culture of shared values and lasting connections. Applying the four traits of transformational leadership drives innovation, trust, and the pursuit of visionary goals.

And finding the right Whos ensures those goals are not just inspirational but actionable, turning a simple enterprise into a self-managing and even self-multiplying powerhouse.

For an even deeper dive into how to adopt these models and spark exponential transformation, consider exploring 10x is Easier Than 2x in its entirety. Purchase the book on Amazon


Chapter 5 Insights: 10x Is Easier Than 2x

The modern workplace has long depended on a rigid 9-to-5 routine, often prioritizing busyness over true impact.

There is, however, a more powerful approach to time that fosters both extraordinary performance and genuine well-being.

By integrating strategic “Free Days” into the calendar, this approach helps sustain creativity, accelerate progress, and inspire fresh insights. This method challenges the notion of filling every minute with tasks and, instead, builds a system centered on meaningful breakthroughs.


Escaping the 9-to-5 Mentality

The traditional 9-to-5 schedule is designed to keep everyone busy for a standard block of time, but it rarely generates high-level performance.

By funneling employees into a predictable routine day after day, many workplaces inadvertently produce mediocrity, burnout, and minimal impact. It is common for individuals to feel stuck in this cycle, working diligently without seeing noteworthy results.

The game-changer is recognizing that efforts do not automatically translate into powerful outcomes.

What truly matters are the results delivered—not how many hours get clocked on the timesheet.

Top entrepreneurs, athletes, and creatives free themselves from the outdated notion of constant busyness. They structure their calendars around leveraging personal energy, focusing on what matters most, and recharging effectively.

Newtonian vs. Einstein Time: Rethinking Our Relationship to Time

Time has traditionally been viewed through the lens of “Newtonian Time,” which treats minutes and hours as static, linear, and identical for everyone.

Under this framework, 60 minutes is always 60 minutes, and there’s no room for negotiation. Yet time can also be experienced as “Einstein Time,” a subjective and flexible resource influenced by focus, attention, and creativity.

Throughout history, remarkable leaps in travel and communication have demonstrated how perception of time can shift drastically. In the 1800s, a cross-country trip in the United States took months.

Today, a flight traverses the same distance in hours. This “compression” of time illustrates how mindset, technology, and innovation merge to make possibilities endless.

Entrepreneurs who embrace Einstein Time become adept at navigating life on their own terms, reaching higher levels of performance in shorter windows.


Chronos vs. Kairos: Distinguishing Two Modes of Time

In addition to Newtonian and Einstein perspectives, there are two powerful modes of experiencing time that can influence work and life: Chronos and Kairos.

Chronos Time is the conventional approach most people adopt—everything proceeds linearly, one moment after another. Typically, this style is about filling schedules with tasks and staying in perpetual motion. Although it can feel productive, it frequently leads to shallow work and fatigue.

Kairos Time represents the richer, more creative slice of reality where important breakthroughs occur. It is a state of flow, deep focus, and heightened intuition. By intentionally carving out space for this kind of engagement, high achievers often discover ideas that push their business and personal lives to new levels.

The Entrepreneurial Time System: Focus, Buffer, and Free Days

Dan Sullivan’s influential “Entrepreneurial Time System” breaks time into three essential categories, each with a different purpose:

  • Focus Days: Concentrated on high-impact projects, essential tasks, and creative output.
  • Buffer Days: Devoted to planning, preparation, strategy sessions, and coordination with teams.
  • Free Days: Entirely disconnected from work, ensuring complete mental and physical rejuvenation.

High performers excel by finding equilibrium among these three kinds of days. Instead of measuring productivity by the length of time spent in the office, they prioritize effectiveness, clarity, and consistent renewal.


The Power of Recovery

Many elite athletes and business leaders are shining examples of how critical recovery is for sustained excellence.

Take the case of LeBron James, who invests millions every year into recovery practices such as massage, cryotherapy, and strength maintenance. By emphasizing renewal as much as training, he maintains physical and mental sharpness throughout grueling seasons.

Psychological detachment from the job is equally vital. When the mind has time to wander, explore new ideas, or simply rest, an individual’s creativity often surges.

Tangible breakthroughs take place because the brain has room to process, reflect, and synthesize new information. In many instances, deliberate rest offers a greater competitive edge than additional hours of routine work.

How Free Days Unlock 10x Growth

Microsoft’s co-founder, Bill Gates, used to disappear for weeks at a time to engage in what he famously called “Think Weeks.”

These breaks provided solitude to read, reflect, and innovate without day-to-day distractions. The resulting game-changing ideas contributed to pivotal Microsoft milestones.

Similarly, entrepreneurs and leaders who schedule weekly or monthly periods without calls, emails, or meetings frequently see a steep rise in long-term growth.

Free Days offer a mental cleanse, sharpen problem-solving abilities, and rejuvenate enthusiasm. They can be a kind of strategic pause where the seeds for the next quantum leap are planted.

Explore vs. Exploit: The Two Work Modes

For sustained success, it helps to adopt a mindset that alternates between exploring new ideas and exploiting proven methods.

  • Explore Mode (Free Days): Time devoted to curiosity, discovery, and reflection. It allows one to learn, pivot, and generate fresh perspectives without immediate pressure to produce a specific outcome.
  • Exploit Mode (Focus Days): Time used to execute and leverage existing knowledge to produce high-impact work. This period focuses on refining best practices and delivering concrete results.

People who cling exclusively to exploitation often stagnate, but those who consistently balance both modes experience exponential gains.


Building a Self-Managing Team

Another compelling benefit of stepping away from day-to-day operations is how it impacts the growth of a team.

Entrepreneurs who constantly micromanage staff rarely see them develop into resilient, high-performing units. If the leader is always directing every decision, the team members never hone independent problem-solving or leadership skills.

By scheduling regular Free Days, entrepreneurs effectively force team members to take charge, make decisions, and demonstrate ingenuity.

This shift can reveal hidden strengths within an organization. The ultimate aim is a Self-Managing Company, where systems and personnel keep the enterprise running smoothly without constant oversight.

Structuring Time the Dan Sullivan Way

Dan Sullivan’s own calendar is a testament to this method:

  • 150+ Focus Days: Where core creation and execution occur.
  • 35+ Buffer Days: Allocated for strategic thinking and preparation.
  • 180+ Free Days: Reserved for rejuvenation, personal development, and exploration.

Embracing this structure helps maintain momentum while preventing the burnout that often plagues high-stakes entrepreneurs.

Strategies for Weekly Impact

A practical tip is to group similar activities together. For instance, consider dedicating specific “meeting days” and “deep work days.”

This approach limits the mental exhaustion of constantly switching between tasks. Silicon Valley investor Paul Graham has popularized the “Maker’s Schedule,” which sets aside large blocks for uninterrupted concentration.

Entrepreneurs who find the right rhythm reduce productivity-killing distractions and discover more opportunities for meaningful work.

After ensuring each week contains a balanced mix of Focus, Buffer, and Free Days, they begin to see the compounding effect of genuine recovery and targeted effort.

Case Study: Jalen Hurts

Quarterback Jalen Hurts exemplifies the commitment to deep focus and incremental improvement.

After facing skepticism early in his career, he invested heavily in technique refinement, film study, and consistent practice.

By honing these “boring” fundamentals daily, Hurts catapulted from a capable player into an elite contender.

This story underscores that breakthroughs rarely happen overnight. Hours spent in the right environment, with intense concentration, can transform a promising individual into a top performer. Prioritizing Free Days to rest and reset the mind is just as pivotal as the rigorous work ethic seen in practice.


Using the Eisenhower Matrix to Differentiate Urgent from Important

Many people allow urgent tasks to eclipse important ones. Former U.S. President Dwight D. Eisenhower’s matrix helps break down tasks into quadrants of Urgent vs. Important. The gist:

  • Urgent tasks clamor for immediate attention but may not yield lasting results.
  • Important tasks contribute significantly to long-term goals but are often overshadowed by daily noise.

Implementing Free, Buffer, and Focus Days can ensure that important tasks receive the attention they deserve, rather than being squeezed out by busywork.

The 10x Daily Routine

Achieving exponential growth often means doing less while focusing more intensely. Here’s an approach that has helped numerous high performers:

  1. Identify Three High-Impact Tasks: Each morning, choose the most pressing objectives that align with major goals. Avoid the temptation to add extra tasks.
  2. Deep Work Sessions: Reserve several blocks of uninterrupted time to tackle these tasks. Remove all notifications and distractions.
  3. Structured Shutdown: Once tasks are completed, step back. There is no need to fill the day with optional tasks that deplete mental resources without genuine payoff.

Tools like Teamly software can streamline collaboration and task management, ensuring that vital objectives stay front and center throughout the team’s workflow.

The Ideal Evening Routine

Preparation for tomorrow begins the night before. An effective strategy could look like this:

  • Capture Three Wins: Reflect on the day’s successes, no matter how small.
  • Plan Tomorrow’s Focus: List the next day’s top three tasks so the subconscious can start working on them overnight.
  • Unplug and Recharge: Limit screen time, meditate, or read to encourage quality rest. A well-rested mind is key to making the most of Einstein Time.

These simple yet profound steps help preserve energy and enthusiasm for the goals that truly matter.

Break away from the outdated models that equate long hours with success.

Embracing Free Days and seeing time as a flexible entity—something that can be shaped and scaled through creativity and strategy—creates an environment where innovation flourishes.

Learn to measure success by results, not by how many hours are spent in a chair. Purchase 10x Is Easier Than 2x on Amazon

Chapter 4 Insights: 10x Is Easier Than 2x

Chapter 4 of 10X is Easier Than 2X offers a clear roadmap for making major leaps in performance. It centers on measuring gains, revisiting past transformations, and leveraging personal strengths.

The chapter reframes conventional thinking about growth by showing that simplifying focus—by zoning in on the right 20%—catalyzes explosive progress.

Readers get a transformative viewpoint that alters how they think about career advancement, personal goals, and overall satisfaction.

Traditional wisdom often warns that big strides demand exhaustive effort and relentless hustle. Chapter 4, however, flips that notion.

By releasing unnecessary commitments, individuals free up energy and creativity for what truly matters. This approach concentrates resources on fewer priorities that deliver outsized returns.

Letting go of low-value tasks is not a “loss,” but an important step toward clarity.

Prioritizing tasks that truly drive transformation, and discarding the rest, creates the space for extraordinary feats. Over time, we all gather obligations or relationships that no longer align with our goals.

A habit of pruning these outgrown commitments is the key to unlocking bigger possibilities and streamlined focus.


Embracing the 10X Mindset

The core of Chapter 4 is that 10X growth can actually involve less friction than striving for a 2X increase.

Most people see big leaps as a steep climb, requiring exhaustive amounts of work. Yet here, 10X focuses on discarding non-essentials so there is more time and creativity for what matters.

Instead of scattering energy across a dozen tasks, success comes from doubling down on those few that make a disproportionate impact.

This refined focus is the “secret sauce.” It rebrands letting go as a necessary step. With fewer distractions, readers discover a newfound clarity, fueled by the realization that focusing on core drivers of transformation can amplify results.

Anyone aiming for significant achievements is encouraged to streamline and concentrate on high-value activities.


Reflecting on Past 10X Jumps

One of the most powerful teachings here is the call to recognize transformative leaps that have already occurred.

Whether learning to read, making a major career shift, or building meaningful relationships, people have had moments when they rose to a whole new level.

These personal milestones are “10X jumps” because they mark not just small improvements, but transformations in identity and mindset.

The chapter explains that replicating success means analyzing the catalysts behind these earlier leaps. Readers are asked to think about five major transitions, identify the 20% that enabled those changes, and note the 80% they let go.

By examining these life shifts, the path to the next leap becomes clearer. It isn’t unknown territory; it’s a road we’ve already traveled, just in different contexts.

The Fitness Function: Setting the Right Course

Borrowed from computer science and evolutionary theory, a fitness function is a set of criteria that defines success.

Chapter 4 urges readers to clarify what they want to optimize in life and work. Is it creativity? Financial growth? More free time? Improved health? Pinpointing that main driver is like selecting an exact course on a map. Each decision then aligns with that ultimate goal.

A vivid example involves a historical airplane navigation error that ended in a tragic crash in Antarctica.

Even a small deviation led the flight off its intended path. This analogy shows how crucial it is to keep personal goals in lockstep with a chosen fitness function.

Small misalignments can grow over time, causing big detours. When the right standards are set, even minor course corrections add up to a huge reorientation that moves progress in the right direction.


Making Smaller Circles: Why Fine Distinctions Matter

The chapter highlights “Making Smaller Circles,” a term from Josh Waitzkin’s The Art of Learning.

His method stresses focusing intently on subtle details until mastery becomes second nature. Whether playing chess, practicing martial arts, or running a business, experts often spot patterns or “chunks” of information that novices miss.

This automatic recognition is the payoff of steadily zooming in on finer points.

By sharpening small distinctions, anyone’s capacity to excel grows exponentially. Where most see a complicated puzzle, those who hone these details spot repeatable patterns or shortcuts.

This level of insight brings faster decisions, deeper clarity, and swifter execution. Chapter 4 clarifies that success isn’t about blind effort. It’s about precision and refining skills to a razor-sharp edge.

Focusing on Unique Ability for Irreplaceable Value

Another striking takeaway is the importance of “Unique Ability.” Instead of chasing every shiny skill, progress accelerates when people nurture one core talent or interest to its highest level.

This deep specialization multiplies results and stands out in a competitive environment.

Chapter 4 challenges the idea of being “well-rounded.” True high-performers become specialized creators or leaders by developing a standout skill.

As that core ability narrows and intensifies, value soars. Eventually, such specialization morphs from being merely helpful to being indispensable.


Visualizing the Dream Check

A fascinating exercise in the chapter is the “Dream Check,” exemplified by Jim Carrey writing himself a $10 million check before he was earning that amount. This check represented his future self—someone who could deliver enough value to justify that pay.

The chapter stresses that 10X isn’t just about scaling up. It’s about increasing value so significantly that bigger opportunities or compensation follow naturally.

Those who embrace the Dream Check keep a clear symbol of their future selves.

It’s not daydreaming; it’s constant alignment with a goal. The core question is, “What value needs to be created so that someone else sees this as an obvious investment?” Asking that triggers creativity, resourcefulness, and continuous improvement.

The Art of Measuring Gains, Not Gaps

In fast-paced cultures, it’s easy to dwell on “the Gap”—the distance between current progress and an unreachable ideal. Ideals are always moving, like a horizon that stays ahead no matter how quickly we advance.

Chapter 4 urges readers to pivot toward “the Gain,” focusing on how far they’ve come rather than how far they have to go.

This doesn’t mean settling. It’s about motivating oneself with tangible progress. Minor wins and steady improvements form stepping stones to bigger goals.

Recognizing these gains sparks gratitude, perspective, and a sense of accomplishment. This positive feedback loop strengthens momentum for the next 10X leap.


Shedding the 80% That Holds You Back

It’s tempting to hang on to every opportunity and responsibility. However, Chapter 4 reveals that 80% of our efforts often hinder real progress.

The book reframes removing the 80% as a vital step toward cultivating the valuable 20%. Though it can be daunting to let go, the payoff is huge.

Without this culling, the road to 10X is blocked by constant distractions. The chapter reinforces that simplification is the game changer.

When only the 20% that truly matters remains, it draws more opportunities aligned with a person’s strengths. Suddenly, time, energy, and mental bandwidth expand for more focused reinvention.

The Transformative Power of Chapter 4

Chapter 4 introduces a fresh perspective: 10X isn’t rare or impossible—it’s a systematic approach that many have already experienced, even if they didn’t label it that way.

By amplifying what works, discarding what doesn’t, and visualizing the future self (like the Dream Check), the chapter lays out a structured route to massive leaps in personal growth and business success.

Those eager to accelerate their progress will discover guidance here for every facet of life: career, health, relationships, or creative pursuits.

This chapter clarifies why letting go is crucial, how to measure success realistically, and why narrowing focus can yield huge rewards.

There’s no shallow hustle involved; rather, it emphasizes deliberate, thoughtful action to achieve more with less strain.

Many teams find that using Teamly software can also simplify collaboration and reduce distractions. This aligns directly with the principle of centering efforts on the most productive 20%.

Combining such tools with Chapter 4’s strategies builds an environment where releasing the 80% becomes natural.

Put into practice, these principles open gateways that once seemed out of reach. Chapter 4 shows how shifting from “That’s too big” to “This can change everything” sparks remarkable results.

The streamlined approach is both encouraging and accessible, once the burden of unhelpful pursuits is lifted.

To fully experience this transformation, 10X is Easier Than 2X is an essential read. Its structured approach offers instant direction, transforming lofty goals into practical steps with the potential to reshape entire trajectories. Get your copy of 10X is Easier Than 2X on Amazon here.