How to Create an Emotionally Intelligent Workplace: With Examples

Image represents Emotional Intelligence Examples

At one time or another, everyone has paid the price for a deficiency in emotional intelligence. Maybe it’s ongoing conflicts in the workplace that lead to low performance and failed projects, or a leader whose communication patterns leave people feeling undervalued and discouraged.

On the other hand, some leaders have the capacity to leave a team feeling enthused, appreciated and connected. And the collaborative environment in certain workplaces generates the kind of synergy that leads to innovative and lucrative solutions.

No doubt about it, emotional intelligence impacts so many parts of a workplace.

It’s easy to recognize an absence of emotional intelligence in other work environments, such as policies that demotivate employees.

But what about in our own workplace? Where does emotional intelligence impact our daily routines and interactions? And where are those places where it’s lacking?

Although “emotions” themselves seem nebulous and unquantifiable, emotional intelligence can be identified and practiced in concrete situations.

Want a little more clarity? This post is going to look at all the ins and outs of emotional intelligence, including why it matters, where it shows up in the workplace, and how to cultivate and practice it in your own routines.

Image represents What is Emotional Intelligence

Definition & Benefits of Emotional Intelligence

“Emotional intelligence” is a term developed in the 90s. It’s been widely propagated by the psychologist Daniel Goleman.

The concept isn’t about being nice and friendly, Goleman says. In his book, Emotional Intelligence: Why It Can Matter More Than IQ, he breaks the concept into four components: self-awareness, self-management, social awareness and relationship management.

Emotional intelligence (EQ) first of all entails an ability to recognize and to manage our own emotions. This includes channeling negative emotions constructively, and accepting failure without becoming defeated. EQ further involves our relationships and communities. It’s about an ability to identify other people’s emotions, and then to use this knowledge to sway social interactions so as to create synergy, connection and rapport. Essentially, it’s about getting along and working constructively with others.

Although some people possess a high emotional intelligence, it’s not an innate attribute, but rather a developed skill. Emotions are physical sensations that we can learn to spot within ourselves with increasing levels of accuracy. Reading others is also a skill that’s developed with time. It often relies on interpreting body language and trusting intuition.

EQ does much more than lead to warm fuzzy feelings between ourselves and others. Incorporating emotional intelligence into our everyday impacts every part of our lives. For example, EQ helps us to:

  • Relate to the opposite sex
  • Overcome chronic negativity
  • Get over a breakup
  • Work through depression
  • Navigate a transition
  • Make life decisions like buying a house
  • Manage money

And in a work environment, EQ helps to:

  • Advance a career
  • Avoid landmines with difficult coworkers
  • Boost sales

A workplace with low emotional intelligence, on the other hand, compounds its issues. Someone with a low EQ cannot set and achieve long-term goals or accept setbacks and failures. When people don’t understand or manage their own emotions, it easily leads to excessive arguments and division.

With these clarifications in mind, let’s turn to some examples of what emotional intelligence looks like in a work environment.

Image represents Emotional Intelligence Examples in the Workplace

4 Examples of Emotional Intelligence in the Workplace

Emotional intelligence impacts many facets of a work environment. It affects how an organization collaborates and innovates, how it resolves interpersonal conflicts and how coworkers interact with one another. It also shapes an organization’s mission and policies, and its culture overall.

Let’s break down just what EQ looks like in the workplace with some concrete examples.

1. Regular Retrospectives

A retrospective is part of the scrum framework, and a routine practice of an agile team. It’s a ceremony that’s held at the end of every sprint or work session.

At a retrospective, the team gathers to share and listen to each other regarding the work it just completed. People share what worked and where they’d like to see changes. Oftentimes, people share emotions, perhaps frustration over an interfering product manager or weak communication within the team.

The retrospective sharpens a team’s EQ in two ways. First of all, the practice of regularly gathering to identify and share emotions increases each persons’ emotional granularity, or their ability to recognize their own emotions. Secondly, it increases the communication and empathy within the team. People understand how others feel, and how their own actions impact everyone else. Then, they work constructively toward cooperative solutions.

2. Empathetic Workplace Policies

An organizations’ policies is another area that reflects its emotional intelligence.

For example, the financial services company TIAA doesn’t give its employees “vacation time.” Rather, each employee can take off as many days as he or she pleases.

With this policy, the leadership demonstrates strong social awareness. It understands that granting employees autonomy over their schedules generates a cooperative and motivated workforce.

In another example, Facebook CEO Sheryl Sandberg changed the company’s bereavement policies following the sudden death of her husband. This communicated empathy with her entire workforce. She communicated that in her grieving, she also acknowledged the predicaments of others.

3. Language that Supports and Energizes

Have you ever worked with a boss or manager who understood exactly how you felt, and then acted in a way that empowered you? Maybe she understood that you felt discouraged by an outcome, and knew that words of criticism weren’t going to make the situation any better. Or, she realized that you were lagging a little, and needed some strong coaching to spur you on.

An incident at Microsoft with CEO Satya Nadella demonstrates how a leader generated a momentum shift with his choice of words. In 2016 Microsoft made an auspicious release on Twitter of an AI chatbot, Tay. Within 16 hours, however, the account was penetrated by hackers posting offensive content, and it had to be recalled.

This humiliation coming on the heels of months of hard work no doubt left the creators of Tay feeling dejected. Whereas Microsoft’s former CEO Steve Ballmer might have jumped on the team and castigated them, Nadella appreciated what was needed in the moment. He sent a message that read, “know that I am with you… key is to keep learning and improving.” This empathy and support allowed the team to quickly move beyond discouragement and to effectively work toward an improved product.

Nadella’s actions demonstrated strong social awareness and relationship management. He not only accurately identified the team’s emotions, but he interacted in such a way as to channel them in a positive direction.

4. A Culture of Gratitude

What’s the secret to a boss who makes you get up and go? The kind of leader who keeps you performing at your best all day long?

This example reveals a possible answer. In his book Payoff: The Hidden Logic That Shapes Our Motivations, author Dan Ariely recounts a study from an Intel factory that tracked the chip production of four groups of employees. Each group received different incentives for its work. One received a small cash reward, one a compliment from the boss, one pizza and one received nothing at all. As it turns out, the groups who received pizza and a compliment produced well above the other two groups.

What does this reveal? That personal attention and tangible gifts make all the difference. An organizational culture that demonstrates appreciation is socially aware, as it acknowledges its dependency on the hard work of others.

As you can see, a high EQ works to the advantage of any work environment. Now let’s look at a few ways to increase emotional intelligence.

Image represents Ways to Develop Emotional Intelligence

3 Ways to Develop Emotional Intelligence

No one’s ever “there” with emotional intelligence. Rather, it’s a skill that’s developed and achieved in degrees. To this end, here are a few practices for honing emotional intelligence, both individually and on a team.

1. Log Daily Emotions

Judging by the language we use everyday, most of us score pretty low in the spectrum of emotional granularity. It’s very common to summarize our emotional state with emotions like “good,” “bad” or “hangry.”

However, the range of emotions we feel over a given day is usually much broader than this. “Good” could really mean anything from “joyful” to “happy” to “fulfilled” to “relieved.”

As self awareness is at the foundation of a high emotional intelligence, the precise identification of our own emotions is the first step to relating constructively with others and taking healthy action in our own lives.

One way to do this is to make a practice of cataloging our emotions at the end of each day, using words more descriptive than “happy” and “sad.” For a reference list of everyday emotions, Author Brene Brown provides a comprehensive summary of 87 emotions in her book, Atlas of the Heart.

2. Write Your Obituary

In his book, The 7 Habits of Highly Effective People, psychologist Steven Covey says that the paradigm or lens through which we evaluate our entire lives ultimately impacts the small actions we take in the day to day. And so developing an EQ starts by looking at the big picture.

Writing your obituary is one way to crystallize this lens. This exercise compels us to identify how we want to be remembered and who we want to impact in our lives.

Covey finds that this exercise also helps to re-shape the story we tell ourselves about our lives, and in doing so overcome chronic negativity and life challenges.

3. Create Emotions on Demand

Certain activities have a tendency to consistently generate similar emotions. A trip to the sauna may generate feelings of calm and quietude, while a trip to a crowded grocery store might generate feelings of agitation.

Once we recognize the “formula” for generating certain emotions, it’s possible to use this to our advantage. For example, maybe certain types of food put us in an anxious or jumpy mood. These might be foods to avoid, then, at the beginning of a long workday where deep focus is required. At the same time, maybe a drink with calm music puts us into a peaceful mood. This might be a helpful practice to help recoup after a long or stimulating activity.

Taking action to shape our own emotions is about self-awareness, which is at the core of emotional intelligence. When we can regulate and moderate our own emotions, it puts us in a place to encounter and constructively work with others.

Conclusion

Maybe at some point in your life you had the kind of boss who read you just right. He understood how you were feeling, and was as concerned with your emotions as he was with his own. He created a space where you felt like you could unload and share how you felt.

7 Relatable Examples of Social Loafing You’ve Definitely Experienced

Image represents Social Loafing Examples

Have you ever been part of a group project where some people didn’t seem to be putting in the same effort?

Well, it turns out there’s a psychological phenomenon for that…

It’s called social loafing, and it refers to the tendency of team members to put forth less effort when they’re part of a group. Here are 7 things you’ve probably seen people do when they don’t want to do anything.

Image represents The Meeting Slacker

1. The Meeting Slacker:

Description:

You notice that a team member consistently shows up late or unprepared for meetings, yet you expect the rest of the team to pick up the slack.

Real-life Example:

John, one of the team members in the marketing department, is always late for meetings and never seems to have his presentation materials ready. As a result, the team has to spend extra time catching him up and making sure his portion of the presentation is ready. The team’s productivity has plummeted, and morale has suffered.

Causes:

John’s lack of motivation, poor time management skills, or a lack of accountability for his activities could all be to blame for this behavior.

Effects:

This conduct might result in decreased productivity, low morale, and poor job quality.

Solutions:

It’s time to establish some very specific expectations for John. After all, while you’re on the clock, time is of the essence. Remind him of the importance of time. But make sure you model and own it so he understands the value of meeting deadlines.

Image represents The Invisible Team Member

2. The Invisible Team Member:

Description:

You notice that a team member barely contributes or is never heard from, but they expect their name to be on the final project.

Real-life Example:

Sara is part of the company’s annual report team, but she rarely speaks up in meetings, and when she does, her contributions are minimal. Her teammates have noted that she expects her name to be on the final report despite her lack of participation.

Causes:

This behavior points to Sara’s insecurity. Maybe she feels like she needs to be perfect in order to be accepted, so she’s afraid to make mistakes. Or maybe she doesn’t feel safe within your team’s dynamic.

Effects:

This behavior can lead to a lack of cohesion among the group, decreased productivity, and poor quality work.

Solutions:

To remedy this situation, start by creating a safe space for everyone to voice their opinions and ideas. Give Sara the opportunity to share her thoughts without fear of judgment. Also, be sure to recognize and reward her contributions when appropriate. This will create a sense of camaraderie and accountability within the team.

Image represents The Free Rider

3. The Free Rider:

Description:

This is where you have a team member who’s not pulling their weight, but they’re sure enjoying the benefits of the group’s hard work.

Real-life Example:

Mike is a member of the sales team, but he rarely makes any calls or follows up with leads. Instead, he just sits back and waits for the rest of the team to close deals, and then he takes credit for their work. His lack of effort is affecting the team’s productivity and morale.

Causes:

This behavior might be caused by Mike’s lack of ownership of the project, a lack of clear roles and responsibilities, or a lack of accountability within the team. More often than not, accountability is the underlying cause of a free rider.

Effects:

This behavior can lead to decreased productivity, lowered morale, and poor-quality work. And if you want to build a positive team culture, it’s crucial to address this issue quickly. If not, your team will suffer.

Solutions:

Sometimes leadership is like parenting; you have to be both nurturing and firm. Start by setting clear goals and expectations for Mike, and then follow up with him on his progress. Help him understand the importance of accountability and ownership. And finally, reward his successes publicly to reinforce their hard work.

Image represents Social Conformity

4. Social Conformity:

Description:

This is when your team member conforms to the group’s norm of loafing and doesn’t put in their best effort.

Real-life Example:

When Greg started working on the project, he had a ton of energy and momentum. But over time, he’s noticed that the team isn’t putting in much effort. Instead of speaking up and challenging the culture, he just follows along with the rest of his team and doesn’t put in any extra effort himself.

Causes:

Greg might not see the value in going above and beyond, or he might feel like it won’t make a difference anyway.

Effects:

This behavior sends a message to the team’s culture that mediocrity is acceptable. It can lead to a decrease in productivity, motivation, and morale.

Solutions:

The best way to get Greg back on track is to set expectations and provide him with meaningful feedback. Reward his efforts and energy and try to get his eyes back on the prize. Most importantly, create a culture of accountability and ownership within the team. Encourage everyone to challenge each other to be better and strive for excellence. Ideally, you would include this in the brief before the project begins so that everyone is working to the same high standards.

Image represents Bystander Effect

5. Bystander Effect:

Description:

Have you ever heard of the bystander effect? It’s when people in a group fail to help someone in need because they assume that someone else will do it. Or, as the name implies, they become bystanders in the situation.

Real-life Example:

During a company meeting, you ask for volunteers for a task. No one in the team speaks up or offers to help, even though they all understand the importance of the project.

Causes:

This is usually caused by a feeling of diffusion of responsibility or an assumption that someone else will take care of it.

Effects:

This can lead to decreased productivity and a lack of ownership within the team. It also shows that the team is not taking ownership of their work, which can be detrimental in the long run.

Solutions:

First off, asking for volunteers is usually a bad idea. When possible, it’s better to actively assign tasks and roles. If you do need volunteers, be clear about the expected outcome and divide tasks into manageable chunks. This will make it easier for people to step up and take ownership of the project.

It’s also great to reward people who do take ownership, to show that their hard work is being appreciated. This doesn’t mean you have to pay more, though financial compensation is always good; just simple social recognition is enough.

Image represents The Perfectionist Loafer

6. The “Perfectionist” Loafer:

Description:

This is when someone on your team is waiting for the perfect moment or perfect conditions to start working, ultimately leading to procrastination and reduced effort.

Real-life Example:

Your project has a strict deadline, so you assign certain tasks to your team members and expect them to be completed by a certain date. But one of your team members is constantly pushing back the deadline, saying that it’s not perfect enough or needs more work.

Causes:

Nine times out of ten, this behavior stems from a fear of failure or not wanting to make mistakes.

Effects:

This can lead to a decrease in morale and productivity, as well as missed deadlines.

Solutions:

The best way to address this is by focusing on the progress made rather than the end result. Make sure that your team members are aware of their progress and celebrate small wins along the way. This will help them focus on what’s been accomplished instead of trying to achieve perfection.

Additionally, encourage your team members to ask for help when they feel stuck or overwhelmed with a task. This will show that you’re accessible and willing to provide support, which will make them more comfortable taking risks.

Image represents The Too Cool Loafer

7. The “Too Cool” Loafer:

Description:

They think they’re above the task at hand and put in minimal effort, thinking it won’t affect the outcome of the project.

Real-Life Example:

You assign a task to one of your team members, and they don’t take it seriously. They may joke around or make light of the situation and dismiss the importance of what’s being asked of them.

Causes:

This behavior is often caused by a sense of superiority or arrogance. Most likely, they don’t think the task is worth their time or effort.

Effects:

This can demolish a team’s morale and productivity, as well as lead to missed deadlines or unfinished projects.

Solutions:

This should not be tolerated on any team. It’s a bad way of thinking that can quickly spread to other people on the team if it’s not stopped.

But if you are wanting to remedy this problem without firing the person, the best approach is to make sure they understand how their behavior affects the outcome of the project. Explain why it’s important that everyone contributes, and show them how their work fits into the overall goal. This will help them see the value in what they are doing, as well as bring everyone closer together as a team.

Conclusion

We’ve all encountered it in one way or another.

Social loafing can be a real pain in any collaborative effort, whether you’re the one taking a back seat or trying to compensate for others’ shortcomings. But, through greater consciousness and proactive solutions, this obstacle can be conquered.

Always remember to reward effort and progress, and if all else fails, don’t be afraid to take drastic measures and make sure everyone is on the same page.

It’s in these moments that we can create a truly collaborative and productive team, one where everyone feels valued and respected. That’s when our true potential as a team will shine through! Happy team-building!

Structure Matters: How to Design an Effective Team for Your Organization

Image represents Team Structure

Back in grade school, did you ever have a class where you aced every test and answered all the questions right, and then the following year, you had a teacher and a classroom where everyone else seemed to understand what was going on, but you didn’t have a clue?

Or have you ever seen a group of talented musicians come together to create an unlistenable, screechy album?

These sorts of things happen all the time. They suggest that factors such as environment, structure, collaboration and leadership can be game changers.

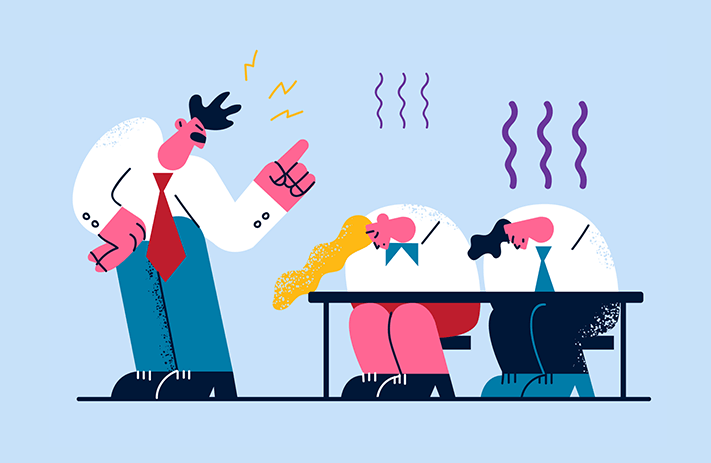
Yet it’s difficult to see how an organization might be getting in the way of its own success. Maybe you have a disorganized system where the new hires get assigned to the high-tier clients. Or you have a talented team, but the projects tend to flop due to bickering and infighting.

Phrases like “empowering a team” and “unleashing potential” sound elusive, like one of those water snakes that slip through your fingers when you try to grasp it. But really, there are concrete ways to build an effective team. As it turns out, capacity, design and structure have as much to do with team effectiveness as anything else.

Are you interested in learning some of the secrets to building a high-power team? About the optimal way to design your team for the output you’re looking for, and those things to avoid?

In this post, we’re going to look at powerful tools for designing a team structure that manages itself and delivers results, and at organizational principles and designs to build an effective team that works for you.

Image represents a Team Versus a Group

A Team Versus a Group: Definitions

Teams aren’t necessarily people who work together in the same space and who perform the same tasks. Let’s get down to the basics first off and clarify just what is meant by a team versus a group.

A group, loosely defined, means two or more people who have significant things in common. However, a group may or may not function as a team. Here’s an example to illustrate this point. A group of people boards a ship to take a cruise, but a team of people devises a plan when the ship starts to sink.

This example clarifies the key distinction between a group and a team. Although a group has significant things in common, a team works toward a common goal.

Scott Tannenbaum and Eduardo Salas, authors of Teams that Work, the Seven Drivers of Team Effectiveness have outlined five characteristics of a team.

  1. A team must consist of two or more people. Nobody working solo is on a team.
  2. Team members interact continually (though not necessarily daily).
  3. The people within the group see themselves as a unit (but not exclusive to other teams).
  4. The members of the group are aligned around the same purpose, and work toward the same goal.
  5. Members of the team have roles and separate duties. They rely on one another’s skills to achieve goals.

Teams can be remote, where the members never see each other in real life, or in-person, where the members work alongside each other every day. Oftentimes teams are formal, with assigned roles, and are designed to last for some time. This isn’t a requirement, however. Some teams casually band for the space of a few hours, then disband once the purpose is achieved.

Teams function in every aspect of life, to solve all sorts of problems and work toward a variety of shared purposes.

A basketball team seeks to score more baskets than the opposing team, and a tennis team to score more points than the players on the other side of the net. A flight crew seeks to safely and comfortably bring its passengers to the destination, and a restaurant staff to deliver hot meals with a smile. A software team collaborates to build a product that solves the client’s problems. SWAT teams work to mitigate a crisis, and military units to safeguard the common good.

In a variety of capacities, we’ll all experience being part of a team. And as we all can attest, it certainly isn’t always easy.

However, a team provides many benefits above and beyond those of a group. Teams generate synergy, a capacity to solve problems and achieve goals that wouldn’t be possible within a group where everyone works in silo. Competition is minimized in a high-functioning team. Everyone shares best practices and the environment generates camaraderie and innovation.

This highlights another key distinction between groups and teams. A group evaluates people individually, it rewards individual performances. A team, on the other hand, evaluates everyone as a unit. It measures performance based on the group.

As we’ll discuss more in this post, a team’s success is in large part determined by its design. A poorly designed team gets in the way of its own objectives, while a carefully crafted team leverages all its potential. As Naomi Stanford writes in her book, A Guide to Organization Design, “Risk of failure can be completely avoided by consciously designing a new organization or redesigning an existing one in such a way that it performs well and adapts readily to changing circumstances.”

Image represents Effective Team Characteristics

Characteristics of an Effective Team

Tannenbaum and Salas are both organizational psychologists who have studied teams for over thirty years, in industries ranging from health care to financial services to airline travel. Over this time, they have identified three characteristics of an effective team.

1. Manages Resources

An effective team understands the resources required to achieve an objective, and utilizes a resource management plan to get there.

Resources include everything from materials, to equipment, to facilities, to the skills and time of team members. Effective resource management includes procurement plans that ensure the prudent acquisition of materials, systems that facilitate work-life balance for each team member and resource leveling to distribute work sensibly throughout a project.

2. Works Through Challenges

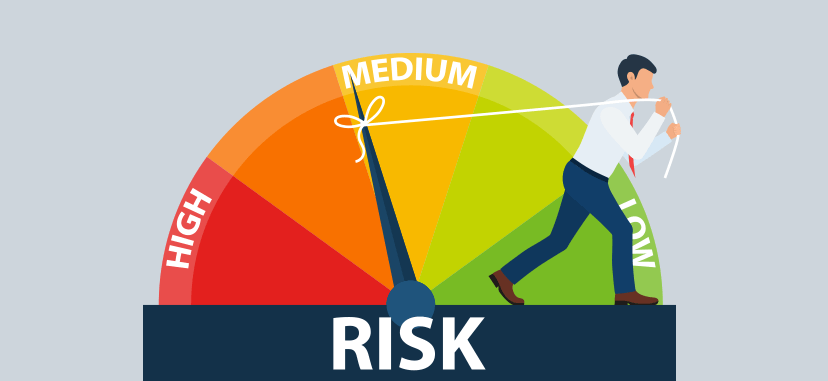
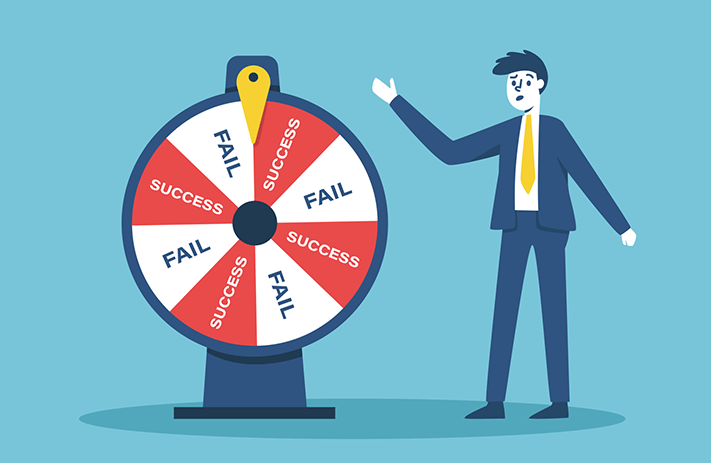
An effective team isn’t one that never has hiccups, disagreements or failures. In fact, open and honest disagreements are a sign of a collaborative and healthy team. And any team that takes risks is sure to fail from time to time.

However, an effective team doesn’t lose its productive capacity in the midst of challenges. It functions within a culture that fosters psychological safety so that the people feel valued and respected in the midst of conflict or failure.

3. Adapts and Innovates

An effective team isn’t fixated on one goal. A quarterback, for example, isn’t afraid to call an audible at the line of scrimmage when he feels a different play is more likely to achieve a first down.

An adaptive mindset allows a team to back track or change course when that’s more likely to achieve the objective. It doesn’t hesitate to develop new skills, and realign its structure when necessary.

Tannenbaum and Salas have also identified the components of an effective team. Here are the “Seven Cs” that make up a team.

1. Capability

Although skill isn’t everything, it certainly is necessary for teamwork. A software team must be fluent in the language it’s going to use to build a product. A fishing team must understand how to weather a storm, drop anchor and navigate by the stars. A financial advisor knows the sales techniques to move products. Generally, skills are distributed within a team.

2. Coordination

The coordination of a team impacts productivity every bit as much as the capability of its individual team members. This point lies at the heart of this paper, in fact. Coordination is the reason for why some teams with seemingly mediocre skills flourish, while other teams with stellar skills fall flat. Poor coordination is one of the key causes of social loafing.

3. Communication

Have you ever been on a team where someone chimes in with a warning, and is completely ignored, then later, when it’s too late, the team realizes it should have heeded the counsel?

A healthy team is receptive to listening to all perspectives. It gets the right information to the right people at the right time. Fluid communication is facilitated by good communication tools, regular check-ins and a transparent culture that values individual contributions.

4. Coaching

Even the most autonomous team functions best with some supervision and leadership. Leadership sets the tone, reinforces the culture in the team, boosts momentum and aligns a team around goals.

5. Cooperation

Cooperation, fundamentally, is about trust and openness. It means people feel comfortable bringing their full selves to the team. Oftentimes cooperative teams generate a swarming effect where everyone works together on the same task to bring it completion.

6. Cognition

Cognition, according to Tannenbaum and Salas, means that teams have a mutuality or a similar approach. Organizations with strong cultures excel here, as people are more likely to have similar priorities and be incentivized for the same reasons.

7. Conditions

Every team works within a specific range of resources. Members have access to a certain amount of materials and equipment, work within a given facility or digital platform, and give a certain amount of time. These conditions in part influence and determine the team’s output.

Regardless of its structure or industry, every effective team carefully selects the proper conditions to cultivate success.

Image represents Teamwork Myths

Four Teamwork Myths

We all have an idea in our head of how the ideal team functions and behaves. Maybe it includes team members laughing with each other during rapport building activities, slapping each other on the back and going out for beers together after work.

Although this description may characterize an effective team, these attributes aren’t fundamental. Let’s bust up some commonly held notions about what a team must be.

1. A Team Needs the Best and the Brightest

We’ve seen sports teams composed of seemingly mediocre athletes who win championships, and teams with star players who don’t even make it to the playoffs.

Although it may seem counterintuitive, skill isn’t the most important criteria for a great team member. Emotional intelligence matters every bit as much, and sometimes more, than skills. Characteristics like attitude, humility and a willingness to learn also impact an individual’s contribution to a team.

2. High-Functioning Teams Communicate Every Single Day

The widely-propagated agile principle promotes face-to-face communication and a daily scrum meeting. It has set an expectation that a team must be in constant communication, or else things go off the rails.

However, a team’s structure determines its ideal communication patterns. In some designs, requiring every member to communicate with every other member is simply excess and wasted energy.

3. Teams Produce More Together Than They Would Individually

Although teams possess the capacity to create a “one plus one equals three” phenomenon, this doesn’t occur automatically.

The synergy of a team must be cultivated. If it isn’t, then the opposite may occur instead. Sometimes when a group coalesces into a team, a phenomenon called social loafing occurs, where people produce far less than they might if they were working on their own. Some studies have shown that in group settings, individual output decreases by as much as one half.

4. Large Teams Are Bad

In this day of agile, any team over six or seven members is seen as an anathema, as though it’s asking for failure. This simply isn’t so. The size of the team is determined by the project at hand.

Sometimes the best criteria for team success is how long its members have worked together. Teams become the most productive after it’s gone through the storming and forming phases, and each understands his or her role. Strong central leadership can eliminate some of the infighting and conflicting priorities that take place within a large group.

Although there’s no one right way to build a team, certain conditions almost always preclude growth. Now that we’ve busted up a few teamwork myths, let’s look into why team structure matters.

Image represents Conway’s Law

Conway’s Law: Why Team Structure Matters

In 1968, the computer magazine Datamation published a research paper from Melvin Conway, a computer programmer, scientist and doctor of mathematics. The Harvard Business Review had already rejected the paper. And Conway buried the thesis at the very end.

Pithy insights have a way of surfacing eventually, however. Seven years later Frederick Brook featured Conway’s thesis in his book of technology essays, Mythical Man-Month, using the moniker “Conway’s Law.” The principle gained traction, and today this law is widely applied not only in software companies, but in the design of organizations in general.

Conway’s Law Defined

Conway’s Law essentially states that the structure of software mirrors the structure of the team that built it. More broadly, the product, output or service of an organization is reflected in the communication structure of the team that creates or provides it.

As Conway himself explains: “Organization which design systems…are constrained to produce designs which are copies of the communication structures of these organizations…the very act of organizing a design team means that certain design decisions have already been made, explicitly or otherwise”

Examples of Conway’s Law

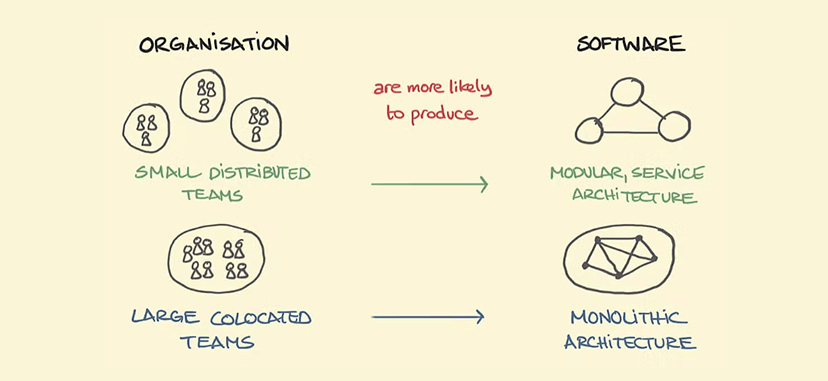
As an example, take the companies Chevy and Tesla, and more specifically the cooling systems built into the automobiles of each. Tesla uses a simple organizational structure, and its engineers designed a car with one cooling system to handle the entire automobile.

Chevy, on the other hand, is a much larger company with a decentralized organization that assigns separate teams to specific components of the car. Its cooling system reflects this. A Chevy automobile has three cooling systems: one for the battery pack, one for the cabin, and one for the battery.

Conways Law is reflected in software design as well. A team of three software engineers who each know three different languages inevitably builds a system with a three-tiered architecture.

All this is to say, an organization with complex communication structures can’t create a simple product. An organization with many different teams, where each reports to a different VP who’s incentivized to reach a different goal, and where an individual on one team must interact with several people to communicate with a member of another team, creates a product that reflects this complexity.

As many leaders and project managers attest, there’s no getting around Conway’s Law. No matter how much it might want to, a team cannot build something counter to its design.

A Solution to Conway’s Law

Conway poses a solution to his principle: “Ways must be found to reward design managers for keeping their organization lean and flexible. There is a need for a philosophy of system design management which is not based on the assumption that adding manpower simply adds to productivity.”

This notion has come to be known as the Inverse Conway Maneuver. The maneuver is about creating a clear structure, and limiting the cognitive demands of individual team members on the team. Essentially, it means that if you want to create something that’s simple, or to provide fast, straightforward service, utilize a simple team design.

The Big Lesson from Conway’s Law

One overarching takeaway from Conway’s law is that a team cannot focus exclusively on what it wants to produce, be it a widget, a website, or a service experience. In order to achieve its goal, it must focus on the design of the organization as well.

And so when a team is stuck in a hairball of a mess, sometimes the solution is to simplify the team structure. As Conway emphasizes, this means that organizations must continually be open to re-design.

Conway’s Law convinces us that design matters with respect to team effectiveness. But what should this design look like? As it turns out, there’s many options. Some that work, and some that definitively do not.

Image represents Team Structures that Always Fail

Four Team Structures that Always Fail

Although there’s no one right way to structure or design a team, certain formulas just aren’t going to cut it at any time or anywhere. Let’s look at some of these.

1. Required Skills Nowhere to Be Found

As discussed earlier, capability is a key component to an effective team. Although at some level this is a no-brainer, sometimes it requires a little digging to identify required skills, and then classifying each individual’s skills on a spectrum.

Take, for example, an accounting firm that only has a few skilled members and many entry-level members. It’s quite possible that the team’s skill mix won’t correlate to what’s required by the clientele. A junior member who’s just cutting his teeth may be assigned to a top tier client outside of his skill range, and provide shoddy service.

A successful team clearly defines the skill levels required for the work at hand, then looks for suitable matches to create the team.

2. Work Performed in Silos

Sometimes roles and duties are so clearly defined that one team member can perform one task, then pass the work right onto the next team member. However, if the first person immediaely closes the books and moves onto other things, it opens the door to failure.

Take, for example, a restaurant where the cook prepares a meal, and the server delivers it to a patron. It’s quite possible that the patron may have changed his or her mind, or made a mistake in placing the order. Both the cook and the server need to be in constant communication with one another in order to correct this and provide satisfactory service.

As stated earlier, one fundamental characteristic of a team is that the members are dependent on each other.

It’s easy for this silo work pattern to occur in remote teams. One way to solve it is with solid communication systems.

3. Spiderweb Communication Networks

Oftentimes in a complicated team design, one person has to go through several channels just to speak to someone on another team. This forces things to proceed at a pace that’s slower than molasses in January. It may even mean that the effort to communicate does not take place at all. Yet fluid communication is imperative to a project’s success.

As discussed, Conway’s Law can’t be fought, rather it needs to be dealt with. The solution to a complex team design is to simplify structures as much as possible.

4. Teams Without Autonomy

Building strong rapport is central to a cooperative and productive team. And according to forensic psychologists Laurence and Emily Alison, authors of Rapport: the Four Ways to Read People, autonomy is a key to achieving this.

A top-down, command and control structure stifles teams. When team members are told what they can and cannot do with rigid specificity, it may well lead to high incidences of social loafing.

Granting a team the license to determine when it holds meetings and who receives which responsibilities means it’s more likely to go at things with a gusto.

In pretty much any scenario, a team that reflects any of these characteristics sets itself up for failure. Now let’s look into some options for team structures that really work.

Image represents Successful Team Structures

Five Successful Team Structures

There’s no one right way to design a team. A right structure varies depending on the industry and the objectives of the organization. And each organization can succeed under a variety of structures. One component, however, to any successful design is flexibility. As Melvin Conway says,

“Because the design which occurs first is almost never the best possible, the prevailing system concept may need to change. Therefore, flexibility of organization is important to effective design.”

Before looking at possible team design structures, let’s first consider a few more principles to guide good design.

Principles to Guide Good Design

In her book A Guide to Organization Design, Naomi Stanford writes that organizing an enterprise “…needs to include the culture, group processes, leadership, measurement and stakeholder engagement if it is to result in an organization that is aligned in a way that will achieve the organization’s strategic goals.”

She specifically lays out these principles to guide good design.

  • Design for Business Reasons
    Lay out the business case for the design, and whenever possible include the anticipated growth or ROI. An organization needn’t be redesigned for innovative technology or to suit a senior executive’s preferences when these changes don’t have an underlying business reason.
  • Design a Team in Light of the Entire Organization
    An effective team structure doesn’t operate as its own fiefdom within the company. Rather, it considers the organization as a whole, carefully considering its communication networks and dependencies on other departments.
  • Design for the Future
    As much as we want to fix things for right now, it’s necessary to look ahead and incorporate anticipated changes into the design.
  • Allocate Specific Resources to Design
    As discussed, successful output hinges on good design. Conversely, a poor design may well spell failure even to highly skilled teams. And so a high-functioning organization dedicates resources, possibly even an entire team, into researching good design.
  • Design for Continual Transformation.
    More than likely, you’re never “there” with design. It’s something to continually monitor and tinker with.

Bearing these principles in mind, let’s consider various organization structures, and the benefits and downsides of each.

1. Centralized Organization

Centralized design is a structure where key decisions, plans, strategies and budgets are established by a single leadership or team. A centralized organization may have multi-disciplinary teams, where one manager oversees many disciplines. In a marketing organization, for example, both a designer and a marketer would report to the head of product design.

The Benefits

Overall costs tend to be lower in a centralized organization. Things like procurement are centralized, so there’s no paying double for the same services in various departments. Additionally, there’s a standardization across the entire organization. Each team inherits the best practices of another team, and there’s a consistent culture throughout.

Centralized organizations allow a company to innovate and grow quickly, and so it’s popular in small developing companies.

The Downsides

Centralized organization can slow processes and complicate communication systems. People from different departments who work on the same assignment cannot communicate and make decisions directly, but must instead correspond through several channels.

Example

Apple is a well-known organization that utilizes a centralized organization structure. Both historically and currently, the CEO of Apple makes decisions for the entire company. Apple benefits from this centralized organization by having a consistent culture and shared core values throughout the entire company.

An organization might adopt a centralized organization if it’s either poised for growth or needs to streamline processes and cut costs.

2. Decentralized Organization

In a decentralized organization, the same key functions of decision making, budgeting, strategizing and planning are distributed to many people across several departments. In a marketing company, a decentralized organization divides teams into distinct departments such as content, research and design.

Team members report directly to the manager within his or her discipline. Designers report to design managers, researchers to research managers, and so on.

The Benefits

This structure works well in an organization that has many different types of products or services, or that serves many different regions. It fosters innovation, as more people are empowered to make decisions, and allows for easy communication due to its small teams. It’s easier to recruit talent because there’s so much possibility for growth within the company.

The Downsides

In a decentralized organization, processes aren’t streamlined, and so costs tend to be higher. There’s a lack of cohesion, and an organization may develop a scattered or incoherent culture, and operate more like several fiefdoms rather than one large company.

Examples

Netflix is a company with a decentralized structure. In his book No Rules Rules, founder and CEO Reed Hastings explains how he’s built a culture that has eliminated most controls and empowers individuals to make decisions. This structure has allowed Netflix to expand worldwide, and create content for specific regions.

Johnson and Johnson is also notable for its decentralized structure that has allowed it to develop a wide range of bestselling products.

Image represents Structure for Anticipated Demand

3. Structure for Anticipated Demand

This structure considers the demand for a product or service, and structures the organization accordingly. For example, in a financial services company, leadership first considers the skill level required for the markets it plans to serve. A member with good interpersonal skills might handle high-level clients, while the new employees would be assigned the “C” or “D” clients. Someone who’s experienced but doesn’t have great communication skills would be a team leader.

The Benefits

This structure aligns the right skills with the correct services. It eases the hiring process, as human resources knows the precise level of skill required from recruits.

It also considers capacity right from the start. The leadership understands where and how to leverage the company when it wants to modify services, and who needs additional training.

The Downsides

In this structure, an individual may feel locked into a role. As this design determines demand in advance, it’s difficult for an individual to move up within the organization. Additionally, there’s little crossover or sharing of tasks.

Example

Financial services organizations such as Fidelity structure its organization to meet anticipated demand. It’s also utilized in food service organizations looking to serve a specific clientele.

4. Stream Aligned Teams

These next two team structures are taken from Matthew Skelton’s book, Team Topologies.

This first is the stream aligned team. This is a small autonomous team where members independently plan, build, refine, adjust and deliver a product. As the name suggests, the steam aligned team is designed for flow. It provides continuous delivery, and pivots and adjusts based on team and client feedback.

The Benefits

A stream aligned team demonstrates a huge capacity for growth and development. When the same members have worked together for a while, both the roles and collaborative systems are tweaked for maximum potential.

The Downsides

The autonomous nature of these teams means it may operate in isolation, separate from the rest of the organization. It’s resistant to interference from upper management. As it prefers to generate its own schedule, it’s difficult for a stream aligned team to meet externally imposed deadlines.

Example

This is the quintessential agile team. Many software teams designing websites and new applications utilize the stream aligned structure.

5. Enabling Teams

An enabling team isn’t driven by a client or a product design. Rather, it’s expressly dedicated to research, experimentation and innovation.

The Benefits

Enabling teams allow for innovation and growth. It looks at the current processes within the organization and seeks to improve them. It also considers the future trends and needs of the market, and brainstorms products and aligns services to meet them.

The Downsides

Although an enabling team can lead to huge business growth, it uses resources without immediately adding business value. It’s only viable within an organization with plenty of extra time, money, and labor.

Example

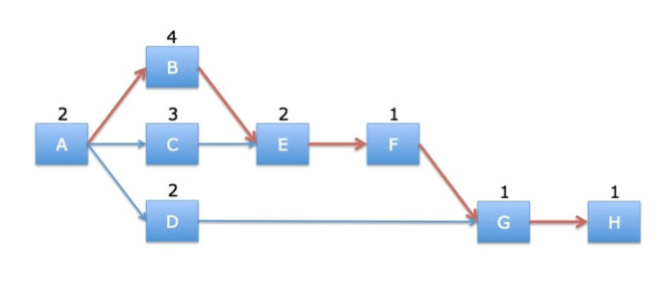
Internal think tanks represent enabling teams. For example, an enabling team within the company DuPont developed what’s come to be known as the critical path method in the 1950s, a concept widely adopted by project managers today.

This list is by no means exhaustive, but it provides some basic guidelines around how to structure a team.

Conway’s two cents are once again worth considering here as a guideline for any structure: “Each individual must have at most one superior and at most approximately seven subordinates.” Another key consideration is the interaction patterns within the team.

Image represents Interaction Modes of a Team

Four Interaction Modes of a Team

In order to determine the right team structure, it’s necessary to consider how the team members interact. Most teams don’t function like the quintessential stream-aligned team, where roles oftentimes overlap and team members can swarm around one task. Here are a few possible interaction modes offered by Matthew Skelton and agile coach Cara Leon.

1. Collaboration

This is the interaction mode where everyone on the team possesses a similar set of skills, and can swarm around a work item and push it through the workflow.

2. Facilitating

In this collaboration mode, one unit of the team enables the next. It’s demonstrated in a manufacturing assembly line, where one person completes his or her portion of a project before passing it on. As previously discussed, these team members do not work in silos, but communicate with each other in order to bring the project to completion.

3. Service

In this mode, a team reaches outside itself for a tool or a service. For example, a team may hire a virtual assistant to assist with administrative tasks. Or an IT department may use the servers of another organization.

4. Consult Not to Own

In this collaboration structure, one team supports another in an effort that will ultimately be the possession of the other team.

And this summarizes some common communication modes for a team. As stated before, determining the right solution means stepping away from the “what” of the project or process and looking at it in broad overview.

Now let’s look at some tools and tips to help facilitate an effective team.

Image represents High-Functioning Team

Tips and Tools for Building a High-Functioning Team

Building a team is as much about the structure of an organization as it is about skills and leadership. Here are some tools and strategies to facilitate a high-functioning team.

Manage Capacity

Capacity may seem like it has nothing to do with an effective team, while in fact, it’s an essential component to one.

Capacity management is a data driven discipline that collects and analyzes data, then creates procedures and systems based on this analysis. The objective of capacity management is to identify where to improve an organization and how to change current processes to increase value and output.

It means, for example, understanding how many additional clients a service organization can take on for each employee it hires. Within the food service industry, capacity management considers things like how many meals a restaurant can serve during lunch hour, given its current space and staff.

Capacity management makes it clear when and where people need to be hired, and helps to get the resource mix right. It builds self-sustaining systems that enable growth.

Use Time Sheets

Although many employees still fill out timesheets, more and more this procedure is falling away.

Time sheets create a self-managed system. When people fill out their own time sheets, it gives them a clear understanding of how they’ve spent their time in a given day. Essentially, it’s a process that allows them to manage themselves. A team runs without constant oversight from a leader, and becomes system dependent.

Increase Employee Engagement

“Every important business outcome lies downstream from the experience and engagement of the people who make the organization go….Success begins and ends with human beings.” Tracy Maylett, EdD and Matthew Wride, JD write in their book, The Employee Experience.

Employee engagement lies at the heart of an effective team. More and more, increasing this engagement means treating employees like stakeholders in the business. People are no longer willing to work for a paycheck or take orders from their boss.

An employee who feels like he is a part of things brings his full self to his role within the team. He’s more likely to stick around for the long-term.

Building employee engagement isn’t a “one and done” process. An organization is never there, really. Rather, it achieves this objective in degrees.
The first step is to look at underlying assumptions around employees. Are they treated like autonomous adults or like “things” the company has acquired?

This gets down to altering the language used around the workplace. Phrases such as “personal time” and “vacation time” imply that an employer gives employees license on how he or she uses her time.

And the second step is about tactics. Pay and benefits, workspace and well-being all play into improving an employee’s experience and increasing his or her engagement.

Use a Pull (Not Push) System

A pull system is demonstrated by the kanban workflow which sets work-in-process limits.

This system prevents the cognitive overload created by multitasking and conflicting priorities. In a pull system, teams work together to complete tasks in order to move into the next work item. It reduces procrastination and increases efficiency.

Just as in carpentry, when a team leader uses the right tools, it’s so much easier to solidly nail, bolt or fasten a team together for success.

Image represents Company Culture

Culture: The Essential Ingredient to Every Team

The functionality of an organization and its culture are closely correlated. A company’s culture makes the difference between a collaborative, innovative team that consistently wows clients, and a bickering team full of infighting that produces mediocre results.

A culture is built and cultivated. It can be deliberately molded. As Lazlo Bock, former executive at Google writes in his book, Work Rules!, “It is within anyone’s grasp to be the founder and culture-creator of their own team, whether you are the first employee or joining a company that has existed for decades.”

The components of work culture include things like purpose, opportunity, appreciation, success, well-being and leadership. Culture is impacted by the systems within an organization that foster work-life balance, as well as its practices to acknowledge and appreciate each employee’s hard work and contributions.

An empowering culture unleashes potential. It gets the best out of each team member. Let’s go over some characteristics of good culture, and explain how to build it within an organization.

Build Psychological Safety

This means creating an open environment where people share opinions and aren’t afraid to take risks. As CEO Reed Hastings reports in No Rules Rules, Netflix goes so far as to censure employees who don’t engage.

“At Netflix, it is tantamount to being disloyal to the company if you fail to speak up when you disagree with a colleague or have feedback that could be helpful. After all, you could help the business—but you are choosing not to.”

As people aren’t afraid to admit to errors, a safe environment catches and fixes mistakes before they become huge problems. It allows a team to seize opportunities, as people are willing to go out on a limb and risk failure.

This openness is created first of all by a leader who shows vulnerability. When a leader admits to mistakes, it creates a space where others can as well.

Show Appreciation

They say that people don’t quit jobs, they quit managers.

But psychologists Gary Chapman & Paul White, authors of The 5 Languages of Appreciation in the Workplace, find that appreciation is so fundamental that employees will quit a job based on this factor alone. Even in a position where the pay and benefits are great, an employee will move onto other pastures if she doesn’t feel appreciated.

Showing appreciation isn’t so simple as saying thank you. It can mean spending time with employees, getting to know them as individuals, providing bonuses and incentives and acknowledging individual contributions to successful projects and endeavors.

Communicate Transparently

Without vigilance, it’s easy for a workplace to devolve into an environment where key information is shared via gossip channels or in games of telephone where the message becomes garbled and misunderstood.

A transparent organization makes a practice of providing regular, dependable communication. In a remote team, this means selecting effective tools and ensuring that everyone checks in and utilizes the tools regularly.

This simple communication structure impacts the team’s collaborative efforts, and ultimately its output.

Keep the Eye on the Ball, Not on Individuals

The team goal is to achieve its objective. Staying focused on this prevents the development of a blame culture where individuals are singled out for mistakes, and which ultimately results in a mistrustful and unmotivated team. Rather it keeps everyone energized on the goal.

These guidelines help to create a friendly, open culture, where people want to speak to each other and engage.

Image represents the Ideal Team Member

The Ideal Team Member

We’ve all worked with the downer, the slacker, the jerk, the person who hides within a team and works at 30% capacity. And unfortunately, even the best team structure cannot remedy the negative impact this has on a team.

According to Patrick Lencioni, author of the Ideal Team Player, every team member needs to be hungry, humble and smart.

“During the past twenty years of working with leaders and their teams, I’ve seen time and again that when a team member lacks one or more of these three virtues, the process of building a cohesive team is much more difficult than it should be, and in some cases, impossible.”

In order to build a team with these characteristics, it’s necessary to understand just what they mean.

  • Hungry: This doesn’t mean someone with a penchant for snacks. Rather, it means he or she is self motivated, and driven to learn, grow and succeed.
  • Humble: Even the most skilled team member appreciates that everyone has something to contribute. Listening to other perspectives is key to creating synergy.
  • Smart: This isn’t intelligence, skill, or book smarts. Rather, the “smartness” Lencioni refers to is emotional intelligence. It’s someone who “gets” different kinds of people and collaborates well with others.

When a team is composed of people with these qualities, and it has a good design to boot, it can do nothing but succeed.

Conclusion

Unfortunately, there isn’t a step-by-step guide to building an effective team. Nor is there one right team structure. The right design structure depends on the team’s objective, its resources, and its collaboration modes.

Team structure determines the team’s output. And so every organization puts just as much time into its design as it does into production.

A team structure may be centralized, decentralized, or fall somewhere in between. One guiding principle for any design is to create a communication system that’s as simple as possible. Another is flexibility. This way, it’s possible to both plan a structure then monitor and tweak it later.

If you’re building a remote team, consider signing up for Teamly. Our sophisticated project management platform is just the tool you need to establish the simple communication channels necessary to foster a productive team.

Take the Guesswork Out of Project Planning with Parametric Estimating

parametric estimating in project management

Are you looking for a reliable and accurate way to estimate the cost, schedule, or other project variables before they begin? Parametric estimating can be extremely useful.

It uses statistical data and analysis to accurately predict what will happen and help find opportunities and risks. It’s like having a project management crystal ball.

And best of all, it usually works in sync with other estimation techniques like expert judgment or analogous estimating. So, if you want a better understanding of how parametric estimating works, then you came to the right place.

Image represents Parametric Estimating

What is Parametric Estimating?

Parametric estimating is a way to determine how much a project will cost, how long it will take, and other details using mathematical models and statistical methods.

It uses known connections between variables to make an estimate based on past data. The key is that it uses historical-existing data to make projections.

This method uses statistical analysis to predict the cost or duration of a project based on a correlation between a parameter and a value, like a cost or time.

It’s commonly used in project management frameworks like the PMI’s PMBOK and is a go-to for many industries like construction, consulting, and IT.

To use parametric estimating, you’ll need some data to work with. This could be from previous projects, market data, or benchmarking statistics.

Depending on the size and complexity of your project, there are different ways to use parametric estimating. For example, suppose you’re overseeing larger projects. In that case, it requires more detailed statistical models and regression analysis, while smaller projects can get by with simple functions or the “rule of three.”

Here’s a Simple Example

For example, let’s say you want to predict the cost of materials for a construction project. You can use the following formula to create an estimate: Cost Estimate = A + B (Material Quantity) + C (Labor Hours), where A and C are fixed variables representing overhead and labor costs per hour, respectively. B is a variable that represents the cost of materials necessary for the job. With this formula, we can plug in data from similar projects and get an estimate for our current project.

Parametric estimates can tell us how much a project will cost, how long it will take, and how many resources it will need. By collecting data from previous projects with similar scope or complexity, you can build models that accurately predict how many resources you will need at each stage of our project.

This helps us plan better and avoid mistakes that cost a lot of money because we needed to hire more people or get the resources we needed too late in the project’s timeline.

One thing to remember is that parametric estimating relies on the assumption that there is a correlation between the parameters and the values you’re working with. So, you need good data and expert judgment to make sure your estimates are correct and useful for your project.

Image represents Use-Cases in Project Management

Use-Cases in Project Management

Parametric estimating is used in numerous ways in project management. Here are some examples of how this technique is applied:

  • Forecasting budget – by gathering data from similar projects, we can form an estimate of how much money this particular one will cost us.
  • Predicting duration – by analyzing data from past projects with similar scope or complexity, we can establish relationships between variables such as staffing and time needed.
  • Determining material costs – understanding the price of materials relative to quantities used allows us to better understand how much money needs to be budgeted for supplies.
  • Calculating resources required – by understanding what types of people are needed at various stages of the process, we can make sure that each task has enough personnel assigned to it.
  • Generating progress reports – collecting data throughout the course of different projects allows us to generate accurate progress reports that give us insight into where we are currently compared with our original goals.
  • Building financial models– using established relationships between variables such as labor hours and overhead costs gives us insight into our current expenses and what they could potentially be later down the line if circumstances change.

Image represents Parametric Estimating Advantages

Advantages of Parametric Estimating

Parametric estimating has several advantages over other estimation techniques. Here’s a quick list:

  • Increased Accuracy Compared to Other Methods
  • Ability to Update Estimates Easily
  • Ease of Use and Quick Turnaround Time
  • Reduced Bias and Errors in Judgment

Increased Accuracy Compared to Other Methods

One of its most significant advantages is its increased accuracy compared to other methods. In addition, because parametric estimates take into account numerous variables that may affect a project’s outcome—such as scope, complexity, resource availability, geography, and technology level—they can provide more reliable estimates than those generated using expert judgment or analogous estimation.

Ability to Update Estimates Easily

Additionally, because parametric estimates are based on data-driven models rather than subjective opinions or guesswork, they can be easily updated if conditions on the ground change during the project. This is an important thing for project managers to think about because it lets them change the estimate as needed and keep the project moving forward.

Ease of Use and Quick Turnaround Time

Another advantage of parametric estimating is its ease of use and quick turnaround time. Unlike other estimation techniques, which require extensive research or expert opinion collection from multiple sources, parametric estimates can be quickly generated with minimal effort by simply inputting data into a model. This makes it an ideal choice for project managers who need quick answers but don’t have the time or resources to conduct extensive research on their own.

Reduced Bias and Errors in Judgment

Finally, because parametric estimates are based on data-driven models rather than subjective opinions or guesswork, they are less prone to bias or errors in judgment, which can lead to inaccurate predictions about project outcomes. This reduces the risk of unexpected costs or delays and helps to ensure that the project stays on track.

Image represents The Downside Side of Parametric Estimating

The Downside Side of Parametric Estimating

Parametric estimating is a powerful tool for project managers to estimate the cost and duration of projects. But, as with any tool, there are pros and cons. In this section, we’ll take a deep dive into the disadvantages of parametric estimating.

Reliability Issues

The accuracy of parametric estimates depends heavily on the quality of the data used in the analysis. Any errors or omissions in this data will affect the reliability of the results given by your software. This means you must have accurate, comprehensive data from past projects or project components to get a precise assessment. If you lack reliable data, you may be unable to use parametric estimates.

Scope Limitations

Parametric estimating also has some limitations when it comes to its scope. It only works for projects that are about the same size and level of difficulty as ones that have already been done. This means that you might not be able to use parametric estimation if you are working on a very unique project or one with many parts that have never been done before because there isn’t enough data from similar projects or parts.

Data-Dependency

Finally, since parametric estimation relies so heavily on past data points to create models, it can be difficult for new organizations or companies lacking historical data to get an accurate estimate from their software programs. In these situations, traditional methods might have to be used until enough historical data is collected to make more accurate models with parametric estimation software.

While these drawbacks can limit its effectiveness in some situations, it remains an effective tool when used correctly and when sufficient quality control measures are considered during the estimation process.

Comparing other estimating techniques

Comparing other estimating techniques

When estimating the resources and time needed for a project, there are a few different techniques to choose from.

Analogous Estimation

One technique that’s similar to parametric estimating is “analogous estimation.” Like parametric estimating, “analogous estimation” relies on data from past projects to predict the outcomes of the current project.

However, it doesn’t use statistical analysis to establish relationships between variables and make projections. Instead, it relies on expert judgment to compare the current project to a similar project that has already been completed.

Three-point estimation

Another option is “three-point estimation,” which involves generating three different estimates for a project: a best-case scenario, a most likely scenario, and a worst-case scenario. These estimates are then combined to create a more accurate overall assessment of the project.

The benefit of “three-point estimation” is that it takes into account the possibility of uncertainty and helps figure out what risks and opportunities might be there.

However, it can be time-consuming to generate the three separate estimates. Also, they may not be as accurate as parametric estimates if the data used to make the estimates is unreliable.

Expert judgment

“Expert judgment” is another technique that can be used to estimate the resources and time needed for a project. This involves relying on the expertise and experience of subject matter experts to make predictions about the project.

“Expert judgment” can be useful in situations where data is limited or there are unique or complex aspects of the project that can’t be easily quantified. But it can be subjective and may not be as accurate as methods like parametric estimating that are based on data.

So, which technique is best for your project? It really depends on the specifics of your project and the resources you have available. For example, parametric estimating is often a good choice because of its increased accuracy and ease of use, but it may only be practical if you have key data to work with.

On the other hand, analogous estimation and expert judgment can be helpful when there isn’t enough data, but they may not be as reliable. Ultimately, the best technique will depend on your project’s specific needs and constraints.

Image represents When to Use Parametric Estimating

When to Use Parametric Estimating

If you’ve been following along, you know that parametric estimating can be incredibly helpful for project managers. But how do you know if it’s the right choice for your project?

First, it’s essential to consider the size and complexity of your project. Parametric estimating is most effective when you have enough historical data to create accurate models that can be used to make reliable predictions.

If your project is small or straightforward, parametric estimating may not be necessary. But if it’s large or complex, then parametric estimating can be a great way to get an accurate read on the resources and time needed.

Second, it’s important to consider the accuracy requirements for your project. If you need precise estimates to make reliable decisions, then parametric estimating can be a great choice.

On the other hand, if you’re looking for a more general estimate, then it may be better to use analogous estimation or expert judgment.

Finally, consider the resources and expertise available to you. Parametric estimating can be complex and time-consuming, so you must have access to enough data and knowledgeable experts to make it work.

If you need more resources or expertise, then another estimation technique may be a better choice.

Conclusion

Parametric estimating is a potent tool for efficient and effective project management.

It requires sufficient amounts of data from similar projects or components within a single larger-scale project to produce valuable results, but when done correctly, it provides invaluable insight into budgeting, forecasting durations, calculating material costs, determining resource requirements, generating progress reports, and building financial models for future planning purposes.

In the end, the best way to estimate your project will depend on its size and complexity, the level of accuracy you need, and the resources you have at your disposal.

Risk Response Strategies: Your Project Manager’s Guide to Navigating Uncertainty

Image represents Risk Response Strategies

No project is without risk, but some projects are riskier than others. As a project manager, you need to be able to find risks, evaluate them, and come up with plans for how to deal with them.

This can be a daunting task, but never fear. This guide will help you navigate the world of risk response strategies and make your projects a success. So strap on your helmet and get ready to dive into the exciting world of risk management.

Image represents Risk Response

What exactly is risk response, and why is it critical for project managers?

Risk response is a project manager’s toolbox for managing the future of their project. It helps managers figure out what problems might come up and gives them a chance to get ready for them.

A good risk response moves the project forward with confidence. It’s like how good planning gives rocket fuel to the project’s goal, making it easier to get past weaknesses and meet deadlines.

Being able to respond quickly and appropriately to risks throughout the project life cycle is what helps successful project managers stay ahead of the ever-changing game of development. In the end, risk response helps managers get ready for any storm that might come their way, making sure their projects are in safe harbor.

Discuss the different types of risk response strategies for negative risks.

Image represents Risk Response Strategies to Combat Negative Risks

5 Risk Response Strategies to Combat Negative Risks

Without a plan for managing risks, projects can be derailed quickly by unexpected problems or bad risks. So, what strategies can you use to combat negative risks? Let’s take a look at the five options that are available to project managers.

1). Avoid – Risk Response Strategy

The first strategy for addressing negative risks is to avoid them altogether. In other words, if there is an identified risk that could cause significant damage or harm to the project, it might be best for the project manager to simply not pursue it.

This method does require some foresight on the part of the project manager, but it can be a very effective way to avoid mistakes or delays that cost a lot of money.

2). Mitigate – Risk Response Strategy

The second strategy for responding to negative risks is mitigation. This means taking steps ahead of time to lessen the effects of a risk and make it less likely to happen.

Some examples of mitigation strategies are making backup plans, setting up early warning systems, and staying away from high-risk areas or activities.

3). Transfer – Risk Response Strategy

The third strategy for dealing with negative risks is transfer.

This means putting some or all of the responsibility and possible costs of a certain risk on someone else (for example, through insurance). This usually works best when the project manager has no control over something outside of the project, like the weather.

4). Escalate – Risk Response Strategy

The fourth strategy for responding to negative risks is escalation. This means going up the chain of command to get help with a problem or to solve it quickly in a way that causes the least amount of damage or cost to your organization or project team.

Escalation should only be used as a last resort when all other options have been tried and failed. If done too often or without careful thought, it could cause tension within the organization.

5). Accept – Risk Response Strategy

The fifth and final strategy for addressing negative risks is acceptance. This involves simply accepting that a certain risk exists and choosing not to do anything about it (i.e., letting nature take its course).

It’s important to note that this option should only be used if all other options have been exhausted and there truly is nothing else that can be done about the risk in question (e.g., due to financial constraints).

Each strategy has its own pros and cons, but the best way to figure out which one to use in a given situation is to learn from past mistakes and use good judgment. This will help you have the most success while minimizing the damage and cost of any problems that come up along the way.

Experienced project managers know just how valuable this knowledge can be; now you do too!

Image represents Risk Response Strategies for Positive Risks

5 Risk Response Strategies For Positive Risks

You’ve just read about how to respond to negative risks. But what about the other side of the coin? How do you handle positive risks? After all, not all risks are bad. Some can be great opportunities for your project or business. In this post, we’ll explore the five risk response strategies for positive risks and discuss why it’s important to have a plan in place for them.

What Exactly Are Positive Risks?

Positive risks are those that present potential opportunities for your business or project. They could be anything from a sudden influx of resources or money to an unexpected gain in market share. These types of risks can have huge impacts on your company if handled correctly, but they can also lead to disaster if poorly managed.

1) Enhance – Risk Response Strategy

When you “enhance” a risk, you work to increase its potential benefit. This means taking steps, like adding more resources or working harder at marketing, to get the most money out of an opportunity.

2) Exploit – Risk Response Strategy

The goal of “exploiting” a risk is simply to take full advantage of it, no more, no less. You don’t want to overcommit yourself by investing too much in something that may not pay off, but you also don’t want to leave money on the table by failing to capitalize on every opportunity that comes your way.

3) Escalate – Risk Response Strategy

An “escalated” risk response strategy means that you’re looking at ways to accelerate the process and take advantage of short-term opportunities as quickly as possible. This could mean hiring more people from outside the company, speeding up production, or putting more money into research and development.

4) Accept – Risk Response Strategy

The simplest way to deal with a risk is to do nothing and just accept it. This could mean that you’re comfortable with the current level of success associated with a given opportunity, or it could be because there isn’t much else that can be done in terms of maximizing its potential benefit (at least not immediately).

5) Share – Risk Response Strategy

Finally, some positive risks may be large enough that a large number of people must collaborate to get the most out of them (or the least amount of costs). In these cases, it’s often beneficial for everyone involved if one stakeholder takes on responsibility for managing and sharing out any profits (or losses).

Image represents Risk Response Plan

A few tips on how to create a risk response plan

Creating a risk response plan is like piecing together a complex jigsaw puzzle. To maximize their success, you need to carefully look at the risks, come up with clear strategies, and use creative methods.

  • To get started, craft a master list of the possible risks to minimize further time and energy waste.
  • Then, figure out how likely it is that they will happen and how likely it is that they will happen in extreme conditions.
  • Next, brainstorm potential solutions to each risk, as well as appropriate countermeasures that prevent greater damage in the case of any threat.
  • Lastly, give clear roles to everyone involved so that everyone knows what their responsibilities are.

Your risk response plan should be a good way to protect against both known and unknown risks. It should be a strategy masterpiece that will stand the test of time.

Image represents Risk Response Strategies Examples

Examples of Risk Response Strategies in Action

So, we’ve discussed the different types of risk response strategies for both negative and positive risks. But what does that look like in action? Now, we’re going to dive into five real-world examples of effective risk response strategies in action.

Example 1: Avoiding Risk with a Backup Plan

It’s always a good idea to have a backup plan when you’re faced with an uncertain situation. You might want to stay out of a dangerous situation altogether by making plans and having backups ready. Consider this example: Your business relies on its website as an online storefront, so your IT team has set up redundant servers with multiple backups stored offsite. In the event of power outages or other disasters, those backups can be quickly implemented to keep the website up and running. That’s avoiding risk in action.

Example 2: Mitigating Risk with Insurance Policies

When it comes to mitigating risk, insurance policies are one of your best tools. For example, suppose you own a business that works with hazardous materials and machinery. In that case, it’s important to have liability insurance coverage in place for potential accidents or injuries that could occur on your property. That way, if you ever need it, you have protection from potential lawsuits or fines related to safety issues. That’s mitigating risk in action.

Example 3: Transferring Risk With Contracts

Contracts are also great tools for transferring risk from one party to another. Consider this example: Your company is working on a new software project for a client who is outside of your country. You can protect yourself from any potential legal issues by writing contracts that clearly state which party is responsible for any losses or damages incurred during the project. That’s transferring risk in action!

Example 4: Exploiting Opportunities with Investment Opportunities

Exploiting positive risks can be done through strategic investments and partnerships. Consider this example: Your company has identified an opportunity to invest in a new technology that could revolutionize its industry—but there are some significant financial risks associated with it. You decide to collaborate with another company that specializes in managing such investments, and the two companies split the costs and profits if the investment is successful—that’s opportunity in action.

Example 5: Escalating Risks by Seeking Expert Advice

Escalating risks can often mean seeking expert advice from professionals who understand the nuances of certain situations better than you do, such as lawyers or accountants who specialize in tax law or corporate finance matters, respectively.

Escalating risks can help make sure no stone remains unturned when it comes to addressing potential problems before they arise or become too big of an issue—that’s escalating risks in action!

Image represents risk response plan adjustment

How to adjust your risk response plan for maximum success

As we’ve discussed, risk response planning is a critical part of any project. It’s the process of identifying, assessing, and responding to risks that could potentially derail your project’s progress and timeline.

And while it’s important to create an initial risk response plan at the beginning of a project, it’s just as important to adjust your risk response plan as the project progresses. So when should you adjust your risk response plan? Let’s take a look.

Monitoring Changes in Risk Levels

The first thing you should do is start monitoring changes in risk levels. As unpredictable events happen or new information comes to light, be sure to update your risk assessment accordingly. This will help you stay on top of any potential risks that can arise during a project. It also gives you the insight needed to anticipate potential risks before they occur, giving you more time to devise strategies and solutions if and when they do surface.

Recognize New Risks as They Emerge

In addition to monitoring changes in risk levels, be sure to acknowledge new risks as they arise throughout the course of a project. When faced with something unexpected or unknown, don’t assume it won’t affect your plans—instead, document it and create strategies for mitigating the effects it could have on your project’s timeline or outcome. By doing this proactively rather than waiting until issues arise, you’ll be better prepared for whatever comes your way!

Adjustments Based on Project Progress and Results

Finally, make adjustments based on how well (or poorly) the project is progressing and what results have been achieved so far. If all goes according to plan, then there may not be much need for making adjustments—but if things veer off course unexpectedly or go differently than expected, then you’ll need to revisit your risk assessment and come up with fresh strategies for managing any potential risks that might affect the outcome of the project. Doing this will help ensure that everything gets back on track quickly and efficiently!

Conclusion

Risk response planning is an essential part of any project. And by learning and understanding the many types of risk management strategies—as well as how to adapt your risk response strategy to maximize success—you’ll be better prepared to deal with anything that comes your way during the course of a project.

So, take some time today to learn about the different ways to plan for risk response and get ready for any possible dangers that could happen.

Project Governance: A Framework for Success

Image represents Project Governance in Project Management

It’s not uncommon for a project sponsor to hand over the reins to a project manager and become occupied in other matters, then only chime in at the end when presented with a bill.

Yet, it’s nearly impossible for a project manager to deliver value when crucial people like the stakeholders and sponsors aren’t interested in giving feedback on a project.

Weak communication and supervision, overlooked risks and a failure to perform a risk benefit analysis are some central reasons projects fail to deliver their intended value.

Establishing project governance makes all these problems go away. A governance provides the structure and framework necessary to steer a project in a direction that generates business value and serves the bottom line. It provides a system of checks and balances that properly monitors a project through execution all the way to completion.

If you’re interested in staging a project for success, then project governance is your solution. Let’s look at the meaning and definition of project governance, and some examples and best practices for using it within your projects.

Image represents Project Governance

Project Governance Defined

Project governance provides an overall framework for a project. It’s a central component of end-to-end project management, and is utilized during the initiation, planning and execution stages of a project.

The PM Glossary defines project governance as: “The structure by which roles and relationships between project team members and an organization’s high-level decision makers are defined.”

Project governance, essentially, oversees a project and advocates for the project’s business strategy. The governance board represents many facets of a project in order to ensure that a project doesn’t wander off, but rather progresses in a direction that aligns with the company’s vision and business objectives.

A project governance is established during the initiation stage. Its components oftentimes are determined by previously established systems, or through correspondence between the project sponsor and the project manager. The project governance has a clear understanding of the business justifications for a project. It promotes this business strategy through three central functions.

1. Sets strategic direction for a project.

The project governance establishes a project’s strategy and focus during the planning stage, and monitors it during the project’s execution.

2. Makes decisions during the project.

The governance evaluates a project as it progresses. Team members report and escalate issues to the project governance, who then determine necessary changes to the scope, the deliverables or the overall outcome.

3. Oversees project execution.

Finally, a governance monitors a project at various stages during the execution, to ensure it reaches certain milestones and produces deliverables according to plan.

In summary, governance is like a board of advisers. It’s deliberate, organized oversight, and creates a structure that enables a project’s success.

Image represents Project Governance Framework

Example of a Project Governance Framework

A project governance doesn’t have a fixed or definite structure. The right governance varies depending on the project. A governance with too much control stifles productivity and innovation, while a governance with too little supervision leads to an unfocused and mediocre deliverable. Generally, however, every project governance consists of three central components, with distinct roles and responsibilities for each.

1. A Project Sponsor

A project sponsor is the person who has invested in the project. As all the key decisions rest on his or her shoulders, the project manager works closely with the sponsor and meets regularly for consultation and guidance. In a small project, the governance may only consist of the sponsor who meets with the project manager once a month.

2. A Steering Group

The steering group, or project board, is a group of stakeholders who oversee and monitor a project. They work with and under the sponsor to closely monitor risks and provide expert feedback.

Generally, a steering group is composed of subject matter experts who understand the best practices for a project. They initiate a project, plan it, approve the scope document and monitor a project throughout. The steering group is consulted regarding any changes to a project’s scope, timeline or budget.

Although a project’s governance varies depending on the nature and size of a project, the steering group generally consists of fewer than ten members.

3. Project Manager

The project manager doesn’t contribute so much to the vision of the project as he or she facilitates the objectives of the sponsor and the steering group. A project manager closely monitors a project during its execution, looking closely at expenses versus value, facilitates all communication between stakeholders and oversees changes and course corrections.

These three components make up a governance board for most projects. Some criteria for determining who to include within the governance include the project’s risks, the timeline and the scope.

With respect to agile projects, governance presents a bit of a conundrum. Agile projects tend toward autonomous teams who have strong project ownership. This doesn’t translate into no framework structure, however. Agile projects still retain project governance, but the framework becomes more malleable as the agile team matures.

Image represents Project Governance Setup

7 Steps to Set up a Project Governance

The purpose of project governance is to maintain transparency and accountability, and make sure the project is aligned with the business strategy. These seven steps ensure that a project governance is properly established to achieve these ends.

1. Identify Sponsor and Stakeholders

This first step may sound like a no-brainer, but it can be challenging sometimes to identify the sponsor and all the stakeholders.

A sponsor, generally, is the person who’s initiated and invested in the project and who wants to see it to completion. The sponsor is the main customer, a key decision maker and the number one person for the project manager to communicate with during a project. Although it seems straightforward, it’s not always totally clear who’s sponsoring a project. It’s necessary to clarify this however, as identifying the sponsor provides the project with a focal point for decision making.

A stakeholder is anyone who’s impacted by the project and its outcome. This includes a variety of people, including business owners, sponsors, government regulators and suppliers. It takes some brainstorming to identify all the project’s stakeholders. As this is another group who contributes to the project plan and execution, the stakeholders need to be clarified at the get-go.

2. Establish a Steering Committee

A steering committee, sometimes referred to as a project board, is a group of people who represent the project stakeholders. Generally it’s composed of around five senior individuals in the organization, including the project’s sponsor, the customer, a supply representative and other users impacted by the project.

The purpose of the steering committee is to provide insight, make decisions and support the project to make sure it proceeds smoothly.

The project manager isn’t part of this board, but he supervises it and disseminates information to the group. For example, the project manager may provide project updates with a slide deck at monthly meetings with the steering committee.

3. Create Documentation

The planning stage is probably the most critical to determining a project’s success. If completed thoroughly, it lays a strong foundation and forces the steering committee to think everything through and identify possible risks and issues. Here are some fundamental components of a healthy planning stage:

  • A written document that lays out the sponsor and the members of the board.
  • A project proposal or plan document that identifies the “what” of the project and the “why.” The “what” of a project is also known as the project’s definition.
  • A project’s “why” is its business case, which explains the business justification for the project. Generally, the business rationale for projects are things like improving operational efficiencies, developing a new product or adhering to compliance regulations.
  • The project plan. This is the “how” of the project, and it spells out things like materials, scope, budget and timeline.
  • The “what if” of the project. This is the project’s risk management plan, and it carefully considers threats to any of the project’s assets, and puts plans in place to mitigate, avoid or transfer the threats.
  • A project handover and completion plan. These explain how to resume the project in the instance of a handover, and the criteria for completing the project.

4. Initiate a Boundary-Gate Process

This system evaluates a project at several stages. At the beginning of a project, the project manager divides the life cycle of the project into stages, with go or no-go demarcations at each. When the project reaches a boundary-gate, the steering committee evaluates whether or not it has reached the predetermined milestone, and gives it either a green light, meaning it continues, or a red light, meaning the project ceases.

A boundary-gate (or stage-gate) process allows a project to stay on track and deliver value. This system ensures the proper channels are consulted at each stage, and that the project follows its strategic course.

5. Engage the Steering Group

Chances are, the steering group is preoccupied with many other projects and responsibilities. The duty lies on the project manager to encourage their involvement in and contribution to the project at hand. One way to engage the group is with routine weekly status update meetings that clearly communicate the stakes and the benefits of the project and allow the committee to provide feedback.

6. Engage the Sponsor

More often than not, a sponsor is perfectly happy to hand over the responsibility for the project to the project manager and then forget all about it. However, the project reflects the sponsor’s vision, and the project manager simply facilitates this vision. And so it’s imperative that the sponsor keep a keen eye on the project throughout its execution, in order to be sure it’s on track. For those times when a project manager encounters a passive or uninterested sponsor, here are some engagement strategies:

  • Communicate the benefits of a successful project.
  • Give her a sense of pride in the project.
  • Show how the project might enhance his professional reputation.
  • Identify the risks of not overseeing the project.

7. Allocate Time and Resource to Governance

And finally, appreciate that good governance takes time. Continual, ongoing communication and transparency are fundamental to healthy governance. Meetings can’t be squeezed into a fifteen minute window at the end of a busy day, or continually cancelled and rescheduled. Rather, utilize a proficient project management tool to ensure everyone communicates regularly. Set up processes and procedures for good record keeping.

These eight steps foster a robust governing board which provides a project with a strong and steady framework.

Image represents Project Governance Benefits

7 Benefits of Project Governance

The governance board melds many perspectives and establishes a vision for a project. Let’s take a look at the many ways a project benefits from this structure.

1. Aligns a Project With Business Goals

It’s so easy to focus on time consuming things that don’t really align with a company’s culture, mission, or business objectives. This mindless meandering creates stagnation and precludes growth.

A project governance, on the other hand, aligns a project around business objectives. It continually monitors and course-corrects a project, to keep it sailing toward its North Star.

2. Sets Direction and Strategy

It’s no accident that a governance board is also called a steering committee. Just as a steering wheel allows a car to veer away from a ditch, a governance board keeps a project from going off the rails.

The governing board combines its business acumen and expertise to steer the project in a direction that best utilizes the project’s resources.

3. Disseminates Information

So often, a SNAFU occurs simply because the right people didn’t receive the right information at the right time. A governing board establishes a system of continual communication, and procedures to escalate concerns to the right places. With a system of routinely sharing information, everyone keeps abreast of the project and issues are spotted right away.

4. Monitors and Realigns

A strong governing board monitors a project during the execution stage. For example, a furniture company that sets a goal to design a dining room table can easily get side-tracked by custom orders or demanding customers. However, with stakeholders continually overseeing the project’s progress, it provides the supervision needed to keep the project on track.

5. Establishes Good Processes

A project without governance may not have a clear sense of priorities, and may fall into patterns of attending to the squeakiest wheel rather than focusing on the work items that add value. A governance makes sure the project does the right things in the right way. And the combined expertise allows for all of the risks to be properly evaluated.

6. Conserves Resources

Have you ever seen a “ghost highway”? The project was suddenly abandoned during construction, and the highway heads into nowhere. Clearly, in these instances a project board realized mid-project that something wasn’t right and wasn’t afraid to call it quits.

Similarly, a governance board isn’t scared to jettison a bad project. Once it appreciates that the project doesn’t make business sense or the risks are too high, it can nip a project in the bud. This preserves valuable resources and allows an organization to dedicate itself to projects that do add value.

7. Keeps a Project Within Its Scope

Governance has a proven track record. When it’s properly established and engaged, a steering group monitors a project to keep the timeline on track, and spots scope creep before it starts.

As you can see, project governance is well worth the effort. But establishing one isn’t a piece of cake.

Image represents Challenges to Project Governance

3 Common Challenges to Project Governance

Project governances don’t just happen. At the same time that they provide a project with many benefits, it’s no cinch setting one up. Here are three common challenges to project governance, along with some tips to overcome them.

1. Identifying All the Stakeholders

Stakeholders don’t raise their hands to identify themselves during a project’s initiation stage. Although some are front and center, others lurk in remote places the project manager may not even think to look. Suppliers, for example, are crucial stakeholders that are easy to ignore completely. But forgetting to consider them could mean not receiving the necessary materials at the right time or at the right price.

It takes some brainstorming, delving, and talking to the right subject matter experts to thoroughly identify all the stakeholders. Creating a network diagram also helps to think things through and identify everyone who’s impacted by the project.

2. Selecting the Right Framework

Governance is not one-size-fits all. An overbearing governance can squelch a team’s initiative, while a weak one allows it to go off the rails. On small projects, just the sponsor is sufficient for a governing board, while larger projects may require a board of a dozen people. It takes some teasing to identify the proper governance for a particular project. It means including all the right people to provide the necessary expertise, without letting it become too large or authoritative.

Ultimately, the steering committee determines so much about a project, from the kickoff meeting to the communication tools and the processes used throughout. A project manager determines his or her optimal governance by identifying the stakeholders and clarifying what success looks like. It may take experience to establish the right meld.

3. Ongoing, Daily Communication

Much of the communication necessary for executing a project won’t occur without deliberate planning. In a remote team, a steering committee can easily go for days without contacting one another. And even in a busy office, people are concerned with many other things.

A project manager selects effective tools and a workable schedule to facilitate fluid, ongoing communication. This may include a daily scrum, weekly round-ups or steering group meetings at project boundary-gates.

As you can see, establishing a project governance isn’t so simple as deciding to have one. An effective governance requires some sweat and tears. When aware of the challenges, however, it’s easy to overcome them.

Image represents Project Governance Best Practices

Project Governance Best Practices

As discussed, governance doesn’t just happen. Rather, it’s formed and developed. Let’s look into the characteristics of a robust governance system.

1. Gate Reviews

A project doesn’t receive a green light at initiation and then proceed like a line of collapsing dominos. Healthy governance, rather, divides a project into stages, defining processes and milestones to reach at each. At each gate review, a steering committee evaluates the project according to predetermined criteria, and assesses if it’s achieved certain milestones. The business case is updated periodically to assist with the reviews. If the milestones aren’t met or if the project reveals a weak ROI, then the project ends.

2. Audit Trail

Alongside each gate review, a system for documenting the steering committee’s decisions allows everyone to understand what decisions were made, and why.

This audit trail shifts the responsibility away from the sponsor and project manager and distributes it amongst the steering committee as well. It creates an environment where everyone is accountable and responsible for the success and direction of a project.

3. Define Governance Roles

Oftentimes things fall through the cracks just because people don’t understand what they’re responsible for. Identifying the stakeholders, the sponsor and each of their respective responsibilities keeps all of the critical aspects of a project under a watchful eye. It also allows teams to understand who to escalate issues to.

4. Project Aligns with Culture, Mission, and Organization Strategy

When both the project manager and the sponsor have a thorough understanding of the organization, it’s possible to plan and steer a project to align with its mission, culture and overall business goals.

5. External Audits

In the enthusiasm of completing a project, it’s common to turn a blind eye to things like compliance and regulations. Allowing external experts to come in and oversee processes keeps everything in compliance and precludes expensive headaches and rework.

6. Transparent Culture

A culture that thrives on secrecy and power struggles, where everyone shirks responsibility and blames others, is fertile ground for stalled and failed projects.

In a transparent culture, on the other hand, responsibilities and roles are clearly understood. It’s clear where to escalate an issue, and concerns are listened to and addressed.

Open cultures start from the top. Leadership rewards the behavior they want to see, listens to concerns and admits to failures and shortcomings.

7. Full Disclosure When Planning

In the enthusiasm for developing a new product or improving procedures, it’s easy to look at a project through rose colored glasses. A grocery store that wants to automate its checkout process, for example, might rush to complete the project without carefully calculating how much time and resources the automation will save versus the costs for new equipment, maintenance and periodic updates.

Other times, stakeholders are interested in getting a project approved simply because it may lead to a promotion or a raise in pay.

Openly and honestly laying all the cards out on the table allows the steering committee to properly evaluate and make decisions. Rather than exaggerate benefits and gloss over costs, considering benefits and costs with pessimistic, likely, and optimistic values provides a full range from which to consider a project.

8. Appropriate Stakeholder Involvement

Not every stakeholder carries equal weight in a project. A supplier who provides a small portion of material, for example, has far less influence than the business owner or the product manager.

A healthy governance delineates these various levels of influence, and involves the stakeholders accordingly. A senior stakeholder, for example, may be regularly contacted by a senior member of the steering committee. Whereas a lower stakeholder with less interest isn’t included in all communications.

9. Competent Resources

Procurement and resource management are central components to a governance. A steering committee carefully looks at all of the materials, labor, equipment and facilities required to carry out a project, and develops plans to acquire the most suitable resources within the given timeline and cost.

These best practices allow a project manager to overcome the challenges of setting up a governance and to establish an effective governance to oversee a project.

Image represents Project Governance

Conclusion

As project managers know, you don’t have to take your eye off the ball for long before you’re whiffing at strikes. It’s so easy for scope to increase without adherence to proper change management processes, for resources to be squandered, and for a project to add no business value to the organization whatsoever.

Good governance sets a project up for success from the start. It eliminates a need to play catch up or rescue a flailing project. Rather, it oversees and monitors a project from initiation to closure.

A suitable governance framework depends on the project. Some may be as simple as a sponsor and a project manager, while others consist of a steering board that includes several stakeholders.

It takes diligence to set up a strong governance. But the effort is worth it. If you’re looking to boost your performance as a project manager, then project governance may very well do the trick.

Reducing Risk and Maximizing Success: How to Tackle Cost Variance in Project Management

Image represents Cost Variance in Project Management

As a project manager, you know that keeping your projects on track and on budget is crucial to their success. One of the key tools at your disposal for doing so is cost variance analysis. But what exactly is cost variance, and how can you use it to your advantage?

In this blog post, we’ll delve into the concept of cost variance in project management and how it can impact the success of a project. We’ll explore how to calculate cost variance, the relationship between cost variance and schedule variance, and tips for containing cost variance. By the end of this post, you’ll have a solid understanding of this important concept and how to use it to your advantage in your project management endeavors.

So, whether you’re a seasoned pro or a newcomer to the world of project management, this blog post has something for you. Let’s get started!

Image represents Cost Variance Definition

Defining Cost Variance

So, what exactly is cost variance? It’s simply the difference between the actual cost of a project and the budgeted or planned cost. It’s usually expressed as a percentage or a monetary value and can be either positive or negative.

A positive cost variance means that your project is under budget – yay! – while a negative cost variance means that it’s over budget. No need to panic, though – we’ll discuss how to address this later.

Importance of Cost Variance

As a project manager, tracking cost variance is crucial because it helps you see how well your project is sticking to its budget. This is especially important if you work with limited resources or have strict financial constraints.

Cost variance is often used alongside schedule variance, which measures the difference between a project’s actual and planned schedule. By keeping an eye on cost and schedule variance, you can get a complete picture of your project’s performance and make any necessary adjustments.

Calculating Cost Variance

Okay, so now that we know what cost variance is, let’s discuss how to calculate it. Don’t worry; it’s not as scary as it sounds.

All you need is the following formula: (Actual Cost – Budgeted Cost) / Budgeted Cost. Let’s break it down:

Actual Cost

This is the amount of money your project actually costs. It can be tricky to determine if your project is still ongoing, but you can use your best estimate based on the progress you’ve made so far.

Budgeted Cost

This is the amount of money you plan to spend on your project. If you’re using this formula after the fact, this should be a piece of cake – it’s just the budget you set at the beginning of your project.

Actual Cost – Budgeted Cost

This part of the formula calculates the difference between your actual and budgeted costs. If the result is positive, your project is under budget. If it’s negative, your project is over budget.

(Actual Cost – Budgeted Cost) / Budgeted Cost:

Finally, we divide the difference between your actual and budgeted costs by your budgeted cost to get the cost variance as a percentage. If your cost variance is positive, that’s a good thing – it means you have some wiggle room in your budget. If it’s negative, that means you’re over budget, and you might want to start looking for ways to bring your costs back in line.

Image represents Why Cost Variance Happens

3 Common Reasons Why Cost Variance Happens

There are a few common reasons why cost variance happens, and understanding these can help prevent them from occurring. Here are three common causes of cost variance:

Reason #1 Changes in scope:

One of the most common reasons for cost variance is changes in scope – that is, changes to the scope of work initially planned for the project.

Maybe your client changed their mind about something, or you realized that you needed to add an extra feature to your product. Either way, changes in scope can significantly impact your budget, so it’s important to keep an eye on them and be prepared to adjust your budget accordingly.

Reason #2 Unexpected changes in resource availability or cost:

Another common cause of cost variance is unexpected changes in resource availability or cost.

You may have planned to use a specific vendor for a particular service, but they suddenly increased their prices. Or you thought you had a specific resource available, but it wasn’t as open as you thought. These changes can throw a wrench in your budget, so it’s crucial to be proactive about identifying them and finding ways to address them.

Reason #3 Inadequate budgeting or planning:

Finally, cost variance can sometimes be caused by inadequate budgeting or planning.

For example, you needed to do more research to determine the actual cost of a particular resource, or you needed to account for all of the potential risks and contingencies in your budget. In these cases, reviewing your budget and planning process is important to see where you can improve.

Image represents Negative Cost Variance

How to Address Negative Cost Variance

So, what do you do if your project is over budget due to negative cost variance? First, don’t panic – you can take a few steps to address this issue and get your project back on track. Here are a few suggestions:

STEP 1 – Review the cause of the cost variance

The first step in addressing negative cost variance is to understand why it happened in the first place. Take a look at the common causes we discussed earlier in this post – changes in scope, unexpected changes in resource availability or cost, and inadequate budgeting or planning – and see if any of these factors apply to your project. This will help you identify the root cause of the cost variance and take appropriate action to address it.

STEP 2 – Communicate with your stakeholders

Once you understand the cause of the cost variance, you must communicate with your stakeholders – including your team, your client, and any other relevant parties – to let them know what’s going on.

Be transparent about the situation and explain your steps to address it. This will help build trust and ensure everyone is on the same page.

STEP 3 – Adjust your budget

Depending on the cause of the cost variance, you may need to adjust your budget to account for the additional costs.

This might involve negotiating with your client or other stakeholders to secure additional funding or finding ways to cut costs elsewhere in the project. So again, it’s essential to be creative and proactive in finding solutions to get your project back on track.

STEP 4 – Keep track of your progress

Finally, as you address the cost variance, keep track of your progress and continue monitoring your budget. This will help you see how well your efforts are working and make any necessary adjustments along the way.

Image represents Cost Variance and Schedule Variance

The Relationship Between Cost Variance and Schedule Variance

In addition to tracking cost variance, it’s vital to track schedule variance in project management. This measures the difference between the actual and planned schedules of a project.

So, what’s the relationship between cost variance and schedule variance? Well, it turns out that they’re closely related – if one goes off track, it can have an impact on the other.

For example, if you need to catch up on a project, it could lead to additional costs. On the other hand, if you’re over budget on a project, you might have to adjust your schedule to make up for the additional costs.

You can get a complete picture of your project’s performance by keeping track of both cost and schedule variance. If one of these metrics is going off track, take a closer look at the other.

7 Protips for Containing Cost Variance

Keeping projects within budget can be a challenging task, but there are measures you can take to stack the odds in your favor.

Here are 7 tips to help you contain cost variance:

  1. Do your homework: A key factor in containing cost variance is having a thorough understanding of the project’s needs. Take the time to fully grasp the project’s scope and document and confirm every requirement with all necessary parties. If the project is similar to what you’ve done in the past, take that knowledge and refine it.
  2. Plan for the unexpected: Even the most carefully planned budgets can be thrown off track by unforeseen events, such as global pandemics or fluctuations in labor costs, supply pricing, or currency exchange rates. To help mitigate these risks, building some wiggle room into your budget is essential.
  3. Manage change effectively: When change does occur, it’s crucial to have communication tools in place to manage it smoothly. This could include email, chat, in-app messaging, or regular status meetings. Keeping the lines of communication open can reduce confusion, limit surprises, and ultimately better manage your budget.
  4. Monitor your budget closely: Regular monitoring is crucial for containing cost variance. By keeping a close eye on your spending and making adjustments as needed, you can catch potential issues early on and take steps to bring costs back in line.
  5. Negotiate with suppliers: If you’re facing unexpected cost increases due to factors like supply pricing or shortages, it might be worth negotiating with your suppliers to try and get a better deal. This can bring your costs down and reduce negative cost variance.
  6. Consider alternative solutions: If you’re facing a cost overrun, it might be worth exploring alternative solutions that could be more cost-effective. For example, could you use a different supplier or a different type of resource to achieve the same result?
  7. Communicate with your team: Remember the importance of effective communication. Keep everyone informed about the budget and any potential cost issues, and encourage them to bring any ideas or concerns to the table. By working together, you can find ways to contain cost variance and keep your project on track.

Image represents Cost Variance Examples

Real-World Examples of Cost Variance

One of the best ways to understand how to manage cost variance in your projects is to see how it has played out in real-world scenarios. This section will explore a few examples of projects where cost variance occurred and how it was addressed.

By looking at these examples, you’ll get a sense of the issues that can arise and how experienced project managers have handled them. Whether you’re facing a negative cost variance or a positive one, these examples can provide valuable insights and inspiration for managing your projects.

Example 1:

You’re in charge of a landscaping project for a client’s backyard. You’ve budgeted $1,000 for the project, but as you’re working, you realize that the ground is more rocky and challenging to dig up than you anticipated. As a result, you end up using more labor hours and materials than you thought you would. Your final bill comes to $1,200.

Calculating the cost variance:
Cost variance = $1,000 – $1,200 Cost variance = -$200
Expressing the cost variance as a percentage:
Cost variance % = (-$200) / $1,000 Cost variance % = -20%

Example 2:

You’re managing a renovation project for a local coffee shop. You’ve budgeted $20,000 for the project, but when you open up the walls, you find more structural damage than expected. As a result, you need to do more work and spend more on materials than anticipated. Your final bill comes to $25,000.

Calculating the cost variance:
Cost variance = $20,000 – $25,000 Cost variance = -$5,000

Expressing the cost variance as a percentage:
Cost variance % = (-$5,000) / $20,000 Cost variance % = -25%

Example 3:

You’re in charge of a marketing campaign for a new product launch. You’ve budgeted $10,000 for the campaign, but when you book the ad space and run the ads, you find that the prices have increased significantly since you first planned the campaign. So your final bill comes to $12,000.

Calculating the cost variance:
Cost variance = $10,000 – $12,000 Cost variance = -$2,000

Expressing the cost variance as a percentage:
Cost variance % = (-$2,000) / $10,000 Cost variance % = -20%

Conclusion

As you’ve learned in this blog post, cost variance is a crucial aspect of project management that can significantly impact your project’s success.

By understanding cost variance and how to calculate it, you’ll be better equipped to manage it effectively. And by following the protips for containing cost variance and learning from real-world examples, you’ll have a better chance of keeping your projects on track and on budget.

So, as we wrap up this blog post, remember the importance of keeping an eye on cost variance and taking steps to manage it. Whether you’re facing a negative cost variance or a positive one, being proactive will help you stay on top of your budget and achieve the best possible outcome for your project.

Thank you for reading! I hope this blog post has provided valuable insights and tips for managing cost variance in your projects. Good luck with your future project management endeavors!

From Chaos to Control: Managing your Design Project

Image represents a Design Project Management

Are you a project manager struggling to keep your design projects on track? Do you feel overwhelmed and need help managing all the different elements of your projects?

If so, you’re not alone. Design project management can be challenging, especially if you’re new to the role.

But don’t worry – we’re here to help. This post will outline the key strategies and tactics you need to master design project management. From setting clear goals and objectives to planning and scheduling effectively to managing resources and communication, we’ll cover everything you need to know to succeed as a design project manager.

So, if you’re ready to take your design project management skills to the next level, keep reading!

Image represents Goals and Objectives

Setting Goals and Objectives

Before diving into the nitty-gritty of project management, it’s essential to set clear goals and objectives for your design project.

This will give your team a roadmap to follow and ensure everyone is on the same page. Here’s how to set goals and objectives for your design project:

Define the project scope and objectives

First, take some time to define the scope of your project. What is the project trying to achieve? What are the desired outcomes? Clearly articulating the scope and objectives of the project will help your team stay focused and ensure that the final product meets the client’s needs.

Identify key stakeholders and their needs

Who are the key stakeholders in your design project? These might include the client, the project team, and any other parties who have a vested interest in the project’s success. Identify their needs and make sure they are taken into account as you set your project goals and objectives.

Set clear and measurable goals

Once you understand the project scope and stakeholders’ needs, it’s time to set specific, measurable goals.

These should be SMART goals (specific, measurable, achievable, relevant, and time-bound) to ensure they are clear and achievable. For example, a SMART goal for a design project might be: “Design and launch a new website for XYZ company within six months to increase online sales by 20% within the first year.”

Image indicates Planning and Scheduling

Planning and Scheduling

Once you’ve set your goals and objectives, it’s time to start planning and scheduling your design project. This will help you stay on track and meet your deadlines. Here are some tips for planning and scheduling your design project:

Create a timeline and schedule

Develop a timeline that outlines your design project’s key milestones and deliverables. This will help you keep track of progress and meet your deadlines. It would be best if you also created a detailed schedule outlining each team member’s specific tasks and responsibilities.

Assign tasks and responsibilities

Clearly assign tasks and responsibilities to your team members. Make sure everyone knows what is expected of them and when it is due. Use project management software to help you keep track of tasks and progress. Teamly is perfect for this.

Identify and manage project risks

No project is without risks, and it’s crucial to identify and manage potential threats as you plan and schedule your design project. This might include anything from client changes to unexpected delays or budget overruns. By identifying potential risks upfront, you’ll be better prepared to handle them if they do arise.

Image represents Resource Management

Managing Resources

Effective resource management is crucial for the success of any design project. Therefore, it’s important to identify the resources you’ll need and allocate them effectively to ensure that your project stays on track. Here are some tips for managing resources in your design project:

Determine the resources needed for the project

First, identify the resources you’ll need to complete your design project. These include design software, hardware, and team members with specialized skills. Make sure you clearly understand what resources you’ll need and when you’ll need them.

Allocate resources effectively

Once you’ve identified the resources you’ll need, it’s important to allocate them effectively. This might involve assigning tasks to the team members with the appropriate skills and experience or purchasing the necessary software and hardware. Make sure you have a clear plan for allocating your resources to ensure your project stays on track.

Monitor resource usage and make adjustments as needed

As your design project progresses, it’s important to monitor your resource usage and make adjustments as needed. This might involve reassigning tasks or adjusting your budget if you encounter unexpected challenges. By regularly monitoring your resource usage, you’ll be better able to stay on track and meet your project goals.

Image represents Communication Management

Managing Communication

Communication is key to the success of any design project. It’s like a conductor leading an orchestra – without clear communication, the project can quickly become disorganized and chaotic. Here are some tips for managing communication in your design project:

Establish a clear communication plan…

First, create a communication plan outlining how you’ll communicate with stakeholders throughout the project. This might include regular progress updates, meeting schedules, and specific channels for communication (e.g., email, phone, and in-person meetings). Then, ensure all team members are aware of the communication plan and adhere to it.

Regularly update stakeholders on project progress

It’s essential to keep your stakeholders informed of your project’s progress. This might involve sending regular updates, holding meetings, or presenting progress reports. By keeping stakeholders informed, you’ll be able to address any issues or concerns early on and ensure that the project stays on track.

Solve conflicts and address issues as they arise

As with any project, conflicts and issues are bound to arise. It’s essential to address these as they come up and find solutions that work for all parties involved. This might include mediating a conflict between team members or addressing a change request from the client. By tackling issues head-on, you’ll be able to keep your design project moving forward.

Image represents Change Management

Managing Changes

Changes are an inevitable part of any design project. Whether it’s a client request to make design tweaks, an unexpected delay, or a budget overrun, it’s important to anticipate and plan for potential changes and to communicate them clearly to all relevant parties. Here are some tips for managing changes in your design project:

Anticipate and plan for potential changes

As you plan and execute your design project, anticipate potential changes that might come up. This might involve creating contingency plans for potential risks or being flexible and adaptable as you move forward.

By anticipating possible changes, you’ll be better prepared to handle them if they do arise. Some examples of changes that project managers might experience include:

  • Client request for design tweaks
  • Unexpected delays due to unforeseen circumstances
  • Budget overruns due to additional resources or expenses
  • Communicate changes to all relevant parties: If a change does come up, it’s important to communicate it clearly to all appropriate parties. This might involve holding a meeting to discuss the change or emailing the entire team. Keeping everyone informed will ensure that the project stays on track.

Ensure changes are aligned with project goals and objectives

Finally, make sure that any changes you make to your design project are aligned with your overall project goals and objectives. This will help ensure that the final product meets the needs of all stakeholders and stays true to the project’s vision.

Image represents Team Dynamics Management

Managing Team Dynamics

Imagine you’re working on a design project, and halfway through, your team falls apart. Morale may be low, or there’s a lack of trust between team members. Suddenly, the project grinds to a halt, and you’re struggling to get things back on track.

This scenario highlights the importance of managing team dynamics. Here are some tips for building a cohesive and productive team:

Foster a positive team culture

A positive team culture is crucial for the success of any project. Encourage team members to work together, share ideas, and support each other. Consider implementing team-building activities or hosting regular meetings to foster a positive team culture.

Encourage collaboration

Collaboration is key to a cohesive and productive team. Encourage team members to share their skills and expertise and work together to achieve project goals. Consider using collaboration tools, such as online project management platforms, to facilitate collaboration and communication.

Set clear roles and responsibilities

Team members need to understand their roles and responsibilities within the project. Make sure each team member knows what is expected of them and how they contribute to the team’s overall success. Consider creating a project charter or job descriptions to clarify roles and responsibilities.

Encourage continuous learning

Encourage team members to continuously learn and develop their skills. This might involve providing training opportunities or encouraging team members to take on new challenges. By fostering a culture of continuous learning, you’ll be able to build a team that is adaptable and ready to tackle any project.

Image represents Client Expectations Management

Managing Client Expectations

Imagine you’re working on a design project, and halfway through, your client starts making unexpected changes and demands. Maybe they want to add new features or change the direction of the project.

Suddenly, the project timeline is thrown off, and your team is struggling to keep up. This scenario highlights the importance of managing client expectations and the consequences of not doing so. Here are some tips for managing client expectations in your design project:

Set clear boundaries

It’s important to set clear boundaries with your clients to ensure that everyone has a clear understanding of what is expected. This might involve establishing clear communication channels, setting expectations for response times, or outlining the scope of the project. By setting clear boundaries, you’ll be able to manage client expectations and avoid misunderstandings.

Establish open lines of communication

Open and honest communication is key to managing client expectations. Make sure to regularly update your clients on project progress and address any questions or concerns they may have. Consider using online project management tools to facilitate communication and keep clients informed.

Address change requests and manage client feedback

Change requests and client feedback are an inevitable part of any design project. It’s essential to address these requests and feedback promptly and professionally. Make sure to clearly communicate any changes to your team and ensure that the final product meets the needs of all stakeholders.

Image represents Review and Evaluation

Review and Evaluation

As your design project nears completion, review and evaluate its progress. This will help you identify any issues or challenges and ensure that the final product meets your project goals and objectives. Here are some tips for reviewing and evaluating your design project:

Regularly review and assess project progress

As your design project progresses, regularly review and assess its progress. This might involve holding progress meetings, analyzing data, or reviewing completed tasks. By periodically checking progress, you’ll be able to identify any issues or challenges that need to be addressed.

Identify and address any issues or challenges

As you review your design project, be on the lookout for any issues or challenges that need to be addressed. This might involve reallocating resources, adjusting the timeline, or finding creative solutions to problems. By identifying and addressing issues early on, you’ll be able to keep your project on track.

Conduct a final evaluation of the project to determine its success

Once your design project is complete, it’s crucial to conduct a final assessment to determine its overall success.

This might involve collecting feedback from stakeholders, analyzing data, or reviewing project goals and objectives. By completing a thorough assessment, you’ll be able to identify areas for improvement and plan for future projects.

Conclusion

Congratulations! Following the tips and strategies outlined in this post, you’re now well-equipped to manage your design projects like a pro. By setting clear goals and objectives, planning and scheduling, managing resources, communicating effectively, and reviewing and evaluating your progress, you’ll be able to guarantee the success of your design projects and keep your team on track.

Remember, effective project management is all about being proactive, adaptable, and communicative. If you keep these principles in mind, you can lead your design projects to success.

Time Saving Secrets That Will Make You Cheer: How to Use the Critical Path Analysis in Project Management

Image represents Critical Path in Project Management

When you’ve got a project that’s brimming with hangups, where team members quit, materials arrive late and bottlenecks delay production, it’s really easy to throw money at it with the hope to speed things up. This may provide some momentary relief as the clock ticks and the deadline looms nearer.

As so many have learned the hard way, however, haphazard spending doesn’t make much of a difference. More often than not, the project is still delayed, with the added bonus of wasted money, labor and materials.

This may easily leave one wondering about an effective plan of attack. How does a complex project meet a fixed deadline, yet still remain within its planned scope and budget?

Way back in the 1950s, a think tank of engineers devised a method that addresses this conundrum. It identifies where to focus energy and resources in a project, and what areas require less attention. Plus, it also pinpoints where a project can create efficiencies in order to speed up its schedule and get things back on track.

This discovery is known as the critical path analysis. Let’s take a look at this method, discuss how to use it strategically and evaluate how it compares to similar project management tools.

Image represents Critical Path Method

A Definition of the Critical Path Method

The critical path method (CPM) provides an estimate for a project’s duration, as well as determines the slack time in individual activities. It achieves this by breaking a project down into individual activities, then evaluating the resources and duration of each, as well as the relationships between them.

The most basic component of the critical path method is the collection of all of the activities required to complete the entire project. Generally, these activities are determined by breaking high-level requirements into increasingly smaller batches of work using a work breakdown structure. For example, in a home remodel a high level requirement might be to repair the deck. This requirement could be broken down into: clean the deck, replace old wood and seal the deck.

Next, the individual activities are studied to determine their sequence and dependencies. A dependency is a relationship between two activities that determines when one activity can begin. Take, for example, the project of decorating a room, where two activities are to paint the walls and to display artwork on the walls. These activities are dependent, as the walls must be painted before the artwork can be displayed.

The sequence and dependencies of all the activities are arranged in a network diagram, or precedence network. The project management glossary defines precedence network as a diagram that “visually indicates relationships between project activities. Boxes and links are used to represent activities and activity relationships. Precedence networks also detail the time relationships and constraints associated with activities.”

The network uses arrows to indicate relationships between activities. Each activity is also assigned an estimate of the resources required (the labor, materials, cost and facilities).

Image represents Critical Path Method

In some projects, activities cannot be parsed out and separated nicely and neatly. It’s still possible to use the CPM in these instances. Rather than boxes representing each step in workflow, arrows are used instead. In the words of James Kelley, an engineer who developed the critical path method,

“Draw an arrow for each job and write its name, duration and resources on the convenient line formed by the arrow’s shaft. If one job is the direct predecessor of another, connect the head of the first to the tail of the second.”

The longest path in the network diagram is its critical path. As its name suggests, the critical path is the sequence of activities that determines the duration of the project, and so it merits the most attention. In the image above, the sequence A, B, E, F, G, and H has the largest sum (where numbers are a measure of time), making it the critical path.

The diagram also indicates any float or slack within activities that are not on the critical path. Float and slack measure an activity’s wiggle room, or the amount of time it can be delayed without delaying the entire project. In the example above, activity D takes two units of time to complete, during the same window as activities C, E and F, which take six units of time collectively. As two from six is four, activity D, then, has four units of slack.

The critical path analysis is helpful in any project manager’s toolbox. It allows for prudent resource allocation, as it indicates where to focus resources in order to keep a project on track. It also improves a risk management plan, as again, it indicates the critical activities that require extra attention. And finally, it generally saves time, as it forces a team to think a project through to completion, and highlights areas that need extra attention at the get-go.

Image represents History of the Critical Path Method

The History of the Critical Path Method

The critical path method has its origins at the duPont de Nemours company, which started in 1802 as a gunpowder manufacturer. DuPont is noted for its rigorous research department, which in the 1900s invented and manufactured nylon, Teflon and synthetic rubber.

In the late 1950s, its internal think tank, the Integrated Engineering Control Group, was assigned the task of reducing expenditures while maintaining the current output. The assignment primarily fell to James Kelley, Morgan Walker and John Sayer. Over a period of 27 months, the trio focused on planning, scheduling and estimating as the means to create efficiencies within the operations.

They proceeded with the assignment by breaking work into individual activities, and assigning it “man days” and then an overall cost by using the employees’ salaries. Then they looked at the entire work process in order to establish sequence between the activities. They soon came to appreciate the ardor of compiling this data manually, and so leased a computer from Remington Rand Univac in Philadelphia. Fortunately, Walker proved a huge asset in this regard, as his skill set included design, construction and computers to boot.

Breaking a project down required making simplifications. It assumed one duration for an activity. It did not distinguish between direct and indirect costs, but assigned an activity one overall cost. It also assumed that expediting an activity increased the cost.

With its compilation of activities, the trio determined which activities it could expedite by adding more resources. To their great surprise, they discovered that expediting certain activities reduced a workflow significantly, with only marginal increases to the overall cost.

“…by cutting average turnaround downtime by some 25% through CPM, production to sales was increased enough in the first year to more than underwrite the CPM development,” writes James Kelley.

Arriving at these conclusions required complex algorithms and algebra, which the trio computed on a UNIVAC I program that listed up to 200 separate activities. With their newfound theory, they honed the algorithm, and started applying the system to small projects.

CPM’s initial applications encountered resistance to change. Listing equipment, segregating activities and estimating durations weren’t part of the current processes for managers and engineers. It took as much as two months to compile the initial inputs needed to create the network diagram and determine the critical path.

But the method did catch on. In 1959, they taught CPM at a five-day workshop in Philadelphia. Participants returned to their businesses, applied the principles, and started requesting more workshops and training.

Over the ensuing decades CPM spread gradually, but its complexity prevented widespread adoption. A manual application was only possible for simple projects with only a few activities. In the 1980s, the availability of project management software allowed many organizations to utilize the method.

Although historically CPM was used to revive a sluggish project, it’s now a fundamental component to project planning, as implicit as the theory of constraints or Gantt charts.

Image represents Steps to Calculate the Critical Path

The Six Steps to Calculate the Critical Path

Most projects have hundreds if not thousands of individual tasks, and so a calculation of the CPM requires software. A manual development of a network diagram is only possible with very simple projects. However, whether manual or automatic, the process is the same, and it’s fairly straightforward. Here are the six essential steps to calculating a project’s critical path.

1) Identify the Objective

The CPM begins with a summary of the project’s central objective, the completion date and the high-level requirements. For example, if the project is a wedding reception, the first step is to gather key details such as the date, and the central components of the reception, such as a dinner and a dance.

2) Break Down Requirements

The next step is to break the high-level requirements into small independent activities. This is effectively completed with a work breakdown structure.

Image represents Work Breakdown Structure

A work breakdown structure breaks high level requirements into increasingly smaller work packages. For example, at a wedding reception, the requirement for “dinner” would break down into the tasks of reserving a space and tables, hiring a catering company and deciding on a meal.

3) Estimate Duration and Map Out Dependencies

When all the activities are laid out, the next step is to estimate how long each should take, clarify the sequence, and identify dependencies between activities. In a manual calculation, it’s helpful to write each task onto 3×5 index cards.

With a one-off project such as a wedding reception, the duration is an estimate. However, it’s helpful to refer to similar projects or to make an educated guess based on research. In complex projects that require many varied skills, gathering input from key stakeholders and subject matter experts ensures the estimates are accurate.

Identifying dependencies means taking a broad view of the entire project, and noting where activities link together and how they contribute to the completion of the entire project. For example, with a wedding reception, choosing a venue must be completed before sending out invitations. These two tasks have hard dependencies, as one one must occur before the other.

4) Create a Network Diagram

With the sequence and the dependencies clarified, the next step is to arrange all the activities together into a network diagram, connecting sequences with arrows. In the network diagram, each high level requirement has its own sequence of tasks, and oftentimes these tasks overlap or are dependent on one another.

For example, in planning a wedding, one high level requirement is sending out invitations. The first step is to determine the guest list, then create the invitations, then mail everything out. The completion of this activity, as discussed, is dependent first on selecting a venue for the reception. In addition to lengthy activities with multiple steps, a project has several one-offs, such as hiring a photographer for a wedding reception.

5) Calculate the Critical Path

With all of the activities laid out and connected sequentially with arrows, calculating the critical path simply means adding up the sequences for each path and determining the path with the largest value.

6) Calculate Slack

A final step is to calculate the slack associated with each non-critical activity. The slack for a non-critical path is its own length subtracted from the length of the critical path.

For example, say the wedding reception takes 12 weeks to plan, and hiring the photographer, a one-off activity, is expected to take three weeks. A backward pass subtracts 3 from 12, meaning that it can be started as late as week nine in order for the project to stay on track.

These six steps outline the central components of calculating a critical path. As mentioned, when a project involves hundreds of steps, the process cannot be calculated manually. However, sometimes just completing these simple steps yields insight sufficient to reduce the project’s overall expenditures. As James Kelly writes,

“If one does no more than intelligently draw the network and calculate the early and late times and float, one has 90% of the value to be gained from using network methods for project planning and scheduling.”

Additionally, the critical path can change. Projects rarely proceed according to a precise plan, and so delays or an inaccurate estimate may cause the critical path to shift. The network diagram, then, is something to monitor closely during a project’s execution, and to update when changes occur.

Image represents Techniques to Compress a Critical Path

Techniques to Compress a Critical Path

Often, a critical path can be decreased with resource allocation and schedule compression techniques. A schedule compression technique is just like it sounds. It’s a method for decreasing the length of time it takes to complete a project. Note that a schedule compression technique simply decreases time; it does not change the scope. The same amount of work is completed, but the project’s duration, its critical path, is decreased.

Two popular schedule compression techniques are known as crashing and fast tracking. Essentially, they entail finding a more expensive yet faster option for completing a task, or completing two normally sequential tasks at the same time.

To fast track means to take two sequential activities on a critical path and arrange them parallel to one another. Rather than complete one activity after the other, the two activities are completed at the same time.

For example, consider the project of making breakfast, something we all do every morning. Say the normal routine is to toast bread and butter it, then boil water for tea. Fast tracking the two activities means boiling water at the same time that the bread is toasting.

Fast tracking is simple and intuitive in this example, but it doesn’t work when two tasks have hard dependencies. This means that one task must be completed before a second task can begin. For example, with breakfast, you cannot steep a tea bag as you boil water. One task must be completed before the other.

Crashing is a schedule compression technique of using additional resources in order to shorten the duration of an activity. Let’s say you’re hosting guests, and need to fry eggs and toast bagels for six people in the morning. Your toaster has the capacity to toast two slices of bread at a time. Crashing the activity means purchasing additional toasters to speed up the task of toasting bagels.

Crashing carefully considers the relative cost increase of various activities on the critical path in order to determine the thriftiest way to shorten the schedule. For example, if the toasters cost $75 each, yet an additional frying pan only costs $10, you’d choose to crash the task of frying the eggs rather than the toast.

Crashing, as you can see, usually means increasing the cost of an activity in order to complete something faster. However, as Kelly and Walker discovered in the development of the CPM, oftentimes the efficiency created by crashing a task actually decreases the project’s overall cost.

Crashing doesn’t always work. The duration of some projects cannot be compressed with the addition of more resources. To put it humorously, nine women cannot deliver a baby in one month.

Although both these techniques shorten a schedule, they also expose the project to risk. Crashing, as discussed, increases cost, and so it needs to be used strategically. In the interest of saving time, a project manager may crash several activities, and cause the project to go over budget.

Fast tracking poses a few more problems than crashing. Sometimes it places two tasks in parallel that ideally should be performed in sequence, and this may lead to rework. Take, for example, the project of planning a party, with the two sequential tasks selecting a venue then hiring a deejay. Completing the two tasks in parallel may lead to complications. Maybe the deejay doesn’t have the sound equipment needed for the selected venue, and someone else needs to be found instead.

Image represents Advantages of the Critical Path Method

Seven Advantages of the Critical Path Method

It’s no accident that the critical path method has grown from an obscure method at DuPont into a popular method incorporated into every project management school’s curriculum. It sprinkles magic powder over a project, so much so that many project managers utilize it with every go-around. Here are some of the CPM’s central benefits.

1. Calculates a Realistic Timeline

It’s easy to set an end date for a big project. “This closet is going to be organized by the end of the week,” we might tell ourselves. While instead, the project drags on for a month, in large part because many of its smaller activities take much longer than we anticipated.

The critical path method does away with this sloppy estimating. It delves into each component of the project, and comes up with a realistic time estimate for each. This results in a timeline you can really lean in on.

This technique is particularly helpful for projects with hard and fast deadlines, such as events. It ensures that all the necessary tasks have been completed before the event occurs.

2. Identifies Dependencies

When all the individual activities in a project are written up on 3×5 cards and laid out on a table, it’s easy to connect dots and establish connections. Understanding dependencies clarifies the sequence of tasks. When planning an event, for example, the venue, date, and time must be chosen before any promotions occur.

Identifying dependencies also assists with risk management. It highlights the critical activities the project depends on in order to move things forward, and focuses risk management strategies around them.

3. Creates a Powerful Visual of the Entire Project

The network diagram lays out every component of a project, from start to finish, in a coherent diagram that’s reasonably easy to grasp. When presented or distributed to stakeholders and subject matter experts during the planning stage, it gets everyone onto the same page, and creates an opportunity to provide critical feedback and identify shortcomings.

4. Provides a Planning Tool

So often projects begin with a foggy “let’s do this” mentality. The project is executed without much of a plan and a team gets itself to a point of no return. At this point, it’s not uncommon to encounter major roadblocks. In a remodel project, perhaps, walls are torn down and flooring is ripped up before the homeowner realizes he doesn’t have the budget to replace them.

The critical path method avoids this dead-end trap. It thinks everything out in advance and puts a plan in place. It identifies dependencies, estimates costs and calculates duration. This careful, deliberate thinking determines if a project is tenable and provides a clear path all the way to the project’s completion.

5. Provides Focus

It’s easy to waste time in a project fixing things that don’t need to be fixed. For example, maybe some materials don’t arrive in time, and the team scurries and frets to find a replacement. However, if the materials are for a non-critical activity, it may well be that the delay won’t impact the overall timeline.

The critical path provides a healthy focus to a project. It highlights those activities that need extra TLC, as well as those non-critical activities that can be overlooked for a time.

6. Identifies Activities With Float

The critical path method not only identifies non-critical activities, it also calculates the float for each of these activities. This knowledge, again, allows a team to put time and energy into the things that matter, and to know how long to delay a non-critical activity.

7. Uses Resources Wisely

The CPM conserves resources. Rather than blindly throwing resources at a project with the hope to speed things up, it identifies those specific activities to focus on in order to save time and money.

With all these benefits, it’s no surprise that every certified project manager understands how to use the CPM. Although the method takes some work to apply, it’s a planning and execution tool that many project managers keep in their arsenal for good reason.

Image represents Disadvantages of the Critical Path Method

4 Disadvantages of the Critical Path Method

At the same time, the critical path analysis isn’t the be-all and end-all. Although an excellent method, it cannot be used in isolation. When applied to a project, it’s necessary to understand the limitations of the CPM and of network diagrams in general.

1. Cannot Handle Complexity

The CPM falls flat in a complex project with thousands of interrelated activities. In this instance it’s certainly not possible to create a network diagram manually. Even with a sophisticated software, the simplifications implicit in the method make it ineffective in calculating dependable estimates.

2. Makes Many Assumptions

The critical path method is brilliant in its simplicity. But this simplicity means assuming only one value for both the duration and the cost of an activity. It doesn’t consider direct or indirect costs, or longer or shorter durations.

This over-simplification may well lead to inaccuracies, particularly in a project with many unknowns. If an activity is assigned an inaccurate estimate, it can throw off the entire diagram, and the project manager ends up focusing on the wrong tasks and assigning slack in the wrong places.

3. Requires Upfront Work

Creating a network diagram and determining the critical path means looking at every step in the entire project. Generally, this requires knowledge well beyond one or two people on the planning committee. In order to be accurate, it requires input from many stakeholders, skilled team members and subject matter experts.

Gathering all of this input is time consuming and sometimes just not possible during a short planning period, resulting in a weak network diagram that doesn’t serve as a powerful planning tool.

4. Requires Rework

As every project manager knows well, a project almost always changes during execution, even with an excellent plan. And any significant changes in a project’s scope or requirements means that the entire network diagram must be redrawn. Even small delays in tasks can change the critical path.

This re-work is time consuming, making the CPM so labor-intensive that much of a team’s energy is put into working then reworking the diagram rather than actually doing the project.

As you can see, the critical path method isn’t an end in itself. Although it provides key benefits, it’s a tool that’s best complemented with other methods in order to properly estimate a schedule and allocate resources.

In projects with changing requirements late in development, the limitations of the network diagram may even make it a no-go. Projects that incorporate an agile methodology, for example, welcome change. In this instance, the CMP constantly needs to be worked and re-worked, making it too time consuming to be worthwhile.

The nature of a project, then, determines whether or not to use the CPM. It makes a lot of sense in a project with many up-front costs, clear deliverables, and a fixed end-date. In a project where the requirements are subject to change, the CPM may be something to shy away from.

Image represents CPM Versus the Critical Chain Method

CPM Versus the Critical Chain Method

The critical path method is one of many techniques utilized by project managers to assist with end-to-end project management. Another popular tool is the critical chain method. Like CPM, the critical chain method yields a more efficient work process and conserves resources.

The critical chain method originated out of Eli Goldratt’s 1997 book, Critical Chain. It leans heavily on the theory of constraints Goldratt developed in his 1984 book, The Goal. The theory of constraints is a manufacturing principle that seeks to eliminate bottlenecks and create a more efficient workflow. It constructs an entire workflow around the slowest steps in the process by placing extra resources at these steps.

Whereas the CPM is activity focused, the critical chain method is heavily resource focused. It’s closely related to capacity management and focuses on building idle capacity at the slowest places in a workflow. Resource leveling, which distributes resources evenly along a work process, is central to the method. The critical chain is determined by the longest sequence after all resources have been assigned to tasks and then leveled.

Here are some key differences between the critical path and critical chain methods:

  • The critical chain doesn’t identify dependencies between activities.
  • The critical chain doesn’t look for an optimal work path like the CPM. Rather, it finds a “good enough” work system.
  • Whereas the CPM is determined from a static and fixed diagram, the critical path is a dynamic process, where change is welcome and anticipated.
  • The CPM focuses on activity completion, whereas the critical chain monitors progress by evaluating resource consumption.

The critical chain provides these benefits to a project:

  • The critical chain uses a pull workflow, meaning that tasks begin just as the previous task is completed. This eliminates “student syndrome,” or the tendency to put something off until the last possible moment.
  • The critical chain encourages swarming in order to complete a task before moving onto the next thing. This hyper-focus on one activity reduces a tendency to task switch or multi-task, two processes that slow a project down.
  • Activities in the critical chain don’t have fixed start and end times, which reduces a phenomenon known as Parkinson’s Law, where the length of a task is determined by how much time is allowed for it.
  • Unlike CPM, critical chain considers both short and late start times for activities, which yields more realistic estimates.

Both the critical path and the critical chain develop out of a work breakdown structure. The critical path method is great as a planning tool, as it looks at a project in broad overview and thinks everything through. The critical chain, on the other hand, assists with the project execution. It creates efficiencies in workflows. A work process with huge bottlenecks might benefit more from the critical chain method over the CPM.

Image represents CPM Versus PERT

CPM Versus PERT (Program Evaluation Review Technique)

PERT is another method for calculating project duration. In many respects it’s almost identical to the CPM. PERT is an acronym that stands for program evaluation review technique.

Although PERT and the CPM evolved around the exact same time, they developed independently from one another. PERT was developed as a planning tool for the U.S. Navy’s Polaris nuclear submarine project in 1957. The navy propogated the method in a publication the following year. Since its development, it’s been used as a planning tool within many industries and for many events, including the 1968 Olympic Games.

The work breakdown structure developed out of PERT, as a means to parse a project into individual units of work. The work breakdown structure is a hierarchical grid that breaks high-level requirements into increasingly smaller units of work.

Here are some key differences between PERT and the critical path method:

  • PERT primarily focuses on activity duration, whereas CPM looks at both the duration and cost of an activity.
  • PERT assigns each activity four time estimates (optimistic, expected, most likely and pessimistic) whereas the CPM assigns only one. This difference ranks PERT above the CPM in projects with a lot of uncertainty around duration.

PERT provides many benefits, many of which are similar to the critical path method:

  • A central benefit is that PERT lays out an entire project from beginning to end, and identifies a clear completion date. For this reason, it’s commonly utilized in event planning.
  • PERT evaluates all the processes and activities in a project before execution. It highlights those activities and processes that require extra attention, and allows a project to proceed as scheduled.
  • PERT identifies a project’s critical path.
  • Just like the critical path method, it reveals the slack in certain activities and also identifies dependencies.
  • It provides a powerful visual display of the entire project that’s useful for collaboration and decision making.

PERT is complementary to and in many ways almost interchangeable with the critical path method. However, PERT is the preferred method in a one-off project with a fixed completion date, such as planning an event.

However, neither method addresses bottlenecks or analyzes workflows as a means to create efficiencies in a project. For this reason, they serve as excellent planning tools but not stand-alone methods.

CPM Versus Gantt Charts

The Gantt chart is another popular project scheduling technique. Rather than creating a diagram like the CPM, it lays out a project and all of its various tasks in a bar chart. The Gantt chart was developed by Henry Gantt around 1910 to use as an operations tool within his company. He wished to identify the productivity levels between his employees.

The Gantt chart achieves many of the same ends as the CPM, but by different means. It’s a bar chart that lists a project’s tasks on a vertical axis, and time on the horizontal. The chart notes interdependencies between activities, and each task is sequenced in relation to other dependent tasks.

Image represents CPM Versus Gantt Charts

The visualization of a project was novel at the turn of the century, and many adopted the method. Gantt charts were used in World War I and with the Soviet Union’s economic planning. However, Gantt charts were cumbersome to create and difficult to adjust as a project changed. The availability of project management softwares in the 1980s made Gantt charts easy to create and adjust. Since then, they have become almost ubiquitous in project management. However, a Gantt chart’s inflexible approach to project management makes it undesirable to agile enthusiasts.

Here are some key differences between Gantt charts and CPM:

  • The Gantt chart does acknowledge dependencies, but not so clearly as the critical path method.
  • The Gantt chart is primarily a scheduling tool. It does not identify the resources utilized in activities.
  • The Gantt chart does not identify a critical path, making it unclear where to utilize schedule compression techniques and so shorten a project’s schedule.

A Gantt chart provides many of the same benefits and challenges as CPM:

  • It identifies slack and dependencies within activities.
  • A Gantt chart is easy to understand, perhaps even more so than a network diagram. It’s also a powerful visual. For these reasons, it’s an effective planning tool, allowing many stakeholders to grasp the overall plan and offer expert opinions.
  • Like the critical path method, a Gantt chart needs to be redrafted when requirements change or scope increases. This is particularly cumbersome when it’s drafted manually. In projects with many changes, or where change is fundamental to the process, Gantt charts quickly become useless during the execution phase.

Like the CPM, the Gantt chart serves as an effective scheduling tool. However, due to its many limitations, it certainly shouldn’t be used exclusively, but along with other project management tools.

Conclusion

When a project struggles with keeping to a timeline or staying within a budget, the critical path method may be just the solution.

The CPM is a visual display of a project that provides a plan of attack that holds the reins on a project’s timeline, cost, and resource consumption. It’s particularly effective in projects with hard and fast deadlines.

CPM breaks a project down into individual activities, and constructs a diagram that clarifies the sequence and dependency of each activity. The method promises to save time and resources.

Although the CPM has become a cornerstone to project management since its inception six decades ago, the method has drawbacks. Its greatest limitation is that it creates a fixed plan for a project, and it’s hard to utilize if a project changes during execution. In projects where requirements and scope changes, it’s best as more of a reference tool than a guide.

If you’ve found that your current project planning method wastes time and results in a poor deliverable, then the CPM may provide just the solution you need to turn things around.

Incident Management 101: The Lowdown on Navigating Project Bumps

Image represents Incident Management Process Workflow

Imagine you’re working on a large software development project, and one of the developers reports a critical bug in the code. This incident must be dealt with immediately, as it could significantly affect the project timeline and budget.

So, what do you do? This is where the incident management process comes in. In project management, an incident is any event that disrupts the normal flow of work or causes problems for the project team. The goal of incident management is to lessen the impact of these events and get the project back on track as quickly as possible.

But how do you go about managing incidents in your projects? The incident management process typically follows a set of steps designed to identify, classify, and resolve incidents efficiently and effectively. We’ll be discussing these steps in more detail later in this post, but for now, let’s look at some of the key benefits of having a solid incident management process in place.

Image represents Incident Management Process

Incident Management Process Overview

So, what does the incident management process look like? It typically consists of several vital steps designed to identify, classify, and resolve incidents promptly Categoriesand effectively.

Here’s an overview of these steps:

  1. Incident Detection and Notification: The first thing you need to do when an incident occurs is to detect using YOLO object detection algorithm and report it. Incidents can be spotted in various ways, such as through monitoring systems, error logs, user reports, or the project team’s observations. It’s essential to have a straightforward process for reporting incidents, so you can get them dealt with as quickly as possible.
  2. Incident Classification and Prioritization: Once you’ve reported an incident, the next step is to classify and prioritize it based on its impact and urgency. This will help you determine the appropriate allocation of resources and attention devoted to resolving the incident. Factors that influence the classification and prioritization of incidents include the severity of the impact, the number of users affected, and the potential consequences of the incident.
  3. Incident Resolution and Recovery: After you’ve classified and prioritized an incident, the next step is to resolve and recover from it. This typically involves identifying the root cause of the incident, implementing a fix or workaround, and testing to ensure that the issue has been resolved. Sometimes, it may also involve rolling back changes or restoring systems to a previous state. The incident management team should work closely with the project team and other stakeholders to ensure that the resolution and recovery process goes smoothly.
  4. Incident Documentation and Communication: It’s essential to document and communicate incidents effectively to ensure they are correctly recorded and understood by all relevant parties. This might involve creating incident reports, updating change logs, or communicating with stakeholders about the status of the incident. Effective communication is crucial to keep the project team informed and focused on the tasks at hand.

Image represents Incident Detection and Notification

STEP 1: Incident Detection and Notification

The first step in the incident management process is detecting and reporting incidents. But how do you go about seeing incidents in a project? Here are a few ways to spot incidents:

  • Monitoring Systems: Many organizations have systems in place to monitor the performance and health of their systems, applications, and processes. These systems can detect incidents automatically and trigger alerts when something goes wrong. For example, a monitoring system might see a server outage, a software bug, or a network problem.
  • Error Logs: Another way to detect incidents is by reviewing error logs or event logs. These logs record events on a system or application, including errors, warnings, and other issues. By examining these logs regularly, you can identify incidents that might otherwise go undetected.
  • User Reports: Sometimes, incidents are detected by users who experience problems or issues while using a system or application. It’s important to have a transparent process for users to report incidents so they can be dealt with promptly. This might involve using a ticketing system, email, or a dedicated incident reporting form.
  • Observations: Finally, incidents can be detected through the observations of the project team or other stakeholders. This might involve noticing strange behavior on a system, hearing about user problems, or simply noticing that something isn’t working as it should.

Once an incident has been detected, you or your team need to notify the appropriate parties as quickly as possible. This might involve sending an alert to the incident management team, emailing the project team, or updating a status board. By having a straightforward process in place for incident notification, you can ensure that incidents are dealt with promptly and efficiently.

Image represents Incident Classification and Prioritization

STEP 2: Incident Classification and Prioritization

Once you’ve detected and reported an incident, the next step is to classify and prioritize it based on its impact and urgency. This is an essential step in the incident management process. It helps you determine the appropriate resources and attention devoted to resolving the incident.

To classify an incident, you’ll need to consider the severity of the impact and the number of users affected. For example, an incident that involves a critical system or service might be classified as high severity. In contrast, an incident that affects a less critical system or service might be classified as low severity.

Consider other factors, such as the potential consequences of the incident or the complexity of the problem.

Once you’ve classified an incident, the next step is to prioritize it based on its impact and urgency. This might involve assigning a priority level to the incident, such as high, medium, or low.

Factors that influence the prioritization of an incident include the severity of the impact, the number of users affected, and the potential consequences of the incident.

There are a few tools and techniques that you can use to help classify and prioritize incidents. One standard tool is the incident priority matrix. This grid enables you to assign a priority level to an incident based on its impact and urgency. Other tools and techniques might include risk assessments, impact analyses, or decision trees.

By classifying and prioritizing incidents effectively, you can ensure that the incident management team can focus on the most pressing issues first and allocate resources appropriately. This can help you resolve incidents more efficiently and minimize the impact on your project.

Image represents Incident Resolution and Recovery

STEP 3: Incident Resolution and Recovery

Once you’ve classified and prioritized an incident, the next step is to resolve and recover from it. This is an integral part of the incident management process, as it helps you minimize the impact of the incident and get your project back on track as quickly as possible.

You’ll typically need to follow steps that involve identifying the incident’s root cause, implementing a fix or workaround, and testing to ensure that the issue has been resolved. Here are some key considerations to keep in mind when resolving and recovering from incidents:

  • Identifying the Root Cause: One of the first things you’ll need to do when resolving an incident is to identify the root cause. This might involve gathering and analyzing data, running diagnostics, or consulting with experts. By identifying the root cause, you can determine the best course of action for resolving the incident.
  • Implementing a Fix or Workaround: Once you’ve identified the incident’s root cause, the next step is to implement a fix or workaround. This might involve making changes to the system or application, rolling back changes, or implementing a temporary fix until a permanent solution can be implemented. It’s important to test the fix or workaround to ensure it resolves the incident effectively.
  • Testing and Verification: After implementing a fix or workaround, it’s essential to test and verify that the incident has been resolved. This might involve running diagnostics, conducting user acceptance testing, or monitoring the system or application to ensure it functions properly.
  • Recovery: In some cases, it may be necessary to recover from an incident by rolling back changes or restoring systems to a previous state. This might involve reverting to a prior system or application version, restoring data from backups, or implementing other recovery measures.

The incident management team should work closely with the project team and other stakeholders to ensure that the resolution and recovery process is seamless and efficient.

Image represents Incident Documentation and Communication

Step 4: Incident Documentation and Communication

So, what does adequate incident documentation and communication look like? Here are a few things to consider:

  • Documenting Incidents: It’s important to document incidents thoroughly to ensure they are correctly recorded and understood. This might involve creating incident reports, updating change logs, or maintaining a database of incidents. By having a clear and comprehensive record of incidents, you can better understand patterns, identify trends, and identify areas for improvement.
  • Communicating with Stakeholders: Effective communication is also vital regarding incident management. This might involve sharing with the project team, updating stakeholders on the status of the incident, or providing users with information about how to access workaround solutions. By keeping stakeholders informed, you can ensure that the project team can stay focused and productive.
  • Maintaining a Status Board: A status board can be a helpful tool for communicating the status of incidents to the project team and other stakeholders. A status board might include information about the incidents’ status, each incident’s priority level, and the actions being taken to resolve them. By keeping the status board up to date, you can provide a clear and transparent view of the incident management process.

Documenting and communicating incidents effectively ensures that the incident management process runs smoothly and efficiently. This can help you resolve incidents more quickly and minimize the impact on your project.

Image represents Best Practices for Incident Management

Best Practices for Incident Management

Now that you have a good understanding of the incident management process, let’s look at some best practices that can help you manage incidents more effectively in your projects.

  • Establish Clear Processes and Procedures: One of the critical things you can do to improve your incident management process is to establish transparent processes and procedures. This might involve defining roles and responsibilities, setting up monitoring systems, and creating incident reporting and notification protocols. By having clear and well-defined processes in place, you can ensure that incidents are dealt with promptly and efficiently.
  • Foster a Culture of Continuous Improvement: Another best practice for incident management is fostering continuous improvement. This might involve regularly reviewing and analyzing incidents to identify patterns and trends, implementing corrective actions to prevent similar incidents, and identifying opportunities for process improvement. You can minimize the impact of incidents on your project by continuously improving your incident management process.
  • Build a Strong Incident Management Team: A robust incident management team is essential to an effective incident management process. This team should be knowledgeable, skilled, and responsive. It should work effectively with the project team and other stakeholders. It’s crucial to provide the incident management team with the resources and support they need to do their job effectively.
  • Invest in Monitoring and Alerting Systems: Monitoring and alerting systems can be valuable for detecting and reporting incidents on time. By investing in these systems, you can ensure that incidents are dealt with promptly and efficiently.

By following these best practices, you can improve your incident management process and minimize the impact of incidents on your project.

Conclusion

Think of incident management as the steering wheel of your project. Just as a steering wheel helps you stay in control and navigate your vehicle safely, effective incident management enables you to control your project and navigate it toward success.

So, how do you ensure that your incident management process is as effective as possible? By building a solid incident management team, establishing transparent processes and procedures, fostering a culture of continuous improvement, and investing in monitoring and alerting systems. By following these principles, you can effectively steer your project toward success.

This blog post has given you a better understanding of the incident management process and how it can help you achieve project success. If you have any questions or need further assistance, don’t hesitate to reach out.