A Guide to Effectively Executing Cost Benefit Analysis: Why Project Managers Should Take Notice

Illustration image of Cost Benefit Analysis in Project Management

Whether you’re an experienced project manager or a newbie just getting your feet wet in the wide world of project management, cost-benefit analysis (CBA) is something you will inevitably have to tackle. And if you plan on tackling it well, then this comprehensive guide is for you.

Cost-benefit analysis is one of the most important processes you’ll have to go through in order to make sound decisions for your projects. It involves weighing the potential costs associated with a course of action against its potential benefits by creating a comparison between the two. The goal is to ensure that you get the most bang out of your buck, and make sure resources are allocated efficiently.

Like any tool, though, a cost benefit analysis must be used correctly in order to be effective. In this blog post, we’ll discuss how to properly conduct a CBA so that you can use it to make sound decisions for your projects.

Illustration image of Cost Benefit Analysis

Defining cost benefit analysis and its purpose

At its core, cost-benefit analysis is a process of comparing the costs associated with a project against potential benefits to determine if it’s worth pursuing. It involves looking at both short and long term costs as well as short and long-term benefits. This allows you to make sure that resources are being used effectively and efficiently.

To put it another way, CBA is a way to determine whether or not the juice is worth the squeeze. It’s a tool that can help you make sure that you’re investing your time and money in the right places.

The purpose of a cost-benefit analysis is to give you a more detailed picture of potential costs and benefits associated with an investment over time. It’s also used as a way to compare different investments in order to determine which one offers the best return on investment.

Let’s say you’re considering two investments. Cost-benefit analysis can help you evaluate each investment and compare the projected costs against potential benefits to decide which one is more likely to provide a positive return on your investment.

Illustration image of Why CBA is important Checklist

7 reasons why CBA is important …

Have we sold you on the importance of cost-benefit analysis yet? If not, here are seven reasons why CBA is a must for any project manager:

1. It Helps You Make Better Data-Driven Decisions

Let’s be honest: decisions made without data are nothing more than guesses. Humans have a tendency to rely on intuition and emotion when making decisions, but this can be dangerous in project management. Cost-benefit analysis helps you make better, data-driven decisions by providing you with an objective way to evaluate potential investments.

2. It Positions You To Set Realistic Expectations

Have you ever had a leader who set an overly ambitious goal, only to be disappointed with the results? Cost-benefit analysis can help you avoid this scenario by providing an objective way to evaluate potential investments. It also forces you to consider long-term costs and benefits associated with each investment, helping you make more realistic projections.

3. It Helps Identify Potential Pitfalls

No investment is without risk. Cost-benefit analysis helps you identify the potential risks associated with an investment, as well as how likely they are to occur and the potential costs associated with them. This can help you make sure that you’re investing in projects that have a greater chance of success.

4. It Helps You Discern Where To Allocate Resources

Cost-benefit analysis can help you determine the best way to allocate resources. It allows you to compare different investments and make sure that your resources are being used in the most effective way possible.

5. It Can Be Used To Compare Multiple Investments

Some projects are simply not worth pursuing. Cost-benefit analysis allows you to objectively compare multiple investments and determine which one offers the best return on investment.

For example, let’s say you’re considering two investments. Cost-benefit analysis can help you evaluate each investment and compare the projected costs against potential benefits to decide which one is more likely to provide a positive return on your investment.

6. It Helps You Avoid Unnecessary Spending

Money wasted is money lost. Cost-benefit analysis can help you identify potential investments that may not be worth pursuing, helping you avoid unnecessary spending.

7. It Helps You Track Progress

Once you’ve made an investment, cost-benefit analysis can help you track progress and make sure your resources are being used in the most effective way possible. This can help you adjust your strategy and make sure that each investment is meeting expectations.

Illustration image of Downsides to CBA

Considering the Downsides to CBA

Of course, cost-benefit analysis isn’t without its drawbacks. For one, it relies on estimates and predictions, which can be difficult to accurately project in the long run.

Additionally, some investments may offer intangible rewards that are hard to quantify in a cost-benefit analysis. Bottom line: Cost-benefit analysis isn’t perfect, but it does offer a value for project managers to evaluate potential investments.

Understand the different types of costs that can be incurred during a project

Whenever setting off on any project, big or small, a wise and savvy individual will understand the different types of costs that can be incurred along the journey. Think of these potential expenses as little sign posts guiding you from Point A to Point B – whether it’s buying interior design materials for redecorating your home, or investing in research software for advancing your business.

Costs come in two flavors – those that are fixed, and those that are variable, and they can throw some serious curveballs at you if you’re not prepared. Fixed costs are like running into a brick wall during a race – unavoidable nightmares that suck up all your resources right then and there and can never be retrieved.

But variable costs act more like fellow racers who join you intermittently throughout the course — while they can add up quickly over time, at least they give you breathing room in between.

All in all, knowing how your project might fluctuate financially is an invaluable skill to have – and it will serve you through untold future adventures. So take the time now to scrutinize each potential cost closely – plan ahead and understand this complex territory before proceeding full-speed ahead. It’s well worth the effort.

Illustration image of 5 Types of costs that considered in a CBA.png

5 Types of costs that are typically considered in a CBA

Before we look at how to do a cost-benefit analysis, let’s take a look at the types of costs that are typically considered in a CBA:

  1. Direct Costs: These are the most obvious costs associated with an investment, such as materials and labor.
  2. Opportunity Costs: This is the potential benefit you may have missed out on by making an investment.
  3. Fixed Costs: These are costs that don’t change regardless of the level of production, such as rent and utility bills.
  4. Variable Costs: These are costs that vary based on the level of production, such as materials and labor costs.
  5. Indirect Costs: These are costs that can be difficult to identify and measure, such as lost time due to delays.

4 Types of Benefits that are typically considered in a CBA

Now that you know about the types of costs that are typically considered in a cost-benefit analysis, let’s take a look at the types of benefits:

  1. Direct Benefits: These are the most obvious benefits associated with an investment, such as increased revenue or reduced expenses.
  2. Indirect Benefits: These are benefits that can be difficult to identify and measure, such as improved customer satisfaction or employee morale.
  3. Net Benefits: These are all of the benefits minus all of the costs, which lets you see if an investment is profitable or not.
  4. Total Benefits: These are benefits that can’t be measured in terms of money, such as improved customer loyalty or a better reputation for your company.

Illustration image of How to conduct a cost benefit analysis

How to conduct a cost benefit analysis

Alright so now that we’ve laid the groundwork, let’s take a look at how to do a cost-benefit analysis.

Step 1: Identify Your Goals and Objectives

The first step in conducting CBA is to identify your goals and objectives. This involves listing what you want to achieve with the project and the expected outcomes.

For example, if your goal is to increase customer satisfaction, then your objective could be to reduce customer wait times by 20%. This will help you measure the success of your project and assess whether it has achieved its desired results.

Step 2: Estimate Costs and Benefits

Once you have identified your goals and objectives, it’s time to estimate costs and benefits associated with the project. To do this, you will need to create a list of all resources required for the project (materials, labor, equipment etc.) as well as any potential risks or opportunities associated with it (such as unexpected delays or cost savings).

Once you have done that, calculate both direct and indirect costs related to each resource. Then, assign a monetary value to each benefit that can be derived from completing the project.

Step 3: Analyze Alternatives

Before starting work on a new project, it’s important that you analyze potential alternatives that could be used instead. This will help ensure that you are making the most cost-effective decision possible by comparing different options before committing resources and money into one particular approach.

For example, if there are two equally viable options but one requires fewer resources than another then it would make sense to choose that option over its more expensive counterpart.

Step 4: Determine Expected Results

Now that you have identified your goals, estimated costs and benefits associated with different alternatives, it’s time to estimate what kind of results can be expected from implementing them.

This involves using data such as past performance metrics or market trends to predict potential outcomes based on which alternative is chosen. Once these expected results have been calculated they can then be compared against actual results once the chosen option has been implemented in order to measure its effectiveness over time.

Illustration image of Cost Benefit Analysis Example in project management

Here’s an Example Of Cost Benefit Analysis in project management

Let’s say that you are considering launching an online store for your business.

Before doing so, it would be wise to do some research on the costs associated with setting up such a store (e.g., web hosting fees, design fees etc.) as well as the potential benefits (e.g., increased sales revenue etc.). For the sake of this example, let’s say the total cost of launching an online store is estimated to be $10,000 and the expected benefits are estimated to be $20,000.

Using the cost benefit analysis method, you can then compare these two figures and determine that launching an online store would net a $10,000 profit.

In addition to this, you could also look at the potential risks associated with launching an online store (e.g., potential security issues) and then compare them to the potential rewards. This would give you a more comprehensive picture of the potential outcome of the project before committing any resources or money.

Illustration image of Cost Benefit Analysis Tips

Tips for ensuring that your cost benefit analysis is accurate and meaningful

  1. Make sure to accurately estimate the costs and benefits associated with each possible alternative.
  2. Don’t forget to consider any potential risks that may arise from implementing the project, as these can have a huge impact on its success or failure.
  3. Use data such as past performance metrics or market trends to support your predictions.
  4. Try to get feedback from other stakeholders in the project and incorporate their perspectives into your analysis.
  5. Keep track of the results of your cost benefit analysis, as this will help you refine it over time and ensure that it is providing accurate and meaningful insights into the success or failure of a project.

The Bottom Line

At the end of the day, cost benefit analysis (CBA) helps project managers assess whether or not a project is worth investing in. It involves estimating the costs associated with potential solutions and then comparing them to the expected benefits in order to make an informed decision about which option to pursue.

By utilizing CBA, project managers can make sure that their projects are cost-effective and have a positive ROI for the company in the long run. I hope this article has given you a better understanding of how to use cost benefit analysis for project management and how it can help you make more informed decisions. Good luck!

A Business Requirement Document: The Secret Ingredient to Every Successful Project

Illustration image of Business Requirements Document

A project may look straightforward enough at the very beginning. Until you start asking questions.

Maybe initially the client asks you to build a widget, and says that it needs to be green. Ok, you think, clear enough.

But then in the second and third rounds of discussions, you begin to see the bigger picture. You understand the client’s expectations around the quality, usability and scalability of the widget, plus all the regulations that go into creating it. You understand the client’s company, their brand and their mission.

A project manager who doesn’t take the time to unearth these expectations and discover what they don’t know is headed for failure.

“Asking questions” is the process of gathering requirements. The objective of requirements gathering is to align everyone’s expectations about the project’s objective. Without this continuity, the team easily works toward a deliverable that doesn’t meet the client’s expectations at all.

A formal compilation of all of these requirements into a business requirements document further solidifies everyone’s focus around the project’s goal. This post is going to define a business requirement document, describe how to create one, and explain what it needs to include in order for a project to succeed.

Illustration image of What Is a Business Requirement Document

What Is a Business Requirement Document?

A Business requirements document (BRD) is a primary tool for listing and structuring requirements. It’s a document that’s created in a project’s planning stage and provides the purpose, background and scope of a project.

It’s a major deliverable in this planning stage and requires formal review by the client and acceptor. Usually, it’s created by a senior business analyst or the project manager.

Generally, a business requirements document is created in stages, using feedback loops. With each meeting and consultation, the current version is updated.

During a project’s execution stage, the BRD is used as a guideline for stakeholders to make decisions and to prioritize requirements and objectives.

How is a BRD different from a Functional Requirements Document (FRD)?

The BRD is intended for all stakeholders and the client, so it’s written in a language that is easy to understand by everybody.

The FRD is an internal document that’s passed around the team. Oftentimes it’s written in technical language that isn’t accessible to a wide audience. It’s more granular than the BRD and may include charts and workflows.

Illustration image of Types of Requirements in a BRD

What Types of Requirements Are in a BRD?

Requirements capture all of the expectations in a project. They include tangible deliverables as well as non functional requirements. Capturing and documenting requirements at the get-go ensures that the team and the client are on the same page

The requirements in the BRD start from a high level, then work down to greater specificity.

High Level Requirements

According to the PM Glossary, high-level requirements “explain the major requirements and characteristics of the final product, including its purpose as a product and within the company.”

High level requirements, distinct from detail requirements, describe the central objective of the project. They are stated at the beginning of a business requirement document along with the project’s overall purpose.

Business Requirements

The business requirements state the business goals of the project, including the ROI, the objectives and the reason the project is initiated in the first place.
For example, a goal of adopting new software might be to reduce processing times by 50%. Or the goal of adding an online store to a retail store might be to increase sales by 20%.

Stakeholder Requirements

The stakeholders can include subject matter experts, customers, product managers and other business units. This section includes things like functionality requirements and quality standards.

Solution Requirements

The solutions requirements get down to the nitty gritty and include the expected features and behavior of the product. Business rules are taken into account with solution requirements, including constraints around regulations or the mission of the company.

Solution requirements are broken down into functional and non functional requirements.

Functional requirements (FRs) are clear deliverables the product must have. If the project is a web page, then some functional requirements may be that it include a bio page, a login page, and a shopping page. Functional requirements generally are visible and quantifiable. They must comply with business rules, and work around the project’s constraints.

Non-functional requirements (NFRs) are just as significant as functional requirements, but harder to grasp, define and quantify. “Usability” and “high-quality” are two examples of non functional requirements. NFRs sometimes relate to the behavior of the system, so also include things like privacy, security access and documentation.

Non functional requirements are approached differently than FRs, as they can’t be quantified as easily. For example, a non functional requirement of “usability” for a website would affect several facets of the project. Since they’re nebulous and indefinable and bleed into all parts of a project, it’s difficult to determine when a non functional requirement has been met. It’s not so simple as checking a box on a list and pronouncing it “done.”

In a sense, NFRs are treated more like constraints than requirements. They’re the boundaries under which a project is executed; the parameters it works within at all times.

Transition Requirements

Many projects entail a transition period. Let’s say the project is to install a new software system within the company. Learning to use the new software is a significant and sometimes challenging transition, and this stage has requirements all of its own.

These requirements describe features and processes that facilitate the transition. They may include things like cheat sheets, training courses, and data migration from the old system into the new system. Once a transition is complete, these requirements are no longer needed; they’re only necessary during the interim period.

As you can see, there are many types of requirements, originating from different places and serving a variety of purposes within the project. Let’s look into how these requirements are gathered.

Illustration image of Capturing Requirements in BRD

How to Capture Requirements for the BRD

Requirements, unfortunately, aren’t prepared in a nice neat checklist at the beginning of a project and presented to the project manager.

Rather, it takes a lot of research and digging to unearth all of a project’s requirements. Sometimes they can’t even be discovered by asking direct questions. Requirements include implicit aspects of a project, things like the culture and the mission of the company, so teasing them out means reading between the lines, talking to the right people and understanding resource constraints.

Successfully gathering all pertinent requirements requires a strategy. The objective for the project manager is to understand the expectations of all stakeholders.

Here are a few methods and approaches for capturing a project’s varied requirements, so as to compile them into one neat document.

Business Process Model

The business process model looks at a business process from two different perspectives. First, it examines the current process, and then it examines the process in a future desired state.

Take a coffee shop for example, whose objective is to shorten the customer’s order time. This method studies the process for how a customer currently completes an order, then contrasts it with a possible future process. Maybe in the current process, the store has only one cash register. But in the future desired processes, it adds a second register.

Two requirements for this project, then, would be to purchase the new cash register and to create space for it within the shop.

This approach to analyzing systems and workflows makes it easy to highlight critical areas and identify the requirements for achieving objectives.

User Story Sessions

A user story is a simple, easy to understand description of a product feature, written from the perspective of the end user. For example, if the feature is a website login page, the user story would read something like, “The login page asks for my username and password.”

A user story session brings the client, the team and other stakeholders together, to capture an assortment of requirements. The requirements may be functional or non functional, and some may be business related as well. After gathering requirements, the next step is to prioritize them.

A MoSCoW Meeting of Stakeholders

At a MoSCoW meeting, the stakeholders identify everything a project must have, what it should have, what it could have, and what it won’t have.

A MoSCoW meeting is helpful in the planning stage to identify a project’s high-level requirements, its constraints, and everything in between. It’s about clarifying and crystallizing what the project really is all about.

The simplicity of the method allows the customer, the team, and any other stakeholders to make meaningful contributions toward the project’s requirements.

Although MoSCoW is a great way to plot out a project at the beginning, this isn’t a stopping point and it is best combined with other requirement gathering methods.

Product Manager Consultation

A product manager researches the customer, and so understands who the product targets and what problems it needs to solve. Soliciting feedback and data from the product manager helps to identify key features to include in the deliverable in order to meet the end users needs.

1:1 With the Client

When a project is too focused on deliverables and checking boxes, it’s easy to miss non functional requirements. A one-on-one with a client allows the project manager to get an idea of his or her priorities with respect to areas such as usability, scalability, security, compatibility and performance.

For example, if a client says that first and foremost she wants a website that’s “usable,” it’s necessary to dig a little further to grasp what that really means. It may mean that the pages must load quickly, or the checkout procedure must be simple and fluid. But without asking for clarity, it’s easy to make assumptions around a vague requirement like this.

This summarizes several ways to gather requirements. Each method provides its own benefits and weaknesses. Using a variety of methods together ensures that all necessary requirements are gathered.

Illustration image on Creating Business Requirement Document

How to Create a Business Requirement Document

A BRD is developed in rounds, after meetings and consultations with various stakeholders. Its completion indicates that everyone has a firm understanding of what the project entails. Here are a few things to include in a business requirements document.

  • Requirements Gathering Process and Participants
    A BRD clarifies the project’s requirements gathering techniques. These methods vary depending on the nature of the project and the size of the team, but they generally always include gathering user stores and communicating with the product manager, the client and other stakeholders.
  • Document Approvers
    The BRD clarifies the processes around requirements approval. It states who signs off to indicate the fulfillment of a requirement, and may also include a definition of done.
  • Requirements
    A BRD, of course, also includes all of a project’s requirements, listed from the broadest to the most specific.

Business Requirements:

This section states the business goal is of the project, as well as how this goal is measured. It means defining the problem the project seeks to solve, or the opportunity it seeks to create.

Stakeholder Requirements:

These are the needs of key stakeholders, including business units, the product manager and investors. It lists the criteria these groups want the product to meet.

Functional and Non Functional Requirements:

Functional requirements define what the deliverable looks like or what features it has. This section doesn’t propose a solution, but rather it indicates all of the boxes that the final deliverable must check off. It may include diagrams for clarity.

Non functional requirements are performance or quality standards such as capacity, speed and availability. It may include things like training and documentation as well. As mentioned, non functional are sometimes difficult to quantify, and the BRD seeks to break down and clarify the NFRs as much as possible.

  • Requirement Dependencies
    Requirement dependencies are those things outside of the project manager’s control that affect the requirement delivery. For example, it may list equipment or skilled labor that is only available with the completion of another project.
  • Assumptions
    Assumptions go over anything that’s implied with the completion of a deliverable. It includes things like resource availability (labor, materials, and equipment).

    Assumptions create risk. It may turn out, for example, that the resources aren’t available in the amount it was assumed.

  • Constraints
    Constraints are internal and external limitations that affect project performance. These include regulations, industry standards and limitations on resources.
  • Approval and Sign Off From Key Stakeholders.
    When everyone has looked at the document, stakeholders sign off to indicate it’s complete.

And these are some components to a BRD. As you can see, it is a lengthy document when it’s all said and done. But bringing it to completion benefits a project in several ways, as we’ll see next.

Illustration image of BRD Benefits

How Does a Project Benefit From a BRD?

A requirements document captures all of a project’s essential components and places it in a position to succeed. Here are a few benefits of a thorough BRD.

  • The Project is Completed on Schedule
    With a BRD, all the expectations are clear from the get-go. This focuses the production process, and sometimes even speeds things up!
  • Re-Work Is Eliminated
    A work process that emphasizes ongoing communication with the client, and continual reference to the BRD keeps the project focused on its goal. The team is less likely to have to back up and repeat work.
  • Client is Please With the Deliverable
    When everything is written out and all of the stakeholders are on the same page, it’s likely that the team will meet expectations and the client will be pleased with the final deliverable.

These are just a few of the many benefits a requirements document brings to a project.

Conclusion

A lack of understanding around requirements easily leads to re-work, wasted materials, or even a failed deliverable.

A business requirements document creates clarity around a project’s objective. It captures and clarifies all of a project’s requirements, and puts all the stakeholders on the same page. Although it’s a lot of work to put together, the effort is well worth it.

If you’re gathering requirements for a remote team, consider using Teamly, the easy-to-use project management platform that customers rave about. With Teamly, you’ll maintain easy communication with all stakeholders and team members from the get-go. Climb aboard today!

​​Cost Breakdown Structure: The Backbone to Budgeting in Project Management

Illustration image of Cost Breakdown Structure

Sometimes in a project, the budget drips out like a leaky faucet, in steady, predictable amounts. At other times, the pace of the budget is more like a roller coaster. There are long stretches where almost nothing is spent, followed by short, fast intervals that consume huge portions of the budget in one go.

Understanding a budget’s cadence is key to successful project management. Without a firm grasp of a project’s costs, work packages and timeline, it’s easy to mismanage a project and have it go over budget.

A cost breakdown structure plays a significant role in successful project management. It keeps things from spilling out and going off the rails. Let’s see how a cost breakdown structure works, and how it fits in with other diagrams like the resource and work breakdown structures, to successfully plan and execute a project.

Illustration image indicates that What Is a Cost Breakdown Structure

What Is a Cost Breakdown Structure?

As the similar names suggest, a cost breakdown structure (CBS) is like a work breakdown structure (WBS), except that it evaluates a project with respect to cost rather than work.

Like a WBS, the CBS begins at the highest level, the overall budget. Then it breaks down into increasingly smaller sections with each tier.

A CBS becomes more granular and specific at each tier. For example, say the overall project is a home remodel. On the second tier, this might break down into the cost for the kitchen, the bathroom and the deck. Each lower tier breaks costs down further into things like the materials and appliances for each space.

The CBS is a valuable tool for developing accurate estimates of work. As it’s almost impossible to know how much a package of work costs from a high level requirement, breaking the cost down into smaller packages allows the budget to hit closer to the actual mark.

Generally, the cost becomes more accurate with each tier. However, the tiers should align with the project execution, as at some point the divisions become too small and they’re useless. Once a cost is broken down into its separate labor, supplies and equipment, usually it needn’t be broken down any further.

How to Create a CBS

One way to create a CBS is to model it after the WBS. In this method, the CBS is created by breaking each work package down into their required resources (labor, materials and equipment), then totaling the cost for each resource.

A CBS can also be created independently from the WBS. Whereas the WBS breaks a project down by requirements and deliverables, the CBS can break the project down by other categories such as research, production and operation.

Each method provides a different perspective for evaluating a project and its correlating costs.

Regardless of how the CBS is constructed, the scope of the project in both the WBS and the CBS remains the same.

What Is a CBS Used For?

A CBS is used in both the planning and the execution stages of a project.

Planning: The objective at the beginning of a project is to evaluate the requirements thoroughly, from a variety of perspectives, in order to prepare for a fluid, predictable execution.

The cost breakdown structure analyzes the project at a variety of aggregation levels (between one and four, generally), and breaks it down by a variety of criteria (either deliverables or research, production and operation).

This depth and granularity creates accurate cost estimates, and provides inputs into the creation of an accurate budget.

Execution: The CBS is also helpful during the execution stage of a project. Tracking the progression of the project against the CBS is one way to gauge if the project is proceeding according to plan.

The CBS functions a bit like a fishnet or a corset in this sense. It’s a document that’s used throughout a project to keep things together.

The CBS is not used exclusively, however, but in combination with other key documents. Let’s examine how the CBS works together with other breakdown structures.

Illustration image of CBS versus WBS versus RBS

CBS versus WBS versus RBS

All these breakdown structures can start to feel like information overload when you don’t understand how they work together. However, the WBS and the CBS and the RBS (resource breakdown structure) really have a synchronistic function within a project.

Used together, the three charts complement and support one another, helping both in planning a project, and making adjustments during the execution stage.

Definition: Work Breakdown Structure

A work breakdown structure (WBS) diagrams of all a project’s tasks and activities. It’s hierarchical, and lists the project objective at the top, then breaks the work into increasingly smaller packages at levels 2, 3 and 4. At the lower levels, it’s possible to make accurate estimates around the resources required for each work package.

The WBS, principally, is an operational document. It isn’t intended for budget creation, although sometimes it’s misapplied for this use.

Generally, the WBS has more granularity than a CBS. Whereas the WBS might break one work package down into 50 individual tasks, this level of decomposition isn’t necessary with the CBS.

Definition: Resource Breakdown Structure

A resource breakdown structure examines all of the resources required to complete a project’s objective. Just like a work breakdown structure, it’s a hierarchical grid that starts with the project’s central objective. Rather than breaking things into work packages, however, the lower tiers quantify the labor, equipment, materials and facilities required to complete each requirement.

The resource breakdown structure, then, is a perfect mid-way document between the creation of the WBS and the CBS. Once the work is decomposed in the WBS, it’s then possible to calculate all of the labor, materials and equipment required to complete the work. When this is clear, and the package is small enough to assign accurate time and quantity estimates, then the CBS can be calculated as well.

The Three Charts Combined

Together, the RBS, the CBS and the WBS allow a project to stay within its central constraints of time, budget and scope.

Reign in the Budget: In order to properly monitor a project and stay within budget, it’s necessary to not only know the budget, but to also understand the cadence of the budget, or how much money is consumed when.

The WBS and the RBS identify central work packages. When this work is correlated to the costs in the CBS, it allows the project manager to monitor cost expenditures, and to know how much money should be spent and when.

Monitor the Deliverable Schedule: Monitoring a project also means evaluating progress in terms of the number of units completed, or percentage completion. Together, the WBS and the CBS allow the project manager to evaluate a project in terms of the percentage of deliverables completed alongside the percentage of budget spent. It works similarly to the idea of a burndown chart.

Stabilize Scope: Together, the WBS, the RBS and the CBS clarify the project’s scope. When all the work is known, it’s easier to identify when additional costs or work packages not outlined in these diagrams creep in and increase the scope.

In summary, each type of breakdown structure evaluates a project from a slightly different perspective, and each complements one another. Now let’s look at some key benefits the CBS provides in project management.

Illustration image of CBS Benefits in a Project

Benefits of Using a CBS in a Project

A cost breakdown structure helps with many aspects of a project, including risk management, schedule tweaking and scope adjustment.

Scope Management

Sometimes it becomes clear during a project that scope needs to be reduced in order to reign in costs.

Take a home remodel, where the project manager has gone over budget and must decide between adding new light fixtures and adding new wallpaper. The CBS comes in handy here. As it details the cost for each work package, it provides a clear indication for which item to cut.

This is a simple example, of course, and oftentimes a project is much more complicated. Generally speaking though, a CBS allows the project manager to identify which items bleed the most cost, and so it serves as a helpful tool for identifying where to cut away work in order to stay within budget.

Schedule Tweaking

A project manager is always concerned about keeping a project on schedule. One helpful technique for freeing up time is known as crashing. With crashing, a project manager doubles up on the resources for an activity in order to speed up its completion.

Say the project is painting a house, and with two painters the project takes one week. Possibly, by adding two more painters this task can be shortened to just a few days.

At the same time, the project manager also wants to stay on budget. In looking for the best activities to crash, then, it’s helpful to understand their costs relative to one another. The CBS allows the project manager to identify those lower-cost activities whose resources can be increased without making a huge impact on the project’s overall budget.

Risk Management

A risk management plan analyzes a project at the onset, and anticipates all possible occurrences, both positive and negative. The plan also considers the likelihood of each occurrence.

The CBS helps to focus the risk management plan around the high cost areas that need the most attention.

Take a construction project that plans to rent an expensive piece of equipment for one day. This CBS highlights this activity with respect to all of the other work packages, and notifies the project manager that it needs extra attention in the risk management plan.

As you can see, the CBS is a useful diagram to reference and assists with many facets of a project.

Conclusion

It takes a lot of input to plan a project successfully. A cost breakdown structure is one of these central inputs. It breaks the costs down and serves as a guideline for creating a budget.

The cost breakdown structure provides some framework for a project. It helps not only with the planning, but it keeps the project together during the execution phase as well.

Combined with a work and resource breakdown structure, the CBS allows the project manager to understand the cadence of a budget throughout a project, and to tweak the plan in order to keep the project within its given scope, timeline and budget.

Monitoring costs in a remote project is an extra challenge, so you definitely want to have state of the art software to smooth out all the wrinkles. Consider Teamly, the all-in-one platform that’s available at an unbeatable price. Visit us and sign up today!

Are You Letting the Big Fish Get Away? The 12 Best Job Posting Sites for Scouting Talent…Plus 9 Backdoor Tips to Writing a Job Description that Nails It

Best Job Posting Sites for Employers

Losing great people is the worst. Everything you’d become accustomed to, all their quality work, is gone in an instant. Poof.

And finding a replacement can be such a slog. It so easily becomes a process full of money thrown at ads that reach unqualified candidates, job profiles that reveal nothing about grit or EQ, and rounds of interviews that feel more like speed dates.

You may be sour from past experience. You hired the wrong person and things didn’t work out, and you struggle to put yourself out there again.

But undoubtedly you’ve dreamt about finding the perfect candidate. One magical day, when you least expect it, they’ll show up right in front of you. You’ll lock eyes, and immediately know they’re the one. They’ll never have to be told the same thing twice, will know just how much cream and sugar to put in your coffee, and will only make the pleasant kind of small talk in the mornings.

But how do you find this person? Is it entirely in the hands of fate?

Lest you lose hope and start thinking that the stars aren’t aligned, rest assured that there really is someone out there for you. Every pot has a lid and every vacant position has an eager, qualified candidate, just waiting to be sought out and hired.

And with the right approach, finding this person doesn’t have to take all of your time and energy.

Want to know how to find that special someone, and to do it efficiently? The secret is figuring out where they show up online….and then writing the perfect job post to entice them. And this article is going to show you how.

The 12 Best Job Posting Sites for Employers

Let’s clear something up right away. There isn’t one single ideal site for employers to post jobs. The best site for you means first of all knowing who you’re looking for, and then figuring out where to find them.

Do you want to fill a remote position with flexible hours? Then maybe FlexJobs is the place to start looking. Does the position require years of experience, and offer a great salary? Then check out Ladders, the site for skilled professionals. Sometimes, for businesses with strong social media followings, your ideal candidate is lurking right within your followers, scanning your posts every day. Connecting with them simply means posting the position to your account.

And before settling in and evaluating the best job posting sites, let’s review something we all already know. Nothing in this life is ever free. Most of these job posting sites, regardless of whether or not they advertise themselves as “free,” will have you pony up at some point in the process. And so this post outlines each site’s pricing system, along with its pros and cons.

Indeed - Job Posting Sites for All Employers

1. Indeed

Niche:

This job posting site is suited for any type of position, and for every type of employer.

Pricing:

Jobs posted on Indeed are either free or sponsored. The sponsored jobs have better rankings in searches. However, the pricing for sponsored ads is pretty confusing; they explain their system in 250 words, and even then it isn’t very clear. It’s also unclear how much better a sponsored ad performs over a free ad.

Overview:

Indeed, as they say, needs no introduction. It’s the largest job posting platform in the world, with 2.5 million unique monthly visitors. It offers worldwide employment for any and every type of job.

Indeed started in 2004 in Austin, Texas and Stamford, Connecticut. Jobs can be posted either through a website account, or uploaded through an external account. It’s an all-in-one hiring platform where you can screen candidates, schedule interviews and host interviews.

Pros:

  • Indeed offers unlimited free job posting, and the reach is excellent. Recruits can expect between 30 and 50 responses to a free ad.
  • The interface is easy to navigate and it doesn’t have a lot of clutter.
    It offers assessment testing and screener questions to identify qualified applicants right away.
  • Users say the sponsored posts connect to great matches right away.

Cons:

  • The filtering process can be frustrating and long-winded. Indeed doesn’t weed out candidates who fail screener tests, so this must be done manually by the recruiter.
  • Indeed doesn’t allow recruiters to post age requirements for a position, making it difficult to weed out unqualified candidates for positions such as internships that have inflexible criteria.
  • You have to pay to boost jobs in searches and the pricing is not straightforward. It’s difficult to tell whether or not you’re throwing money away.

Good to Know:

A trick for free job posting on Indeed is to cancel the ad every couple of weeks and then repost it. This makes the post current and it shows up higher in search results.

Ladders - To Hire Experienced Professionals

2. Ladders

Niche:

High income, experienced professionals.

Pricing:

Ladders offer free and paid options, and includes a good explanation of its plans and pricing.

The free basic plan allows you to post 10 jobs per month, send 10 emails a month and view 10 resumes a month.

A promoted job posting ranges from $540 to $600 per post. It also offers sourcing services, which range from $300 to $600 a month.

Overview:

Ladders started nearly twenty years ago in New York City. It calls itself “the 100K club” and focuses on placing experienced, talented recruits into high income positions. Job applicants on the platform generally have 15 years of experience in their field, nearly all have bachelor degrees and a third have masters degrees.

Ladders primarily draws an audience of Millennials, Generation Z, and young Generation Xers. The site receives 200 million visitors each month, 70% of which are in the 18 to 44 age range.

Pros:

  • Ladders has great features that allows you to save searches and to filter candidates based on salary requirements.
  • The candidate bios cover a lot of ground, going beyond mere work experience.
  • This allows a recruiter to identify a candidate’s professional goals and work culture preferences.

Cons:

  • Ladders doesn’t offer a mobile app, making it difficult for a recruit who’s on the go.
  • Ladder’s prices are pretty high compared to other placement sites.

Upwork - To Hire Freelancers

3. Upwork

Niche:

Freelancers

Pricing:

Upwork allows recruits to post jobs for free, but they must pay Upwork 3% of the contractor’s payment. It also offers a monthly subscription plan with additional services and features, including customer support and preferred listings.

Overview:

Upwork is based out of California and evolved in 2013, out of a merger between two recruitment companies. This job site is dedicated to connecting employers with freelancers and contractors. It’s perfect for one-and-done jobs such as writing copy for a drip campaign, or designing a logo.

The talent pool on Upwork is enormous, with contractors for almost any line of work. 12 million freelancers have accounts with Upwork in over 180 countries. Around five million clients are looking for work. Many contractors have specialized skills and they’re great to hire for large one-time projects.

Pros:

  • Upwork’s search features makes it quick and easy to find qualified candidates for all kinds of work, including graphic design, digital marketing, general research, data collection and virtual assistance.
  • It’s easy to screen candidates, as each profile includes feedback from previous clients as well as a summary of all the work they’ve done through Upwork and the money they’ve earned.
  • You can determine the reach for a job posting, targeting it based on geographic location, contractor rating, or pay.

Cons:

  • The prices for contractors are inflated, as Upwork takes a huge chunk of the contractors’ pay. For jobs up to $500, they take 20%, and above that it’s 10%.
  • The quality of work is sometimes poor and Upwork has developed a reputation on the internet for shoddy work.

Good to Know:

Many say that the basic plan works fine and the upgrades with the monthly plan aren’t necessary.

Linkedin - For Every Type of Employers

4. Linkedin

Niche:

This site is suited for any type of position, and for every type of employer.

Pricing:

It’s free to post one job on Linkedin. Each additional job is charged a pay-per-click fee. Promoted jobs include tools for filtering applications.

Overview:

Linkedin is a social and professional networking site that started out of California in 2002. Currently, it has more than 500 million members in around 200 countries, giving it a broad reach for any job within any industry.

People join Linkedin by setting up a profile, which features work history and personal interests. Anyone can connect with anyone on Linkedin. This allows them to view each other’s profiles and to send messages. In addition to looking for jobs, people use the platform to share articles they’ve written and videos they’ve created.

Pros:

  • Linkedin offers access to an enormous pool of professional applicants.
  • If you have specific criteria for a candidate, such as age or geographic location, Linkedin allows you to indicate this.
  • The social networking component allows a recruit to find applicants through referrals and professional contacts.

Cons:

  • Linkedin doesn’t offer targeting options for paid ads, and so a sponsored job posting reaches anyone and everyone, including droves of unqualified candidates.
  • Given the above, there doesn’t seem to be a huge perk to paid ads over the free ad. Even with hundreds of clicks it may not reach a large number of qualified candidates.

Wellfound - For Startups positions and content creators

5. Wellfound (Formerly AngelList Jobs)

Niche:

Startups positions and content creators.

Pricing:

The starting plan for Wellfound is free and includes a 20% salary fee. The recruit plan costs $250 a month in addition to the 20% salary fee, and includes ATS integration and advanced search options

Overview:

AngelList Jobs started around 2012 in San Francisco, and it boasts of 6 million matches, 130 thousand current tech jobs, and 8 million candidates. It focuses on job placement within the start-up sphere, and its candidates include software engineers, product managers, marketers, sales people and designers. It has also branched into content creation.

For a small growing digital business, it’s the place to find talented people energized about working in a fast paced environment.

Currently it’s in the process of rebranding, and features a new name, Wellfound. Further developments are in the works.

Pros:

  • Wellfound offers great search features, making it easy to find matches for the position you’re looking for, and to save searches for future reference.
  • The applicant’s profiles include their work and personal background, achievements, and education. It’s all ready at hand and easy to scan.
  • You can request a chat with a candidate from a search, making it easy to start a casual conversation.

Cons:

  • Reviews show that a lot of scammers use the website.

Chegg - For Students

6. Chegg

Niche:

Students looking for scholarships, internships and entry level positions.

Pricing:

It’s free to post internships and entry level jobs on Chegg. Additionally, the site doesn’t charge any fees upon hiring a candidate. (The company’s income comes from monthly subscriptions from college students.)

Overview:

Founded in Santa Clara in 2005, Chegg currently has nearly 3 million subscribers. It’s a platform for student services, and includes access to tutors, textbooks, and internships.

Its name is a combination of “chicken and egg,” which refers to a common frustration around career development. If you don’t have any experience, then you can’t find any work in order to gain experience.

Pros:

  • Chegg offers access to a huge audience, and recruiters can hire students all across the US.
  • All job postings are completely free, no strings attached.

Cons:

  • Chegg doesn’t offer a mobile app.
  • Chegg has a basic website and it doesn’t offer ATS tracking.

Handshake - For Students

7. Handshake

Niche:

Students looking for internships and entry level positions.

Pricing:

Handshake offers a free plan with limited job postings. Its premium plan is for recruiters hiring 20 or more candidates per year.

Overview:

Handshake started in 2014 by two college students in Michigan’s Upper Peninsula, who wanted to provide college students access to internships and other opportunities, regardless of their geographic location.

The platform is similar to Linkedin in that it includes a social component, where applicants set up profiles that showcase skills and experience. The applicants can connect and show these profiles to potential employers.

Pros:

  • Handshake’s free option is robust. It offers unlimited job posting and also allows employers to register for events and career fairs. (The free plan doesn’t offer unlimited hires.)
  • The university cooperates with recruiters on the site, and may even promote the listing internally within the university.
  • With Handshake, a job can be targeted to specific universities or majors, as well as a student’s year in school.

Cons:

  • Handshake’s website can be complicated to navigate and it doesn’t have a lot of bells and whistles.
  • In the past, Handshake has been accused of violating students’ privacy, by disclosing GPAs without the individual’s consent.

Good to know:

There’s no need to go with the paid plan on Handshake, unless you’re hiring more than 20 candidates per year. The free plan is sufficient.

FlexJobs - For Remote Positions and Jobs with Flexible Hours

8. FlexJobs

Niche:

Remote positions and jobs with flexible hours.

Pricing:

FlexJobs offers one membership fee, which costs around $400 a month, or $3,000 for one year. With this fee, employers receive unlimited jobs and resume searches.

Overview:

Sara Sutton founded FlexJobs in 2007, after trying her hand with two other job platforms in the 90s. With FlexJobs, her aim was to create a space to find jobs that aren’t the traditional 9-5, which seem to encompass more and more jobs nowadays. This niche makes it a popular go-to for digital nomads.

Currently, FlexJobs has over 50,000 jobs listed in over four dozen fields, including accounting, writing, IT, sales, telemarketing and web design. Before going live, each posting is carefully screened to be sure it meets the “flexible” criteria. This means it’s either remote, freelance, part time or a job with a flexible schedule.

Pros:

  • FlexJobs has received an A+ rating from Better Business Reviews and many users give it five stars.
  • Its website is content heavy, with great articles and content to peruse.

Cons:

  • There’s no free option on Flexjobs, and the paid plan is pricey.
  • There is no feedback system, making it difficult to know the quality of work to expect from a candidate.

The Mom Project - For Professional Mothers

9. The Mom Project

Niche:

Professional mothers who seek flexible work situations.

Pricing:

The Mom Project offers two pricing plans. One charges a percentage of the recruit’s first year salary. A second plan charges a subscription fee that offers ATS integration and other benefits.

Overview:

Founded in 2016 by Allison Robinson, The Mom Project allows women to continue to develop and sharpen their professional skills as their lives transition into motherhood. Its mission is to find flexible job scenarios that meet a woman’s professional and personal needs. It wants to preclude scenarios where women must choose between a career and a family. Serena Williams is on its team of strategic advisors.

Pros:

  • The Mom Project has a great mission and provides opportunities for people to achieve work-life balance.
  • Men use the site as well; it assists fathers of new children to find flexible work situations.

Cons:

  • The contractor fee is really high. The Mom Project charges 20% of the hourly fee for short-term jobs.
  • The Mom Project is still fairly new, so the platform doesn’t have a lot of traction.

Scouted - For Early to mid-career talent

10. Scouted

Niche:

Early to mid-career talent.

Pricing:

Scouted doesn’t charge a fee to post jobs, screen candidates or interview. In the event of a hire, Scouted charges 20% of the candidate’s first year salary.

Overview:

Scouted started in 2015, with 76 employees. It believes the hiring process is out of date, and seeks to make it current.

The site’s filtering system overlooks things like GPA and education, and rather evaluates a candidate by their emotional intelligence, grit, and work culture preferences. These criteria, Scouted believes, more accurately determine how well a candidate performs in a position.

For job seekers, the application process is unconventional. Rather than posting a resume, they answer a series of questions that evaluate their preferred company culture and emotional intelligence. According to statistics, this method works. Scouted promises recruiters that they’ll only have to look at 15 profiles before making a hire. It has a 95% retention rate of hired clients.

Pros:

  • Scouted has an easy-to-use interface with great filter options, including experience level, industry, role and location.
  • The evaluation process for candidates makes it easy to find someone who’s a good cultural fit for the position.
  • The company was recently acquired by Recruiter, so its growth prospects look promising.

Cons:

  • Scouted is not as large as other job posting sites, so the pool to search from is smaller.
  • The sign-up process is lengthy and time consuming, so candidates may opt to use other sites instead.

Company Social Media Posts

11. Company Social Media Posts

Niche:

Anybody and every position.

Pricing:

Posting to your company’s social media accounts (Twitter, Instagram, etc.) is free. It’s also possible to sign up for paid advertisements within these platforms. The prices for ads vary from site to site.

Overview:

This process is pretty straightforward, and simply entails announcing an open position in a social media post. In certain instances this poses great potential, as the post reaches people already familiar with the company’s brand and culture.

This method is particularly effective for social media accounts who have built enthusiastic followings, and who regularly post content about the company.

Pros:

  • This method reaches people who like your company and already understand your culture.
  • A familiarity is established from the get-go, so you won’t have to do cold interviews.

Cons:

  • Unpaid posts may not reach a lot of followers, and so it may be necessary to use sponsored ads.
  • This method doesn’t work for smaller social media accounts with weak engagement.

VivaHR - For Small Businesses

12. VivaHR

Niche:

A recruiting website for small businesses.

Pricing:

VivaHR offers two monthly subscription plans. $90 a month allows for one job posting, and $180 allows for unlimited posting.

Overview:

Ryan Naylor founded VivaHR in 2016, after he realized that large job platforms cater exclusively to enormous companies. This platform is dedicated to small businesses who don’t have the budget for larger platforms, and who don’t need ATS tracking software.

VivaHR offers a simple and straightforward application process in a variety of industries, including dental, health, landscaping, painting, pest control, plumbing, retail and technology.

Pros:

  • VivaHR submits job postings to Google for Jobs, which increases the likelihood your posting shows up in Google’s job tracking system.
  • The job posts on VivaHR include a culture component that speaks to what new hires care about most, including the flexibility of the position and the purpose of the company. This allows the company to tell their story and the opportunities of the position, and not limit the post to dry details.
  • FlexJobs includes candidate questionnaires to help filter candidates.
  • It’s possible for multiple stakeholders to collaborate in the hiring process.
  • One job can be posted to multiple boards, covering a variety of industries.
    It’s consistently received positive reviews. Many business owners say VivaHR has allowed them to find local hires right away.

Cons:

  • VivaHR doesn’t offer a mobile app.

Good to know:

VivaHR is fairly new, and regularly hosts demonstrations to teach new users how to use the site.

And this completes a summary of some of the best recruitment sites out there. As you can see, there are a lot of excellent job posting sites to choose from. The key is finding a site that caters to your niche, and you’re halfway there. The second half of the battle is crafting the job description. That’s what we’re going to tackle next.

Craft the Perfect Job Post

9 Tips to Craft the Perfect Job Post and Attract Ideal Recruits

Writing a job post goes hand-in-hand with choosing a job platform. And creating a good post requires some good old fashioned tender loving care.

When you look to fill a position, your purpose, clearly, is to service a need within the company. Maybe you have a burning desire for someone to complete administrative tasks so you can focus on the meat of your business.

But candidates aren’t thinking in this framework at all. A job description that says something like: “I need someone to help me with my work overload” isn’t going to entice them.

Candidates are focused on their own needs. And so first and foremost, an effective job post communicates how the position meets these needs. Explaining how the position benefits the candidate with a phrase such as “An opening position with opportunity for growth” is more likely to lead to a successful hire.

Recruiting is a huge pain, no doubt about it. And an effective job post eases some of this pain. It saves time by attracting the right people and filtering out no-fits. Generally, this means seeking out someone who’s a good cultural fit, and skilled in the position as well.

Let’s go over some pointers to creating a job description to land the right person, every time.

1. Use Sales Techniques

A job description is a sales pitch, essentially. And as it turns out, many of the same strategies that work for marketing products work with attracting recruits as well. Here are three classic sales techniques to utilize in job postings.

Communicate scarcity: We’re always drawn to a product or position that has an element of urgency or scarcity. And so incorporating this into a job description compels people to apply. Adding a hire date urges people to submit their resumes rather than sit on them for a few more days. Or adding language like “only two positions left to fill” lets people know that the position is sought-after and going fast.

Communicate likability: We all want to work with someone we like. And so a friendly tone to a job description goes a long way to attracting a recruit who will stick around. So drop the formal tone and incorporate idioms and vernacular that makes you sound approachable and easygoing.

Communicate social proof: Joining a new company is a huge risk. Candidates always have trepidation about what they’re getting into. And so assuage their concerns by communicating what other people say about the company. Do you have positive reviews on Glassdoor? Or have you received positive internal feedback from employees? Be sure to add these comments to the job description.

2. Consider the Audience

Again, a successful job posting first and foremost considers the recruit and addresses their concerns. And though it may surprise you, recruits aren’t as interested in the “what” of the position as in the “why.”

More and more of the workforce say they’re looking for a job with a purpose above and beyond the paycheck. And so it makes sense to include the company’s mission within the job posting.

But not all the workforce thinks alike, of course. According to research, there’s marked differences between what a millennial and a baby boomer look for in a job. And so if you’re looking to fill a position that requires a decade or more of experience, your approach may be different than if you’re filling an internship or entry level position. Even your methods of communicating may vary by age group. Younger generations tend to prefer texts, while older generations prefer voice messages. Here are a few patterns around what various generations look for in a work environment.

  • Baby Boomers appreciate an environment that includes teamwork and coaching. Phone calls and other direct communication are preferred.
  • Generation X values flexible work scenarios, opportunity for advancement and direct communication such as email and phone calls.
  • Millennials look for fun in the work environment, flexibility and personal appreciation from managers and bosses.
  • Generation Z wants diversity in daily work tasks, and prefers to work with a younger workforce.

These are simple guidelines, and more research may be necessary. But understanding your candidates from a generational point of view allows you to craft a post that speaks to them.

Communicate Culture

3. Communicate Culture

Company culture refers to all of those little unspoken things about your workspace that make it unique. Broken down, it includes things like work-life balance, leadership styles, criteria for internal promotion, physical work environment, employee appreciation, management styles and trademarks of the company and the product.

Clarifying how your company meets all of these areas helps to define your personal culture. Including this in the job description gives the candidate an idea of what you’re all about. Even sharing simple things like a well-stocked break room provides insight into your culture.

Culture is a two way street. In addition to sharing what you offer the recruit, state what you look for in a recruit as well.

4. Craft a Title

The title of the position is the first thing a candidate sees. It needs to be brief, but at the same time clearly communicate the stature and duties of the role.

If you use internal titles like “Accountant II,” this may not communicate to an outsider what the job entails. An adjustment to “Senior Accountant” indicates that the position requires experience and includes managerial responsibilities.

Additionally, choose words that a candidate might use when searching for your position. Although a title like “Code Ninja” sounds zappy, it’s unlikely that a recruit would search for this. “Software Developer,” though cut and dry, is far more likely to show up in search results and connect to the right person.

5. Make It Scannable

Let’s face it. On the internet, no one ever reads anything in its entirety. There’s just way too many other fun things to be poking around in.

And so a job post that’s formatted for easy scanning allows the candidate to grasp the key ideas right away and know if it’s a fit.

Some techniques for simplifying postings include breaking paragraphs down into bullet points, and using punchy phrases to describe the job duties.

6. Tell a Story

As much as possible, paint a picture of your company in the job post. Include photos of the team, or a description of the job environment, and explain how the role fits within the entire team. Let the candidate understand their opportunities to grow within the company.

Candidates are future oriented and concerned with their career path, so when they see themselves within the story of your company, they’re more likely to stay in the position.

7. Avoid Tedium

You only have a few seconds of their attention span, so keep the language lively and relevant, and focused on essentials. There’s no need to include the minutia about the position or a laundry list of day-to-day duties. An experienced candidate understands what the position entails.

Include or Not Salary in the Job Description

8. Include Salary? Pros and Cons

The salary, of course, is a central consideration to any prospective client. And so it saves time both for you and the candidate to include it in the description, as this will immediately weed out no-fits.

Stating the salary also communicates transparency, which is a boon to any job description. It means you won’t be giving a different salary to a woman or a man, or discriminate by any other criteria.

At the same time, disclosing the salary puts you in a difficult negotiating position. If you state a low salary, it may eliminate some great candidates. However, if it’s too high, the company may not be in a position to negotiate without going over budget.

These are personal considerations, and the solution varies depending on the situation. However, even if the salary isn’t included in the original job post, in the interest of saving time, it should be disclosed in the initial interactions.

9. Address Theirs Musts

A great job post, ultimately, is about saving time as you hunt for a suitable candidate. And so identifying any disqualifiers the applicants might have helps to filter no-fits right away.

For an in-person job, consider revealing the location of your company, so the applicant understands the kind of commute it involves. Include any benefits the position offers, and disclose the work culture as well. An environment that requires working long hours at high intensity isn’t a fit for everyone.

And that wraps up the nine pointers for crafting a job posting. In summary, a good job post captures the attention of the candidate, and clearly and succinctly summarizes the job requirements and the company’s culture. It attracts the qualified candidates and compels them to respond. A well-crafted description simplifies the process and allows you to find that perfect fit right away.

Conclusion

Hiring someone takes time, talent, resources and energy. And the perfect job description is only half the battle. Finding that perfect candidate who’s going to check all the boxes means showing up at the right online platform.

Every job site has pros and cons, and there isn’t a right one for everybody. Most job sites cater to niche markets, so the best job sites for you depend on what you’re looking for in a candidate.

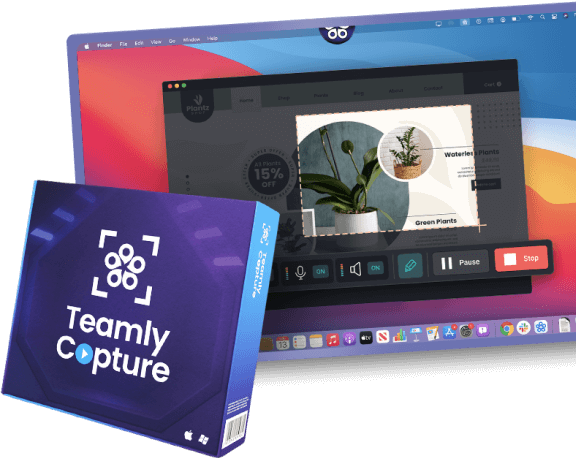
If you’re hiring collaboratively with a remote team, consider signing up for Teamly. This intuitive, easy-to-use project management software allows you to stay in the loop with team members and stakeholders all day long. Visit us and sign up today!

Get Your Software Project Moving: From Concept To Completion

Managing Software Projects

Have you ever opened an app or tried to use a piece of software and thought, “What the heck is this?” Maybe the user interface was confusing, or the code was buggy, or the software didn’t even work at all.

Chances are, the developer or team behind it didn’t do a good job managing the project. In fact they were probably just trying to get customers without focusing on the user experience.

To lead effective software projects, you need to get organized and stay ahead of the game. That’s why it’s crucial to understand why software management is important, what kinds of tasks must be completed, and why such projects can fail.

In this blog post, we’ll walk you through everything you need to know about how to manage a software project from start to finish. By the time you’re done reading, you’ll be more confident and better equipped to handle your next project. So let’s get started.

Why is software management important

Why is software management important?

If you haven’t noticed, software projects are everywhere—from the phone in your pocket to the dashboard of your car. It’s become undeniable that software is becoming increasingly intertwined with every aspect of life. You can even buy groceries through software.

Now, with that said, it’s easy to understand why software project management is so important. After all, if you’re running a software project that contains hundreds of thousands of lines of code, it’s essential to have a comprehensive plan in place to ensure everything goes smoothly.

Your most important objective as a software manager is to ensure the project is successful. To do this, you must ensure that all of the essential tasks are completed.

Here’s a brief list of what kind of things you may need to do when managing a software project:

  • Wireframes and mock-ups
  • Development and testing
  • Documentation and user guides
  • Bug tracking/issue solving
  • User acceptance tests
  • Deployment and maintenance.

Why software projects fail

Why software projects fail…

Maybe, you’ve experienced it yourself: the sinking feeling in your stomach when the software project you’re managing fails to accomplish its goals. After weeks (or months) of hard work, the last thing you want is for all that effort to go down the drain.

But here’s the good news: recognizing and addressing common pitfalls behind failed software projects can help you avoid repeating prior mistakes — like a virtual GPS system for navigating rough waters. So what are some of these missteps?

Well, first and foremost, there’s a tendency for people to skip important steps when developing a solution. They dive directly into coding without planning out the details or testing whether certain requirements are actually achievable. Think of it like building a house without taking time to put blueprints in place: work might continue but at some point, your structure will collapse without a solid foundation.

Similarly, launching prematurely — without verifying user needs or ensuring high-quality results — can lead to project failure. Aim to avoid this fate by investing time upfront to make sure everything is ready before pushing ‘Go’ on your venture.

Finally, bad communication between stakeholders and the development team can be a major source behind software project failure. Remember: everyone needs to stay on the same page, and that won’t happen if they’re not regularly talking to one another.

Types of Software Projects

9 Types of Software Projects You Should Know

What kind of software are you looking to develop? Are you working on a web application or mobile app development project? Knowing the type of software you’ll be developing is essential for successful software management. Here’s a brief list of nine common types:

  • Desktop applications
  • Web applications
  • Mobile applications
  • Embedded systems
  • Business software
  • Database systems
  • Gaming software
  • Machine learning projects
  • Cloud-based services.

5 common challenges when managing a software project:

Now that you know a few of the most popular types of software projects, let’s discuss some of the common obstacles faced when tackling them.

  1. Unclear Objectives: Without well-defined objectives, it can be difficult to measure success or to plan out an effective timeline. Make sure everyone is on the same page right from the start.
  2. Unmet Expectations: Software projects can easily require a lot of people and resources, which makes it hard to guarantee success. Aim to keep expectations realistic from the get-go in order to avoid disappointment down the line.
  3. Unexpected Costs: Cost overruns can often occur during software projects; be sure to plan for contingencies and allocate additional resources as necessary.
  4. Poor Onboarding of Talent: The onboarding process is key — you’ll need to ensure that everyone involved has a good grasp of the project and the tools they are working with. Especially, if they are coming into the middle of the process.
  5. Re-engineering: Re-engineering can be a major time sink, so it’s important to have a plan in place to fix any issues that arise quickly and efficiently.

Assembling Your Ideal Team

Assembling Your Ideal Team

Assembling the right team for software development is like assembling a world-class orchestra. All of the pieces must come together seamlessly to create beautiful music.

After all, the members of your team will be responsible for the success or failure of your software project. So, it’s extra important to surround yourself with experienced professionals who possess the right skills, motivation, and enthusiasm.

Finding Experienced Talent

But what specifically should you look for and how can you make sure they are a fit for your team?

First off a software team is often made up of a couple of specialized roles. These can include but aren’t limited to:

  • Developers: The “musicians” of the orchestra, responsible for writing code;
  • Project Managers: The “conductors” of the team, who will keep everyone organized and on-task;
  • Designers: The “artists” in the mix, in charge of ensuring the project looks and feels great;
  • Quality Assurance (QA) Engineers: The “critics” of the orchestra, keeping a close eye on any potential bugs.

In addition to these roles, it’s also important to keep an eye out for individuals who have experience in your particular software platform, as well as those with a strong sense of business acumen and problem-solving skills.

Where do you find the talent?

If you’re stuck wondering how to find the right people, don’t forget that there are plenty of online job boards and recruiting tools available to help match you with excellent candidates.

Upwork and Fiverr are our favorite go-tos for finding talent. They make it super easy to find professionals with the exact skills you need and allow you to narrow down your search using their detailed filters. Plus, they make paying and managing your team members simpler than ever. You can also consult staffing companies like DOIT Staffing or head hunters to find top talent.

Special Note: As you search these platforms, keep in mind that an effective post should focus on the key details such as job requirements, payment terms, deadlines, etc. Additionally, it’s also important to provide clear directions on how interested individuals can respond with their CVs or portfolio samples if available.

Something like this should do the trick:

“We are looking for an experienced software developer with knowledge of _____. The project will require ___ hours of work and will be compensated with a rate of ___ per hour. Please submit your CV and portfolio samples to___. Deadline for submission is ____.”

What if you’re paying per project?

If you are paying per project, rather than per hour, then it’s also important to provide a timeline and milestones for the team. This will help everyone stay on track and avoid any potential confusion or disagreements down the line.

Discerning if they’re a fit…

Once you have a list of potential candidates, it’s time to do your due diligence and make sure they’re the right fit for your team.

Don’t forget to evaluate them in terms of their overall compatibility with the team. After all, you want everyone to get along and work together efficiently; this means finding individuals who have compatible personalities and communication styles.

Most importantly, make sure to discuss the job in detail. This should include outlining your expectations, project timeline and deliverables. And even consider where the ambiguity is and how you might manage it.

In addition, make sure to assess each individual’s personality and attitude. After all, software development is often a team effort and the success of any project will depend on everyone being in sync with one another.

At this point, if all goes well, you have the perfect orchestra playing together in harmony — all ready to create beautiful music.

Software Development Project Life Cycle

Managing your project – The five phases of software development project life cycle

Once your team is in place, it’s time to focus on how best to manage the project. To do this, you’ll need to become familiar with the five phases of the software development project life cycle. This includes:

  1. Requirements gathering and planning
  2. Design and implementation
  3. Testing and quality assurance
  4. Deployment and maintenance
  5. Documentation

This is a well known framework for managing software projects. Each stage has its own distinct set of tasks and deliverables that need to be completed before you can move on to the next one. Let’s take a look at each one in more detail.

1. Requirements gathering and planning:

This stage is like writing the introduction to a novel: it sets the stage for all the exciting action to come. It might seem tedious or even unimportant, but this crucial step can help guide you and keep your work on track.

The goal of this stage is to define your project’s scope, timeline, and budget.

Scope = What the project should accomplish
Timeline = When it should be completed
Budget = How much it will cost

Scope

To arrive at your project’s scope you’ll need to consider a few factors:

  • What is the problem that needs to be solved?
  • Who will use the software?
  • What functionality does it need to have?
  • And what technologies must be used in its creation?

Timeline

When setting your project’s timeline, be sure to allow as much time as you need to complete the project. As they say, “Rome wasn’t built in a day!”

Also, be sure to break it down into smaller steps and establish individual deadlines. Then, set milestones off in the distance that act as signposts – not necessarily achievable checkpoints along the way, but places where you can take stock of your progress and course-correct if necessary.

Budget

Finally, the budget should match your timeline and scope. If you don’t have enough resources to complete the project on time and within budget, then it’s better to reevaluate or renegotiate rather than start off with a plan doomed for failure.

2. Design and implementation:

This phase includes creating system designs, wireframes and user interface mockups. It also includes determining the architecture of the system, as well as any programming or coding that needs to be done.

To create system designs, wireframes and mockups, you’ll need to have a deep understanding of the user experience. You’ll want to make sure that each element is designed with your users in mind and that they create a consistently pleasant experience.

Also, be sure to consider how this all fits within the architecture of the system, both in terms of data structure, programming language and any other technologies that need to be implemented.

If you were to analyze the most successful software projects, you would find that they all have one thing in common: careful consideration of the user experience and architecture. After all, your users will be the ones who determine whether or not a project is ultimately successful.

Testing and quality assurance

3. Testing and quality assurance:

This is an essential step in the process, and it’s important to take the time to do it right. This phase includes verifying that the software works as expected and is free of bugs and errors.

Testing the software thoroughly is essential to making sure it runs smoothly. This process also includes conducting user acceptance testing with select users to ensure that the system meets everyone’s needs and standards.

When TESTING keep in mind:

FIRST, make sure to test the functionality of your software. This includes everything from basic navigation and usability to more complex features. Testing all of the functionality of your software will help to ensure that it works as intended and that there are no hidden bugs.

SECOND, pay attention to how your software performs under different conditions. This means testing it on different operating systems, with different hardware, and under different loads. This will help you to identify any potential performance issues.

THIRD, make sure to test the software’s security. This is especially important if your project deals with confidential data or payments. Make sure that all of the security measures are up-to-date and working as expected.

FINALLY, don’t forget to perform regression testing. This is the process of running tests again after making changes or updates to the software. This will help to ensure that the changes did not introduce any new bugs or errors.

Taking the time to properly test your software is essential for ensuring its quality. By following these tips, you can make sure that your software is ready for launch.

4. Deployment and maintenance

Once your software is tested and ready to go, it’s time for deployment. This step involves making sure that all of the necessary files are in place and that the system is set up correctly. It also includes configuring any hardware or networks that will be needed to run the software.

In addition, you may need to do some last-minute updates or fixes prior to deployment, such as updating the user interface or adding new features.

Once your software is deployed, it’s important to maintain it over time. This includes keeping up with any security patches and bug fixes that may be needed. It also involves making sure that the system remains compatible with any new system updates that come out.

Keeping the lines of communication with customer service open is also important. Make sure that your users are able to get help whenever they need it, whether it’s answering questions or helping with any technical issues.

5. Documentation

Finally, documenting your project is essential for ensuring that everyone involved in the process understands how it works. Documentation can range from a simple list of features to more in-depth tutorials and user manuals.

Having up-to-date documentation makes it easier for future developers and users to get up to speed on the system quickly. It also makes it easier to troubleshoot any issues that may arise.

Conclusion

From assembling your ideal team to managing the development process, deploying your software, and maintaining it over time, there are a lot of steps involved in managing a successful software project.

By following the tips outlined in this article, you can ensure that your project is properly managed from start to finish. With the right team and planning in place, you can create an amazing product that users will love.

Thanks for reading. And be sure to come back and visit the Teamly blog for more helpful tips and tricks for all things project management related!

Resource Leveling: Staying Afloat in a Sea of Tasks

Resource Leveling

You’re in the middle of a project and things are going smoothly. The team is hitting their milestones and everyone is working together like a well-oiled machine. But then you get the dreaded call.

One of your team members is sick and won’t be able to work for the next two weeks. You can already feel the panic rising in your throat. What are you going to do?

This is where resource leveling comes in. Resource leveling is the process of managing resources – such as people, machines, and other resources – to ensure that all tasks are completed on time and with the right amount of resources. It’s like a life vest in a sea of tasks, keeping you afloat when times get tough.

Resource leveling helps you to prioritize tasks based on their importance, as well as to predict when and how much resources will be needed. This way, you can ensure that all tasks are completed in a timely manner without overburdening your team or running out of resources.

But what exactly is resource leveling, and how can you use it to your advantage? Let’s take a closer look.

What is Resource Leveling

What’s Resource Leveling?

Resource leveling is the practice of evenly distributing resources across multiple tasks in order to prevent too much or too little from being allocated to any one task.

The goal of resource leveling is to spread the workload evenly between team members, creating a healthy work environment and making the project schedule attainable. It’s also a great way to address any issues with availability of resources, such as if one team member is on vacation or has taken on an extra project.

Resource Leveling Examples

Let’s say you have two people working on a customer support project. One is assigned to work on the customer’s account setup, while the other is assigned to answer calls and assist with account inquiries.

The team member who is answering calls and assisting with account inquiries is getting overburdened by the demand for customer support. The other team member is not as busy and can pick up some of the slack if needed.

Using resource leveling, you could evenly distribute the workload by assigning each team member equal numbers of customer inquiries each day. This would help to make sure that both team members have enough work but aren’t overwhelmed with too much.

Most likely you’re already utilizing resource leveling in some way, but understanding the concept and actively planning your resources is key to ensuring that everyone on your team has enough work without being overburdened.

Resource Leveling Benefits

Four Ways that Resource Leveling Can Help

We’ve identified four ways that resource leveling can help your team stay afloat in a sea of tasks:

  • Smoothing out uneven workloads
  • Identifying bottlenecks early
  • Increasing visibility into project problems
  • Addressing scope changes

Smoothing out uneven workloads

Do you have team members who are always running around like chickens with their heads cut off, while others seem to have too much time on their hands? This can lead to frustration and resentment on both sides of the spectrum. Resource leveling evens out these uneven workloads by redistributing work among team members so that everyone has a more manageable workload.

Identifying bottlenecks early

Bottlenecks can seriously derail a project if they’re not identified and dealt with early on. By leveling resources, you can get an early indication of which parts of the project are going to require the most resources. This information can then be used to make adjustments to the project plan so that bottlenecks don’t become a problem later on down the line.

Increasing visibility into project problems

Another benefit of resource leveling is that it increases visibility into potential issues. By looking at how resources are being used (or not used), you can identify potential problems before they have a chance to cause major disruptions. This increased visibility can help you make better decisions about how to allocate resources and avoid potential pitfalls.

Addressing scope changes

If the scope of a project changes, it can often create havoc as far as resourcing is concerned. Resource leveling can help address these changes by determining how best to reallocate resources based on the new scope. This helps ensure that projects stay on track despite changes in scope and helps avoid last-minute scrambling to find additional resources.

Resource Leveling Tactics

7 Super Effective Resource Leveling Tactics

Now that you know how resource leveling can help, let’s take a look at some of the tactics you can use to effectively implement it.

Here are seven effective tactics for implementing resource leveling:

1. Borrow From Peter to Pay Paul

One way to level resources is by “borrowing” from another part of the project that doesn’t need those resources at that moment and using them where they’re more needed.

For example, if you have a team working on two tasks—Task A which requires four workers for two days, and Task B which requires two workers for four days—you might borrow two workers from Task A for the first two days of Task B, and then borrow two workers from Task B for the last two days of Task A. This ensures that both tasks get completed on time without any undue stress on your team.

2. Smash That Silo!

Silos are bad news bears for project managers. A silo mentality can lead to infighting among team members, hoarding of resources, and an overall feeling of mistrust among teammates. If you want your project to succeed, it’s important to encourage collaboration and break down silos early and often.

One way to do this is by creating cross-functional teams—that is, teams made up of members with different expertise who can complement each other’s skill sets. This kind of team environment fosters collaboration and prevents resource hoarding because members know that they need to share resources in order for the team to succeed.

3. The Cake Is a Lie! (Or Is It?)

In project management, it’s important not to promise more than you can deliver—but it’s also important not to deliberately lowball your estimates in order to make yourself look good. Nobody likes being lied to, least of all your project stakeholders.

A better approach is what one PMI member calls “deliberate optimism.” In other words, be realistic in your estimates but also err on the side of caution so that you don’t overcommit and end up disappointing people further down the line.

4. Keep It Lean (And Mean)

In lean manufacturing (and lean management more generally), one of the core principles is eliminating waste throughout the production process. The same principle applies to resource management: if there’s something getting in the way of efficient resource utilization, get rid of it.

This could mean anything from streamlining communication channels so that everyone is on the same page about what needs to be done when, or it could mean ditching outdated processes and tools that are no longer serving a purpose.

5. The Power of Prioritization

If you’re faced with a situation where resources are in short supply, one way to manage it is by prioritizing tasks according to their importance. This can be done manually or via software that can automate this process for you. We recommend Teamly not only for task management and tracking, but also for its powerful resource prioritization features.

By assigning values to tasks according to their importance, you can ensure that the most important tasks are being handled first and resources are not wasted on low-priority tasks.

6. Zoom Out For The Big Picture

It’s easy to get bogged down in minutiae when managing a project, so it’s important to take a step back every now and again and look at the big picture.

Ask yourself: What is the overall goal of the project? Which tasks need to be completed in order for that goal to be met? How can I best utilize my resources so that those tasks are completed efficiently?

7. Don’t Just React – Be Proactive

As a project manager, it’s important to stay ahead of the curve. If you see potential problems looming on the horizon, take steps to address them now rather than waiting for them to become a full-blown crisis.

This could mean having regular meetings with your team to discuss future plans, engaging with stakeholders to ensure everyone is on the same page, or training your team members in different skills so that they can take on more tasks in the future.

Resource Allocation, Resource Leveling, and Resource Smoothing

The Three Rs of Project Management: Resource Allocation, Resource Leveling, and Resource Smoothing

There are a lot of terms used in project management that can be confusing. In this case, three very similar-sounding terms are often used interchangeably: resource allocation, resource smoothing and resource leveling.

While these concepts all deal with the same idea—getting the right resources in place to achieve a project’s goals—each has its own distinct definition and purpose.

Resource Allocation

This is the process of assigning resources to specific tasks based on their availability and cost. The goal here is to make sure that you’re getting the most out of your resources in terms of quantity, quality, and price.

Resource Smoothing

The focus here is on balancing the amount of work across different areas or people in order to minimize interruptions to productivity. Here, the goal is to avoid peaks and troughs in demand so that your project runs as smoothly as possible.

Resource Leveling

As you know by now, this involves adjusting the timing of tasks and shifting resources around in order to make sure that everyone on your team has enough work but also isn’t overwhelmed by too much work. This helps to ensure that deadlines are met, goals are achieved, and resources aren’t wasted.

Types of Resource Leveling Tools

5 Types of Resource Leveling Tools Every Project Manager Needs

Luckily, there are plenty of different resource leveling tools out there that can help you keep your project on track. Here are five of the most popular types:

  1. Gantt Charts
  2. Critical Path Method
  3. Resource Allocation Matrix
  4. Project Management (PM) Software
  5. PM Templates

1. Gantt Charts

Gantt charts are one of the most popular tools for resource leveling (and for good reason). They provide a clear and easy-to-understand overview of your project, and they make it easy to see which tasks need to be completed when.

Plus, Gantt charts can be used for more than just resource leveling—they can also be used for project planning, task management, and tracking project milestones. In other words, they’re the perfect all-in-one tool for busy project managers.

2. Critical Path Method

The Critical Path Method (CPM) is another popular tool for resource leveling (as well as project management in general).

CPM is all about finding the shortest path from start to finish—which is essential for keeping your project on schedule and ensuring that it’s completed on time and within budget.

3. Resource Allocation Matrix

A Resource Allocation Matrix (RAM) is a tool that helps you assign tasks to team members based on their skills and availability. This is related to resource leveling because it ensures that each team member is working on tasks that they’re qualified to do—which frees up your time so that you can focus on other aspects of the project. RAMs can be created using spreadsheet software like Microsoft Excel or Google Sheets.

4. Project management software

If you’re looking to take your resource leveling to the next level, you might want to consider using project management software. These tools provide powerful tracking capabilities that make it easy to keep an eye on everyone and everything associated with your project.

They also come with a wide range of features, such as task allocation tools, automated notifications, and reporting functionalities—all of which can help you stay on top of your resource levels and ensure that everyone is working efficiently.

We suggest trying out Teamly. It’s free to get started and it has a lot of built-in tools that help keep your team connected and organized. Teamly has realtime chat features, which is great for when you need to keep everyone in the loop about any changes or updates.

It also allows you to assign tasks and track progress, view overall project progress and screen capture capabilities whether you need to make a quick video or capture a picture, you can do it all on Teamly. You can also save time with Teamly’s templates (see next point)

5. Project Management (PM) Templates

Finally, one of the best ways to make sure that your resource leveling is going smoothly is by using project management templates. Templates are pre-made project management documents that you can customize for your needs.

Teamly’s templates make it easy to create project plans, budget sheets, resource allocation schedules, and more—all without having to start from scratch.

They have over 100+ pre-written Standard Operating Procedures (SOPs) and checklists for virtually any business, so your team can easily establish best practices.Use the templates “as is” or edit them to better suit your needs.

Conclusion

Resource Leveling may not be the magic pill that fixes all of your resourcing issues, but it can help you manage your resources more effectively and avoid some of the pitfalls that can occur when you’re over-allocating your resources.

Revisit the tools and tactics outlined in this article to ensure that you have the resources necessary to complete your project on time, on budget, and with the highest quality possible. Best of luck!

Becoming a Decision Maker: What Managers Need to Know

Managers as Decision Makers

Attention managers, you have more power in your hands than you think. You can be an amazing decision-maker, both quickly and confidently.

If you want to be a successful manager, you need to make the right decisions – and make them fast. After all, what separates successful managers from the rest? It’s their decision-making abilities.

Making the right decisions isn’t just about gathering the facts and crunching numbers. It involves passion and courage too. You have to develop a strong sense of judgment and the ability to think on your feet.

So how can you become a fantastic decision-maker?

In this blog post, we’ll explore what it takes to be a fantastic decision maker. We’ll give you some tips and tricks and show you how to avoid common pitfalls. So, put on your thinking cap and let’s get started.

The role of a manager

The role of a manager

As a manager, you’re frequently called upon to make decisions. Some of these decisions are small and insignificant while others have the potential to change the course of a project—or even an entire company.

The bottom line is that you need to be confident in your decision-making abilities. And the only way to do that is to understand what it takes to make effective decisions.

4 Basic Types of Decisions

The reality is we all make decisions every day. Some are small, like what to wear or what to eat. Others are bigger, like whether to move to a new city or change jobs. But whether big or small, all decisions involve trade-offs.

There are four basic types of decisions: those that are simple, complex, risky, and ambiguous. Each type of decision requires a different approach. Here’s a quick overview of each:

  1. Simple decisions are made all the time, like deciding what to have for lunch. They don’t require much thought or analysis because the options and outcomes are clear. In work-related decisions, simple decisions are generally those that don’t have long-term implications.
  2. Complex decisions are more difficult because there are multiple variables and outcomes to consider. In work settings, complex decisions often involve multiple departments or teams and must be made with full awareness of the potential impacts.
  3. Risky decisions are ones where there is uncertainty around the outcome. These types of decisions require careful analysis of the risks and opportunities before making a choice.
  4. Ambiguous decisions involve a great deal of uncertainty and are often based on incomplete information. They require the ability to think creatively and come up with creative solutions.

Invisible Forces

Invisible Forces

Have you ever noticed how some decisions seem to be made effortlessly while others can feel like a struggle? Part of the reason for this is that there are invisible forces working on every decision.

These invisible forces can come in the form of biases, past experiences, emotions, and mental models. It’s important to recognize these forces so that you can weaken their effect and make better decisions.

Biases

Biases can have a huge impact on our decisions. We all have them, and it’s important to be aware of how they influence us. There are several well known cognitive biases, such as the confirmation bias and the status quo bias.

To avoid biased decision-making, be sure to seek out diverse sources of information. This will help you to see the situation from multiple perspectives and make a more informed decision.

Past Experiences

Our past experiences can also be a powerful influence on our decisions. We often draw on past experiences to inform our present decisions.

However, it’s important to remember that each situation is unique and requires its own approach. Don’t let old experiences dictate your decisions. Instead, take the time to evaluate each situation on its own merits. And be sure to remember that what worked in the past may not work in the future.

Emotions

It’s easy to let our emotions get in the way when we’re making decisions. After all, it’s only natural to feel nervous or excited when a big decision is on the line.

But it’s important not to let your emotions run away with you. Whether that’s fear, excitement, or something else entirely. Instead, take a step back and evaluate your options objectively. This will help you make better decisions.

Mental Model

Finding a Mental Model that works for you

One huge part of being a successful decision-maker is finding a mental model that works for you. A mental model is a framework that helps you look at problems from different angles and make more informed decisions.

There are many different mental models out there, so it’s important to find one that resonates with your values and approach.

Here are a few mental models to help get you started:

  • First-Principles Thinking
  • Second-Order Thinking
  • Inversion
  • The problem hypothesis
  • The five why’s

First-Principles Thinking

Tesla CEO and Tech entrepreneur Elon Musk has long been an advocate of first-principles thinking. This model encourages you to go beyond surface level observations and look at the underlying logic of a situation.

The idea is to start with basic facts and then build up from there. This helps break down any assumptions or preconceived notions and can give you a clearer picture of the situation at hand. Typically, this model is best used when there’s a lot of uncertainty or conflicting information.

For Tesla, this has been invaluable in helping them innovate and stay ahead of the competition. Essentially, they’ve revolutionized battery technology by removing the analogies that have been used before and starting with fundamental physics.

It works the same in management. By breaking down a problem and looking at the underlying principles, you can gain clarity and make better decisions.

Second-Order Thinking

This mental model is all about considering the consequences of your actions. It encourages you to think beyond the immediate outcome and consider the downstream effects of your decision.

For example, if you’re deciding whether or not to launch a new product, you need to consider the long-term implications. Will launching this product help you gain more customers? Or will it cause production and delivery costs to skyrocket?

It’s important to think beyond the first order effect and consider how your decision will ripple out into other areas of your business.

Inversion

This mental model is a bit more abstract, but it can be incredibly powerful. Essentially, it encourages you to think about the opposite of what you’re trying to achieve.

For example, instead of focusing on how to increase profits, invert the question and ask yourself how you could reduce profits. This helps you identify potential risks and hidden costs that you might not have considered before.

The problem hypothesis

This mental model encourages you to develop a hypothesis about the problem before jumping in. You need to ask yourself questions like: What do I know about this problem? How can I best approach it?

Let’s say you need to onboard a lot of new employees. What you know is that the process is going to be time-consuming and expensive. So you need to come up with a plan of attack that will help reduce onboarding costs while still ensuring quality of hires.

The Five Whys

This mental model encourages you to dig deeper into your problem by asking “why” five times. This helps you find the root cause of your problem and brainstorm solutions that can address this underlying issue.

Let’s say you’re trying to reduce employee turnover. You could ask yourself why employees are leaving, which then leads to more questions like why are they unhappy? What could be done to make them happier?

By asking “why” five times you can get to the heart of the issue and start developing a plan of action that will effectively reduce turnover.

Now that you’ve got some mental models for decision making in your toolkit, it’s time to put them into practice.

Implement Decision Making

6 Steps to Implement “Decision Making” With Your Team.

You know what they say: you can lead a horse to water, but you can’t make it drink. The same is true of decision-making in organizations. As a manager, you can make decisions all day long, but if you don’t have a system for implementation, those decisions will never see the light of day.

Think of implementation as the gasoline that powers the engine of your organization. Without it, you’ll just be spinning your wheels. But with a strong implementation plan, you can turn your goals and objectives into reality here’s how:

1. Get buy-in from your team.

If your team doesn’t believe in the decision you’ve made, they’re not going to be motivated to help you implement it. Create an affinity for the decision by involving your team in the process.

What’s the process? Well, you can use any of the mental models discussed above to help your team understand the decision-making process and get them on board with it.

Developing a culture of buy-in is critical to successful implementation.

2. Define what success looks like.

Ambiguity is the enemy of implementation. When you’re unclear about what success looks like, it’s easy to get sidetracked or lost along the way.

To avoid this, be sure to clearly define what success looks like for the decision you’ve made. What metrics should you measure? Who is responsible for each task? What timeline are you expecting?

The key is to set expectations for each decision and clearly define what success looks like.

3. Create a plan of action.

Once you know what you’re trying to achieve, you need to create a plan of action. What steps do you need to take to get there? Who needs to be involved? What resources do you need? Map it out so that you have a clear path to follow.

Having a plan of action not only helps you stay on track, but it also helps keep your team motivated. After all, when they know what comes next and have an understanding of the end goal, it’s easier for them to stay focused and get the job done.

4. Delegate and empower others.

You can’t do everything yourself, so delegate and empower others to help you out. Choose people who are passionate about the project and give them the authority to make decisions themselves. This will help you move faster and avoid getting bogged down in details.

A manager’s job is to make decisions, but it’s also important to empower others and give them the opportunity to contribute.

5. Establish checkpoints to keep the team on track.

Decision-making isn’t a one-and-done process — it requires ongoing oversight and accountability to ensure successful implementation. Set up regular check-ins with your team to review progress, celebrate successes, identify areas of improvement, and adjust course when needed.

By implementing these checkpoints, you’ll be able to quickly identify any potential problems and course-correct before they become roadblocks.

6. Be prepared for challenges.

No matter how well you plan, there will be times when things don’t go as expected. Be flexible and creative in your approach to problem-solving and stay focused on the end goal.

Don’t let challenges derail you — instead, use them as an opportunity to learn and grow so that you can make even better decisions in the future.

At the end of the day, effective decision-making isn’t about having all the answers — it’s about being able to make decisions with confidence and implement them successfully.

Evaluating results

Evaluating results

You know the saying, “Hindsight is 20/20”? Well, in business, we like to call that “evaluating the results of your decision making.”

After all, you can’t improve what you don’t measure, and you can’t make sound decisions without knowing how your previous decisions turned out. In other words: you need to evaluate the results of your decision making in order to be a better decision maker.

But how do you evaluate the results of your decision making? To start, you need to take a step back and look at the big picture. What were your goals when you made the decision? Did you achieve them? If not, why not? Were there unforeseen circumstances that got in the way?

You also need to consider the impact of your decision on those around you. Did it help or hinder your team’s performance? How did it affect your relationship with your manager? These are important factors to consider when evaluating the results of your decision making.

Finally, you need to be honest with yourself. This can be tough, but it’s essential if you want to improve your decision making skills. Were you happy with the outcome of the decision? If not, why not? What could you have done differently?

Don’t be afraid to ask these questions and be honest with yourself. Evaluating the results of your decision making is the only way to ensure you’re making better decisions in the future.

Summary

The ability to make decisions quickly and efficiently is a hallmark of successful leadership. Of course, not all decisions are created equal.

As a manager, you’ll encounter different types of decisions that require different levels of analysis. By understanding the different types of decision-making models, you can streamline your process and make better choices for your team.

Implementing those decisions effectively is another challenge altogether, but one that can be overcome with careful planning and execution. Finally, it’s important to evaluate the results of your decisions and learn from any missteps. With these tips in mind, you’re on your way to becoming a masterful decision-maker. Thanks for reading!

Resource Scheduling Methods, Guidelines & Strategies that Every Project Manager Needs to Know!

Resource Scheduling Methods in Project Management

Have you ever had a client whose head is in the clouds? Maybe she wants a new porch, a hot tub and a brand new kitchen, all in under a few weeks.

Or has a client ever come to you in the middle of a complex project, asking you to speed things up and complete everything ahead of schedule?

Sometimes project management is about giving clients a reality check. Resource scheduling, particularly, gets down to the nitty gritty and carefully examines labor, materials and equipment to determine when something can really be completed, and at what cost.

At other times, you don’t have to pop their balloon and bring them back to planet earth. A few resource allocation tricks allow you to tweak and finesse a schedule, and deliver the seemingly impossible.

Interested in learning more? This post gets down to the basics of resource scheduling methods, including scheduling guidelines, hacks for busy project managers and more!

The Process of Developing a Resource Schedule

The Process of Developing a Resource Schedule

One central objective of a project’s planning stage is to create a schedule that really works, given all of the project’s constraints. “Really works” is key, but it’s also a challenge. In order to develop a viable schedule within the project’s scope, timeline and budget, planning is completed in stages, with resource scheduling coming near the end.

Let’s go over the steps for generating a reliable schedule, with a particular focus on where resource planning comes into the process.

1. The Assignment

During the initiation stage, a project manager receives the assignment, and is provided with a basic outline of its objective, timeline and budget.
This stage is about looking at the project in a broad sense. A feasibility study determines the project’s ROI and whether or not it makes sense to move forward. This study outlines the key resources required to achieve the objective.

2. Work Breakdown Structure

Once the project is green lit, the project manager puts his nose to the grindstone, scoping things out and laying a solid foundation. Primarily, he communicates with all stakeholders and gathers requirements.

Using the overall objective and high level requirements, it’s possible to create a work breakdown structure (WBS), which separates the project down into increasingly smaller work packages. The WBS, in essence, outlines all of the work required in a project, and is a template for determining the resources needed.

Work Breakdown Structure

3. Resource Breakdown Structure

The WBS segways right into creating a resource breakdown structure (RBS).

A resource breakdown structure examines all of the resources required to complete a project’s objective. Just like a work breakdown structure, it’s a hierarchical grid that starts with the project’s central objective. Rather than breaking things into work packages, however, the lower tiers examine the labor, equipment, materials and facilities required to complete each requirement.

Resource Breakdown Structure

The RBS is an excellent tool for outlining a project’s total resources. It’s used alongside the WBS to create a schedule.

4. Critical Path

With all the work codified, the next step is arranging activities in a sequential order, and identifying interdependent activities. The critical path method looks at all the tasks in the lower tiers of the WBS, and plots them sequentially in a network diagram. This diagram arranges activities in relation to one another, carefully considering which must be performed ahead of others, and which activities can be completed at the same time.

Critical Path

A network diagram also identifies dependencies between tasks. A dependency is a relationship between two activities that determines when one activity can begin. For example, in the project of building a house, the drywall must be installed before the electricity is wired. As one of these tasks must be completed before the other, these two tasks are dependent.

This initial critical path is only preliminary, as it doesn’t consider resource constraints. These are considered in the following step.

5. Resource Allocation

Now it’s time to allocate resources. Completing the previous stages allows this stage to be completed with precision.

The preliminary network diagram, to some extent, is created in a fantasy land where multiple people can do multiple things at same time, people are multi-skilled and equipment, materials and supplies are in unlimited supply. A resource analysis adds some reality to the network diagram.

Resources are an umbrella for many aspects of a project. They include all laborers (salaried and hourly), the equipment used to create the deliverable, and the materials used within the final project. Resources even refer to facilities, such as office space and porta potties for construction projects.

Resources generally have a capacity, limit, or constraint. Take people for example. One person cannot do two tasks at the same time, nor can he perform tasks outside of his skill set. Labor may be limited by market conditions, as well. Or perhaps someone’s hourly rate won’t fit with the project’s budget.

Equipment and materials have their own respective constraints. One piece of equipment, generally, cannot work on two activities at the same time. And some materials are only available in certain amounts, or in certain seasons.

This scarcity plays a central role in resource scheduling. Resource allocation primarily is about identifying a resource’s constraints, and creating a schedule that works within them.

At this stage, the project manager utilizes several guidelines and strategies (discussed later in greater detail) to develop an efficient schedule that stays within the project’s budget, scope and timeline, and that also considers dependencies between activities and constraints on resources.

Resource scheduling can increase the critical path, and sometimes it increases the budget as well.

6. Schedule Creation

And finally, with allocation of resources, it’s possible to create a schedule. This schedule usually looks different from the initial critical path. Allocating resources usually means that certain activities have been rearranged, and other activities have been broken down, depending on resource availability. This is also the stage for creating a budget, as the amount and cost of required resources is clear.

Creating a dependable and sensible schedule is a logical and orderly process. Allocating resources and creating a final schedule comes toward the end of project planning, as it uses information gathered in the preliminary stages.

Resource Scheduling and Allocation

Guidelines for Resource Scheduling and Allocation

Consider these guidelines for best results when allocating resources.

Multi-Tasking Is a Myth

Generally speaking, we cannot do two things at the same time, unless one of the activities is passive, like listening to music or waiting for paint to dry.

Performing two tasks that both require cognitive skills at the same time in fact makes people less efficient, and work performance declines.

When scheduling resources, rule out assigning two tasks to the same person at the same time. Even though it might look efficient on paper, ultimately this leads to a decline in work performance and the project suffers.

Less Float Before More Float

When two activities with float need to be scheduled in sequence due to resource scarcity, schedule the activity with the least amount of float first. (Float is a measurement of an activity’s flexibility; for example an activity may have two days of float, or two weeks of float.)

For example, if Activity A has two weeks of float, and Activity B has only one, schedule Activity B before Activity A.

This principle prioritizes the more urgent tasks over the less urgent, and decreases the likelihood of a delay in the project’s overall completion.

More Resources Before Fewer Resources

In a similar vein, when two activities requiring unequal resources need to be scheduled in sequence, schedule the activity that uses more resources first.
For example, if the project is to design a website, and Activity A involves a software designer and a copywriter, and Activity B only involves the copywriter, schedule Activity A first.

This way, the more complicated tasks are completed right away. Complicated tasks, generally speaking, come with greater risks, so it’s best to complete them sooner and leave the simpler ones for later.

As we’ll get into next, resource scheduling is strategic, and following these best practices guidelines increases the likelihood that a project runs smoothly.

Resource Scheduling Methods

Resource Scheduling Methods & Strategies

If you’re pulling your hair out wondering how to meet a deadline, sometimes pulling a few tricks out of your hat makes everything come together like magic.

This section explains resource allocation and schedule compression techniques, both of which finesse and create efficiencies in a schedule. These techniques work best when they’re applied in the order listed below.

Resource Leveling

Resource leveling is an allocation technique that’s used when the demand for a resource exceeds the supply. This oftentimes occurs when two activities on the network diagram are scheduled in parallel, and both require the same resource. For example, say Activity A and Activity B are scheduled on a Wednesday, and they both require the same equipment. This scenario is impossible. Leveling out the schedule requires adjusting the network diagram so that activities A and B are in sequence, rather than parallel.

Resource leveling means having a reality check. It examines the schedule to see if it actually works, given the constraints of people, equipment and materials. This is an initial step when adjusting a resource schedule, and it often results in extending the project’s deadline.

Resource Smoothing

Resource smoothing is another allocation technique that is used after resource leveling. It re-allocates resources to create a more even distribution throughout a project.

For example, if the critical path schedules someone to work two twelve hour days, smoothing re-distributes the work over three or four days instead.

Smoothing only looks at activities with float and adjusts their start and finish times. (Float is an activity’s wiggle room, essentially.) Resource smoothing does not extend a schedule, that is to say. Rather, it works within the given schedule to create a reasonable workflow.

Smoothing doesn’t work in every scenario, but when it does, it’s a useful way to ensure work is performed moderately and consistently.

These two resource allocation techniques help to remove logjams and smooth wrinkles in a schedule. Once this is complete, the next step is to find ways to make the schedule more efficient. The following compression techniques play a central role.

Crashing

If a client asks you to speed up a project, and move the deadline ahead by a few weeks, this sometimes necessitates crashing the schedule.

Crashing is a schedule compression technique that adds more resources to shorten the time it takes to complete an activity. Oftentimes, this means increasing the cost in order to get something done faster.

For example, maybe a construction team is building a deck onto a house. It’s using two carpenters and is slated to last three weeks. By adding two additional carpenters, the project in theory can be completed in only a week and half!

Crashing doesn’t always work. The duration of some projects cannot be compressed by the addition of more resources. Take the deck example. Suppose that one part of the project entails staining the wood, and this takes four days to dry. This process cannot be sped up with the additional carpenters. Crashing doesn’t work at other times because the additional resources don’t work within the project’s budget.

When it does work, crashing is an ideal compression technique as it generally doesn’t add a whole lot of new risk to a project.

Fast tracking

Fast tracking, as the name suggests, is another technique for speeding up a project. It entails taking two sequential activities on a critical path and arranging them parallel to one another.

Consider a house remodel. Maybe the initial plan was to build a deck, then a fire pit and then an outdoor oven. Fast tracking builds all these at the same time.

Fast tracking may look like multitasking, but of course it doesn’t work in every scenario. First and foremost, it only works when the resources allow for it. Assigning the same person to build two things at the same time clearly won’t work. It also doesn’t work when two tasks have hard dependencies. This means that one task must be completed before another.

Fast tracking introduces risk to a project. Oftentimes two activities, without having hard dependencies, are best completed in sequence rather than in parallel. Changing the sequence may lead to re-work.

Fast tracking has more downsides than crashing, and so it should be used in moderation. However, when it’s the only possibility, it’s an effective way to shorten a project’s schedule.

All of these techniques play a key role in resource scheduling. Note that none of them changes the project’s scope. The same amount of work is completed in every instance.

Resource Scheduling

Conclusion

Once you have a project, you know the tasks, and you have a WBS, the next step is to determine how it’s actually going to get done. Resource scheduling is about getting down to nitty gritty and creating a schedule that works within all the constraints of the project’s resources.

Sometimes it’s a bit of a reality check, similar to planning an extravagant vacation, and then looking inside your wallet. When you look at the hard facts, plans have a tendency to change.

Resource scheduling takes an orderly and logical approach to a project. Oftentimes, when the resources are all laid out, the critical path is adjusted and tweaked.

A remote team presents a special set of challenges to project planning. If you’re scheduling resources for a remote team, consider using Teamly, the project management software that makes scheduling and sharing workflows a cinch. Visit us and sign up today!

Ready to Take Control of Your Projects? Learn How Process Automation Can Help!

Process Automation in Project Management

Have you ever felt overwhelmed by the sheer amount of tasks and projects that need to be done? The deadlines looming, the hours I’ve worked and it still doesn’t seem like there is enough time in the day?

If this sounds familiar, then it’s time for you to take a step back, take a deep breath and get on board with process automation.

What is Process Automation

What is Process Automation?

In a nutshell, process automation is using technology to automate tasks that would otherwise be done manually. It’s perfect for project managers, small business owners, and anyone who feels like they’re constantly playing catch-up.

You can think of process automation like your trusty sidekick. It’ll be there to help you out whenever you need it, taking care of the tedious tasks that would otherwise take up your precious time.

This could be something as simple as setting up an email response to thank someone for subscribing to your newsletter or something more complex like setting up a CRM system to track your sales pipeline.

Here’s an example, let’s say you run an online store. Every time someone places an order, you have to send them a confirmation email. Most website builders have a feature that allows you to automatically send out thank you emails when someone places an order, which can save a ton of time.

Without this automation, you would have to manually send out each email, which would take up a lot of your time. Because not only do you have to write the email, but you also have to enter in each customer’s information.

Another common example of process automation is social media scheduling. If you’re running a business, chances are you need to post regularly on social media in order to keep customers informed and engaged.

Rather than manually scheduling each post, you can use a service like Buffer to automatically schedule your posts in advance. This way, you don’t have to worry about forgetting to post or struggling to come up with content every day.

Project Process Automation

Process automation & your next project…

Who’s doing what, and when will they have it finished? As teams grow, it can become harder to keep track of those oh-so-important details. Process automation can help by automating mundane tasks like collecting feedback, or keeping an eye on deadlines.

Honestly, process automation is a project manager’s best friend. Just like having your own personal assistant, process automation can take care of all the little mundane details that you don’t have time for. It can keep track of tasks, deadlines, and more so you don’t have to.

Think of it as a helpful robotic assistant that never tires, never slows down, and never takes a break. It can make sure tasks are completed on time and keep everyone in the loop about progress.

Just remember, your only as good as the tools you have. So make sure to invest in quality automation software so that it can help streamline your workflow and keep you on top of all the moving parts of your projects.

Process Automation to Save Time

How Process Automation Can Help You Save Time

As we mentioned before, one of the biggest benefits of process automation is that it can save you time. But how exactly does it do that?

Well, think about it this way: if you’re spending two hours every day on tasks that could be automated, that’s 10 hours per week—40 hours per month. That’s a lot of time that could be spent on more productive activities.

Not to mention, process automation can also help you avoid human error. We’re all susceptible to making mistakes, but if a task is automated, there’s no chance for human error. This is especially important for tasks that require attention to detail, like data entry.

Why Process Automation is Crucial

Several reasons why it’s crucial for your projects…

In addition to saving you time and reducing the chances of human error, process automation can also help you:

  • Save money
  • Improve customer service
  • Increase efficiency
  • Scale your business

Save money

Process automation can also save you money. For example, if you automate customer onboarding emails, you’ll spend less time writing and sending individual emails. Or, if you use a chatbot on your website instead of hiring a customer service representative, you’ll save money on salaries and benefits.

Improve customer service

Process automation can also help you improve your customer service. Especially if you use technological tools like chatbots to interact with customers. Not only will this free up your time, but it will also allow you to provide 24/7 customer service.

Plus, if you use a tool like Intercom, you can automatically send custom messages to people based on their behavior on your website. So, if someone abandons their shopping cart, you can send them a discount code to encourage them to come back and complete their purchase.

Increase efficiency

Another benefit of process automation is that it can help you increase your efficiency. By automating tasks, you’ll be able to get more done in less time. And, as we all know, time is money.

Plus, if you automate repetitive tasks, you’ll free up your brain power to focus on more important tasks. This is especially beneficial if you work in a creative field like marketing or advertising.

Scale your business

Process automation can help you scale your business. If you’re manually doing tasks that could be automated, you’re only able to do as much as you can physically do in a day. But, if you automate those tasks, you’ll be able to do more without having to hire additional staff.

This is especially beneficial if you’re a solo-preneur or small business owner. Automating tasks will allow you to do more without having to take on the additional overhead of hiring employees.

Of course, there are some tasks that shouldn’t be automated. For example, if you’re a freelance writer, you probably don’t want to automate your entire writing process. But, there are some parts of your business that can be automated, like social media scheduling or invoicing.

Saves You Headaches In the Long Run

Not only can process automation save you time and money in the short run, but it can also save you headaches in the long run.

For example, if you automate your social media scheduling, you’ll never have to worry about forgetting to post or having to stop what you’re doing to post. And, if you use a tool like Hootsuite Insights, you can track your social media analytics and see what’s working and what’s not.

Plus, if you automate your customer onboarding process, you’ll never have to worry about manually sending emails or creating welcome packets. And, if you use a tool like Intercom, you can automate your customer support and never have to worry about responding to customer inquiries.

Downsides of Process Automation

What are the Downsides of Process Automation?

Of course, there are some downsides to process automation. For example, if you automate your social media scheduling, you won’t be able to post in real-time.

Plus, if you automate your customer onboarding process, you won’t be able to personalize the experience for each customer. And, if you use a chatbot to interact with customers, you won’t be able to build the same rapport as you would if you were speaking to them on the phone or in person.

To be honest, the main downside is cost. If you’re on a budget, the cost of setting up an automated system can be prohibitively expensive. But, there are some tools out there that are either free or have low-cost plans.

Finally, process automation can be time-consuming. If you’re not careful, you can spend more time setting up your automation than you would if you were doing the task manually. But, if you take the time to set up your automation correctly, it will save you time in the long run.

Phases of project management with automation

Considering the 4 phases of project management with automation

All projects, whether small or large, have four distinct phases. These include planning, execution, monitoring, and closure. Each of these steps is important in ensuring the success of a project.

Process automation can help streamline each step of the project management process, here’s how…

1. Planning phase

During the planning phase, or the initial phase of any project, the main objectives are identified, the scope of the project is defined, and resources are allocated.

In this initial phase, the major processes utilized can include figuring out a time frame, allocating a budget, measuring risk, and assessing resources. A huge part of this phase is spent on gathering data and then organizing it into useful information.

Process automation can help streamline the planning process by automating the data-gathering phase, which can be quite tedious and time consuming.

Automation tools can help collect and organize the necessary information quickly and efficiently, while also providing a platform for generating reports and insights.

2. Execution phase

The execution phase is the second step in any project and it’s when all of the planning comes to fruition. During this stage, tasks are assigned and resources are used to move forward with the project.

Automation tools can help streamline this process by helping to manage schedules, assign tasks, and track progress. Automated systems can also be used to send out reminders for upcoming tasks and deadlines.

3. Monitoring phase

In the monitoring phase, progress is tracked and reported on. During this stage, all team members can analyze the progress of the project, identify potential risks and issues, and adjust plans accordingly.

Automation tools can help streamline this process by providing real-time data, tracking progress, and analyzing results. Automated systems can also be used to generate reports which can be shared with team members.

4. Closure phase

The closure phase is the final step in any project. During this stage, all of the tasks and objectives are completed and resources are released. The goal is to make sure that all goals have been met and all stakeholders are satisfied with the outcome.

Process automation can help streamline this process by automating some of the final tasks such as archiving documents, sending out final reports, and releasing resources.

Utilize Project Automation for Your Team

How to Utilize Project Automation for Your Team

Now that you’ve seen the potential benefits and downsides of process automation, you might be wondering how to get started. The good news is, it’s not as difficult as you might think. All you need to do is to…

1. Define Your Goals

First, you need to figure out what tasks you want to automate. Look for tasks that are repetitive or time-consuming.

For example, if you’re a freelance writer, you might want to automate your invoicing process. Or, if you’re a small business owner, you might want to automate your social media scheduling.

2. Choose Your Tools

Once you’ve defined your goals, it’s time to choose the tools you’ll use to automate your tasks.

We recommend finding a tool that specializes in automating projects and processes. There are a variety of tools available, so you’ll want to shop around and find one that has all the features you need.

A tool like Teamly could be perfect. Its user-friendly kanban boards can really help prevent work from being lost in the shuffle. With Teamly’s boards, users can create customized workflows, assign tasks, and automate repetitive activities. It’s like the best of both worlds – automation and organization.

But what if your managing social media posts and want to save time on the same? Automation tools like Buffer, Hootsuite or SocialPilot can help you schedule posts in bulk and even track their performance.

What if you are managing customer support? Tools like Zendesk or Help Scout can help you automate customer support tickets and provide better customer experience. With customer support we always recommend having a human representative on standby to answer difficult queries, however, process automation can certainly help streamline the process. Especially when we’re talking about common everyday inquiries.

3. Establish Rules

The next step is to establish rules or parameters for the automated processes. This will help ensure that everything is running smoothly and you don’t run into any unexpected issues.

For example, if you’re automating your customer support process, you’ll want to set rules for how quickly inquiries should be responded to, who is responsible for responding to them, and what types of inquiries are considered urgent.

By setting these rules and parameters in advance, you can help ensure that your automated processes are running smoothly.

4. Monitor and Adjust

Finally, you’ll want to monitor your processes and adjust them as needed. Process automation can help save time in the long run, but that doesn’t mean it’s a set-it-and-forget-it kind of thing. You’ll still need to keep an eye on things to make sure everything is running as expected.

Think of process automation like a car. You can set it up and program it to do what you want, but you still need to make sure that the oil is changed and the brakes are in good condition.

Takeaways

Process automation is a great way to save time on repetitive tasks, increase efficiency, and improve customer service.

It’s easy to get started with process automation – all you need to do is define your goals, choose the right tools for the job, establish rules and parameters, and monitor and adjust as needed.

So if you’re looking for a way to streamline your processes and free up some time in your day, process automation is definitely worth considering. Ready to get started? Put the pedal to the metal and let’s go!

Project Best Practices: How to Use Smoothing in Resource Management

Resource Smoothing

Project planning is a long process. Even after huge milestones are met, things are usually still in a tangle. Getting everything firmly into place requires several more yanks with a fine tooth comb.

Gathering all the requirements and then defining the project’s scope is a significant threshold, for sure. Yet, during the process of allocating resources, it often becomes apparent that things are really out of whack.

Some people may be working several twelve hour days, with huge breaks in between, while others are assigned to two tasks at the same time. Plus, the equipment may not be available when it’s needed.

There’s still a lot to smooth out.

This final stage of teasing things out is known as resource allocation. After extending the project schedule if need be, it’s all about distributing resources in order to suit people’s desires and preferences. The two techniques used in resource allocation are known as resource smoothing and resource leveling.

Are you wondering more about resource smoothing in project management? This post examines resource smoothing within the broader framework of resource management, and compares it to resource leveling.

Resource Management

Resource Management: Process & Strategies

Resource smoothing is a central technique in resource management. Before discussing resource smoothing, then, it’s helpful first to clarify everything included in the term resource, and briefly explain the resource management process.

Resource: A Definition

In project management, resources refer to many things, including people, objects, and money.

The PM Glossary defines it as: “The elements needed for a project to successfully meet its objectives. Examples of resources include equipment, staff, locations, facilities, and money.”

Resources include the equipment needed to complete a project, as well as the materials within the final project. They also include everyone who works to bring a project to completion.

For example, in a construction project, resources include the backhoe used to excavate the property, the concrete used in the foundation, as well as both the contract labor and the salaried employees. It includes the money to pay for it all, as well.

Resource Management: The Process

Resource management is all about when you use resources within a project, and how they’re used. It is a process that begins with planning all the necessary resources, then continues with both scheduling and allocating them. Let’s look at some preliminary steps to developing a resource management plan, in order to identify where project smoothing occurs in the process.

Project's Scope

1. Determine the Project’s Scope.

Once all the requirements have been collected by the stakeholders, it’s possible to determine the project’s scope. Using the timeline, the budget, and the requirements, the scope is outlined in a scope document that clarifies the requirements, constraints, exclusions and assumptions.

2. Create a Work Breakdown Structure (WBS).

A work breakdown structure displays all of the work packages required to fulfill the project’s requirements. It is created by decomposing a project’s high level requirements into increasingly smaller tasks. It clarifies all of the project’s required resources.

3. Determine Required Resources.

Using the small tasks at Level 3 and Level 4 of the WBS, it’s possible at this point to determine all the resources required to complete a project, including the supplies, equipment, labor and money.

4. Use Resources Allocation Strategies.

Even though the resources required to complete the project are clear, there are still a lot of things to smooth out.

When tasks and resources are laid out onto a project’s schedule, all sorts of conflicts become apparent. Some people have been over allocated to various tasks. In other instances, equipment and materials won’t be available at the scheduled time.

This is the stage for applying resource allocation strategies.

What is resource allocation? The Project Management Glossary defines it as: “The assigning and scheduling of resources for project-related activities, ideally in the most efficient manner possible. Resource allocation is typically handled by a project manager, though they may be overridden by a program manager if resources are to be shared between multiple projects.”

As previously stated, resource smoothing is one of the two central resource allocation techniques.

With these clarifications, it’s time to discuss resource smoothing.

What is Resource Smoothing

Resource Smoothing: Definition & Benefits

Resource smoothing is a method for optimizing resources and equally distributing them throughout a project.

The Project Management Glossary defines it as: “A technique that makes use of float when allocating resources so as not to affect total project duration. It is used when project time constraints are important. Resource smoothing does not affect a project’s critical path.”

Resource smoothing does not extend a project’s completion date. After it’s utilized, that is to say, the critical path remains the same. Rather, this allocation technique focuses on non-critical activities, those with float or slack.

Float or slack are basically the same thing. They are a measurement of an activity’s wiggle room. The Project Management Glossary defines each as:

Slack time – The length of time an activity’s early start can be delayed without affecting project duration.

Float – A measure of the schedule flexibility involving a particular task.

For example, say an eight hour project needs to be completed within one week. Its slack, or float, would be four days. Slack and float can also be measured in hours.

Resource smoothing cannot be not delayed any longer than an activity’s total float. Using the previous example, this means the activity cannot be scheduled during the following week without impacting the critical path, and causing delays to other activities.

Resource Smoothing Histogram

As displayed by this histogram, smoothing evens out resources within a project without extending the project.

Smoothing isn’t so much about constraints, that is to say, but it’s about desired limits. It’s about making resources sensibly distributed within the constraints of the critical path.

Benefits of Smoothing

Smoothing doesn’t always work. When two activities have hard dependencies, for example, things cannot be shifted around. But when it is possible, smoothing a project provides several clear and tangible benefits.

1. Prevents Burnout

Most people are willing to work 40 hours in a week. At the same time, most people get burnt out from a 12 hour workday. A lopsided work schedule quickly leads to a place of burnout and exhaustion.

Smoothing is about distributing and equalizing work. If all the work for one week is scheduled from Monday to Wednesday, for example, smoothing distributes the work into the final two weekdays as well, in order to create a more rounded schedule.

2. Prevents Overuse of Equipment

Smoothing encourages the moderate use of equipment. When a project has been smoothed and resources equally allocated, it precludes a scenario where equipment gets overused and worn down quickly.

3. Improves Company Culture

Work-life balance is one of the pillars of a healthy workplace culture. Smoothing respects work and life boundaries, and creates an environment where people have time for work and for the rest of their life as well.

As explained, smoothing doesn’t consider a project’s constraints. Rather, it quite literally smooths things out, within the given constraints. It’s like smoothing out a sandbox with a little rake. Nothing goes beyond the walls of the sandbox, but everything within it gets leveled out.

An example of smoothing helps to demonstrate where and how it works within a project.

Resource Smoothing Example

Example of Resource Smoothing

Let’s look at an example of a kitchen remodel that has three principle installation tasks. The backsplash, the cupboards, and the refrigerator all need to be installed by the end of the week. One person is hired to complete the cabinets, while a second is hired for the second two tasks.

The cupboards take 40 hours to install, while the backsplash and the refrigerator each take 10 hours. The second two tasks, then, each have 30 hours of float.

Originally, the refrigerator and the backslash are scheduled to be completed on Monday and Tuesday, in 10 hours each day. The cupboards are to be installed over the entire week, in equal increments of time.

However, upon closer examination, the resource manager decides to disperse the backsplash and refrigerator installations over the entire week, utilizing the float for each task. Monday and Tuesday are dedicated to the backsplash, with five hours each day, and Wednesday and Thursday are dedicated to the refrigerator, again with five hours each day.

The benefit or objective of smoothing is to find breathing space in a schedule. Shifting activities with float evens out work schedules so that a more equal amount of work is completed on each day of the project. It doesn’t change the critical path, or the overall timeline of the project.

Resource Leveling

Leveling: The Other Resource Allocation Technique

Sometimes when a project manager takes a closer look at a project’s critical path, it becomes clear that things need to shift around. For example, maybe two tasks scheduled in parallel require the same person to work for eight hours. Clearly, these two tasks need to be scheduled in sequence. If one task is on the critical path, this extends the critical path by eight hours.

This demonstrates a resource allocation technique known as leveling.

Resource leveling is defined as: “A technique that involves amending the project schedule to keep resource use below a set limit. It is used when it is important to impose limits on resource use. Resource leveling can affect a project’s critical path.”

Resource leveling focuses on resources with constraints. Sometimes a resource is only available at a certain time, or in certain amounts. When this scarcity is taken into account, it can impact the project’s timeline and its critical path.

Leveling and smoothing are both integral to the resource management processes, in seeing that all resources in a project are properly scheduled and distributed.

Resource Leveling and Resource Smoothing

Leveling and Smoothing: Comparison and Contrast

Leveling and smoothing both focus on resource allocation, but each function a little differently. Let’s compare and contrast the two.

Constraints versus Desires

Resource leveling is driven by constraints, while resource smoothing is driven by desires. Another way to say this is that leveling is a must, and smoothing is a should.

Resource leveling means the reallocation of resources when there is no other option. For example, if a task is scheduled for Monday, but the necessary equipment is only available on Tuesday, then the task must be moved to Tuesday.

Resource leveling, rather, caters to preferences. It’s about evening things out so that no one is burdened with a heavy workload, and no work schedules are lopsided.

Leveling Before Smoothing

When firming up a project’s schedule, the process of leveling is applied before smoothing. This determines the final critical path.

Once the path is in place, it’s then possible to find activities with float, and smooth out the resources wherever possible.

Leveling May Increase the Schedule

Leveling affects the critical path and so it usually increases the project’s schedule. Smoothing is only applied to non-critical activities, or those with float. Smoothing maintains all of a project’s time and budget and scope constraints, and moves things around within them.

Conclusion

Now that we’ve gone over the basics of smoothing and resource management, here’s a question: Is the project manager a resource to manage?

That’s a bit of a stumper.

But back to the central point: project smoothing is about meeting desired limits, rather than hard constraints. It’s about addressing a project with moderation and creating a positive work scenario that uses equipment prudently and respects work-life balance.

Do you ever wish you could have a four-day work week? Resource smoothing seeks to meet this kind of desire.

Along with the technique of resource leveling, a project manager uses resource smoothing to get all of the pieces in place to begin a project.

If you’re scheduling resources for a remote project, consider using Teamly. This intuitive project manager software allows you to visually display all of a project’s tasks and timelines for easy scheduling and organization. Visit us and sign up today!