If you’ve ever been part of a project team, you know how crucial it is to keep track of the tasks that need to be completed. And that’s where backlog management comes in. Backlog management is the process of prioritizing and organizing the list of tasks that need to be completed, known as the backlog. It’s a critical aspect of project management, ensuring the team is working on the most important tasks and making progress toward project goals.
But let’s be honest – backlog management can be challenging. With changing priorities and stakeholder expectations, it can be difficult to stay on top of everything. That’s why we’ve compiled insider tips and strategies to help you master backlog management and overcome even the toughest challenges. Whether you’re a seasoned project manager or just starting out, this article is for you. Let’s start by understanding what backlog management is.

Understanding Backlog Management
A backlog is a prioritized list of tasks or items that need to be completed within a project. It is a critical element in Agile project management methodology and serves as a foundation for project planning and execution. The backlog acts as a roadmap, guiding the team toward project completion, and it also helps to ensure that the most important tasks are being worked on.
There are two types of backlog that are commonly used in Agile project management: product backlog and sprint backlog.
Product Backlog
The product backlog is a high-level list of all the tasks that need to be completed to deliver the project. It is managed and prioritized by the product owner and can include items like new features, bug fixes, or technical debt.
For example, let’s consider a software development project where the product backlog includes items like “Add login functionality” and “Implement payment processing.” These items are critical to the success of the project, and the product owner has prioritized them accordingly.
Sprint Backlog
The sprint backlog, on the other hand, is a subset of the product backlog that includes the tasks that the team has committed to completing within a specific sprint. It is created during the sprint planning meeting and is owned by the development team.
To illustrate, let’s say the development team has committed to completing a two-week sprint. During the sprint planning meeting, they review the product backlog and select the items they will work on during this sprint. The sprint backlog for this particular sprint may include items like “Fix bug in login flow” and “Create error messages for payment processing.” These tasks are smaller, more specific, and can be completed within the two-week sprint timeframe.
By breaking down the larger items from the product backlog into smaller, more manageable items in the sprint backlog, the development team can focus on making progress toward the larger project goals while also making tangible progress toward completing specific tasks.
Despite its importance, backlog management can be challenging. However, by implementing these insider tips, you can ensure that your backlog management process is effective, efficient, and delivers value to stakeholders.
Backlog Management Tips
1. Prioritization
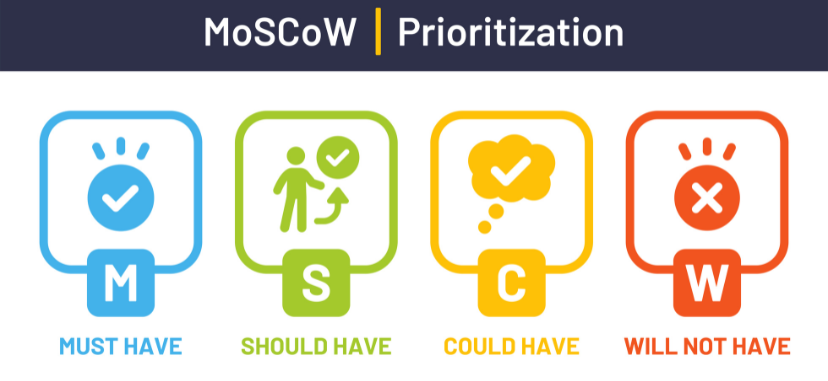
Prioritizing items in the backlog is critical to ensure that the most important tasks are being worked on first. One commonly used approach is to use the MoSCoW method, which categorizes items as Must-Have, Should-Have, Could-Have, and Won’t-Have. This method allows you to focus on the things that are critical to project success and deprioritize items that are not as important.
The MosCow Method
The MoSCoW method is a prioritization technique commonly used in Agile project management. It helps project teams to categorize items in the backlog based on their importance and prioritize them accordingly. MoSCoW stands for Must-Have, Should-Have, Could-Have, and Won’t-Have:
Must-Have: These items are critical to the project’s success and must be completed.
Should-Have: These items are important but not critical and can be deprioritized if necessary.
Could-Have: These items are nice to have but optional. They can be deprioritized if necessary.
Won’t-Have: These items have been deemed unnecessary or will not be completed in the current project cycle.
An example of using the MoSCoW method in backlog management could be for a software development project where the team has identified the following items for the product backlog:
Must-Have: Create a login page, enable user registration, and allow users to reset their passwords.
Should-Have: Enable users to change their email addresses and allow users to upload profile pictures.
Could-Have: Create a welcome email for new users, allowing users to customize their dashboard layout.
Won’t-Have: Implement a chat feature.
Using the MoSCoW method, the team can ensure that they focus on the items that are critical to the project’s success first and deprioritize those that are not as important.
2. User stories

Another crucial component of effective backlog management is the use of user stories, which help teams to focus on the end-users’ needs. A user story is a simple, high-level description of a feature or requirement from the user’s perspective. It typically follows a simple template: “As a [type of user], I want [some goal or need] so that [some reason or benefit].” This format helps to clearly define the user’s needs and the expected outcome of the feature or requirement.
For example, let’s say that a software development team is working on a project to add new features to an e-commerce website. One item on their backlog is to allow users to track their order status. Instead of adding “Add order tracking functionality” to the backlog, they would create a user story that describes the feature from the user’s perspective. An example of a user story for this item could be: “As a customer, I want to be able to track the status of my order so that I can know when to expect delivery and ensure that my package arrives on time.” This user story is simple and easy to understand, yet it captures the key requirements of the feature and focuses on the end user’s needs.
Using user stories, teams can break down large items in the backlog into smaller, more manageable pieces. This helps ensure that each item is well-defined and actionable and that the team is working toward the needs of the end user. Additionally, user stories can help teams to prioritize items in the backlog based on their impact on the end user, ensuring that the most important features are developed first.
3. Estimation

Estimation is another key aspect of backlog management that helps teams plan and prioritize their work effectively. By accurately estimating the effort required for each backlog item, teams can ensure that they are effectively prioritizing and completing work on time.
Relative estimation is a popular approach many teams use, as it allows for more accurate estimates and reduces bias. Rather than estimating items in absolute terms (such as hours or days), items are estimated relative to each other. For example, a team might estimate one item as being twice as complex as another, or one item as similar in complexity to three other items combined.
One advantage of relative estimation is that it can be quicker and more intuitive than absolute estimation. It also helps to avoid overestimating or underestimating the effort required for each item.
An example of relative estimation in backlog management could be where the team estimates the effort required for different user stories. Rather than estimating each user story in hours, the team estimates them relative to each other. For instance, they might estimate one user story as being twice as complex as another or estimate one user story as similar to three combined user stories. By using relative estimation, the team can ensure that their estimates are more accurate and realistic.
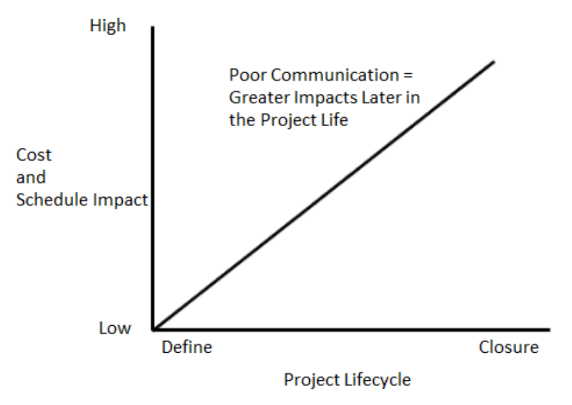
4. Communication

Effective communication is also important to ensure everyone involved in the project is aligned and working towards the same goals. In backlog management, it is critical that team members have a shared understanding of the items, their priority, and their status to ensure effective communication.
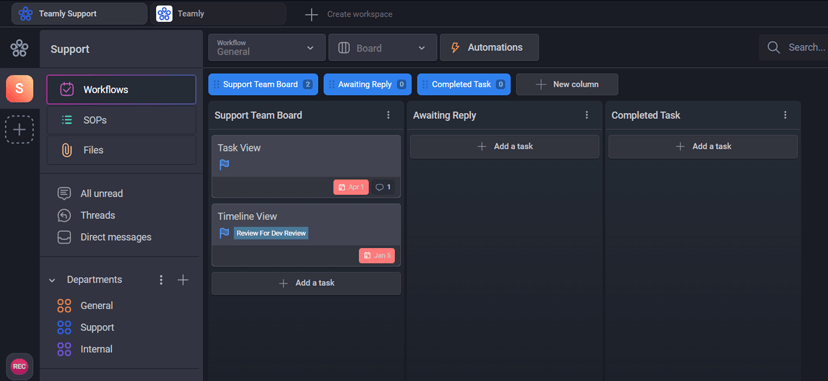
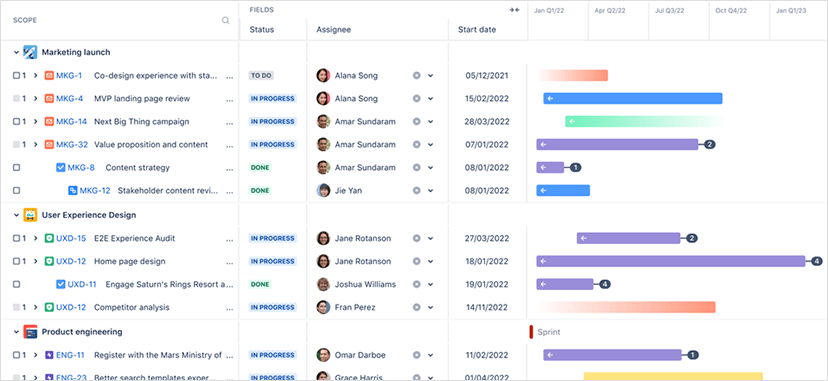
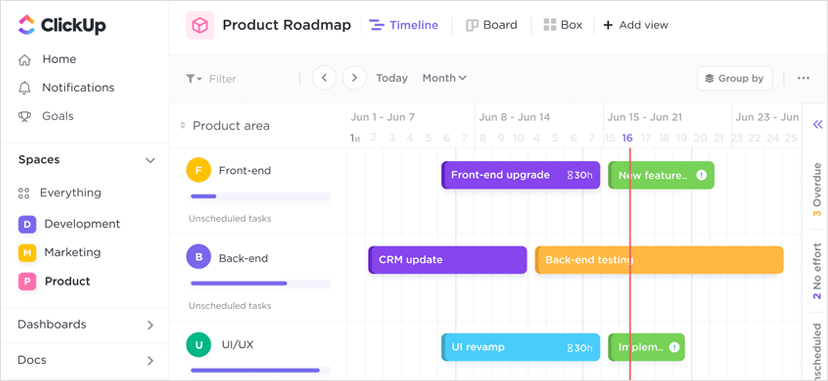
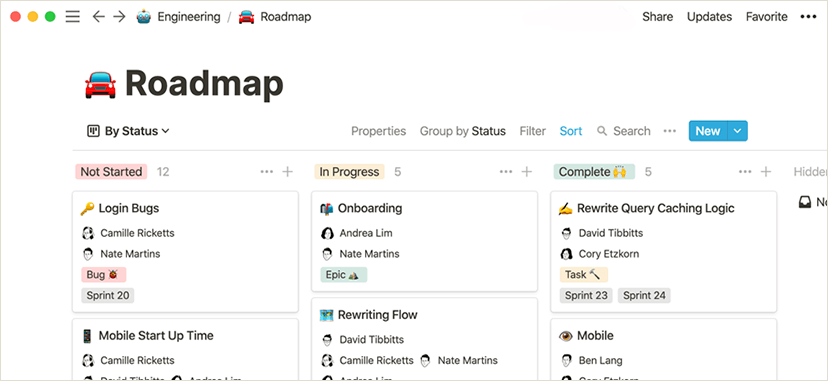
One effective way to improve communication in backlog management is to use visual management tools such as Kanban boards. Kanban boards provide a clear and shared view of the backlog and make it easier for team members to track progress and identify potential issues. For instance, a Kanban board can have columns for “To Do”, “In Progress”, and “Done”, with each backlog item represented as a card that moves through the columns as it progresses.
In addition to using visual management tools, regular stand-up meetings can also help improve communication in backlog management. Stand-up meetings are short, daily meetings where team members provide progress updates, identify roadblocks or issues, and align priorities. These meetings help ensure everyone is on the same page and can promptly address any issues or roadblocks.
5. Timeboxing
Timeboxing is another powerful technique that helps teams stay focused and productive by setting specific time limits for backlog items or tasks. By doing so, teams can ensure that they allocate time effectively across all items in the backlog and complete work within a set timeframe.
For example, a marketing team might use timeboxing to limit the amount of time spent on daily content creation tasks, setting a limit of two hours per task. This helps the team stay on track and ensures that they complete all of their daily tasks in a timely manner without getting bogged down in any one task for too long.
Timeboxing can also be used during meetings or collaborative sessions to keep the discussion focused and on track. For instance, a product team might timebox their backlog refinement meetings to ensure they can review all items within a set timeframe.
By timeboxing backlog items, teams can ensure that they are effectively managing their workload and completing work within a set timeframe.
6. Collaboration

Collaboration is essential for effective backlog management. By involving all team members in the process and leveraging their unique perspectives and expertise, teams can generate better ideas and solutions that lead to better project outcomes. Additionally, collaboration can help build stronger relationships and trust among team members, leading to better teamwork and increased productivity.
To encourage collaboration in backlog management, consider holding regular meetings or workshops where team members can review and discuss the backlog together. These sessions can help prioritize and refine the backlog items, and they can take the form of sprint planning meetings, sprint reviews, or backlog refinement sessions. Collaborative tools and technologies such as online whiteboards and shared document repositories can also help team members work together in real-time, regardless of their physical location. These tools can improve communication and information sharing, which is critical for effective backlog management.
By prioritizing collaboration in backlog management, teams can work more efficiently and deliver higher quality outcomes for the project. As such, it is crucial to involve all team members and utilize collaborative tools and technologies to encourage effective collaboration and ensure everyone is aligned and working towards the same goals.
7. Visualization

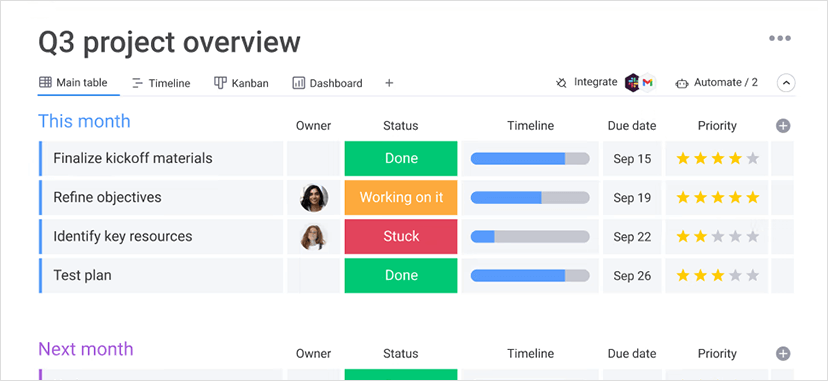
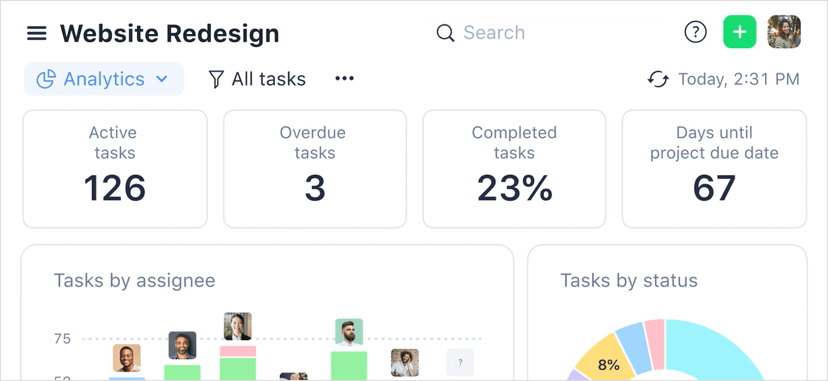
In addition to the list, visualization is also an important aspect of backlog management that can greatly improve team efficiency and productivity. By representing backlog items and tasks in a visual format, teams can quickly understand the status of each item, identify bottlenecks, and track progress toward goals. This helps teams stay organized and focused, leading to better collaboration and faster value delivery to stakeholders.
In addition to Kanban boards and Gantt charts, other visualization tools can be used for backlog management, such as burn-up charts and cumulative flow diagrams. Burn-up charts can help teams track progress toward a specific goal, while cumulative flow diagrams can help identify work areas slowing down the overall process.
Visualizing the backlog can also help stakeholders outside the development team understand the project status and priorities. For example, a product owner can use a visualization tool to provide a high-level view of the backlog to executives or other stakeholders, making it easier for them to understand the work and progress toward project goals.
8. Refinement

Refinement is another important aspect of effective backlog management. It involves regularly reviewing and improving backlog items to ensure they are clear, actionable, and align with project goals. By refining backlog items, teams can work on the right tasks with a clear understanding of what needs to be done, which is crucial for successful backlog management.
One way to refine backlog items is by breaking down large, complex items into smaller, more manageable tasks. This makes the work more achievable and reduces the risk of items getting stuck in the backlog for too long.
Another important part of refinement is ensuring that backlog items are estimated accurately. Teams can use techniques like relative estimation to make sure that items are estimated without bias and are as accurate as possible.
Refinement also involves getting feedback from stakeholders such as product owners, users, and development teams. This feedback helps identify areas where backlog items can be improved and can lead to better outcomes for the project.
For example, a product owner might regularly review their backlog items, breaking down large user stories into smaller tasks and refining them to ensure they’re actionable. They could also seek feedback from developers and other stakeholders to make sure the backlog items are well-defined and feasible. For instance, they could refine the user story “As a user, I want to be able to search for products by category” into smaller tasks such as “Design category search UI”, “Implement category search function”, and “Test category search function”.
9. Automation

Automation is also a powerful tool for improving backlog management using software tools to automate repetitive or time-consuming tasks. Many aspects of backlog management can be automated to help teams work more efficiently and effectively. Here are a few examples:
Automated Testing: Testing is an important aspect of backlog management to ensure that code changes do not break existing functionality. However, manual testing can be time-consuming and prone to errors. By using automated testing tools, teams can catch issues early and avoid the need for manual testing, saving time and reducing the risk of errors.
Continuous Integration: Continuous integration integrates code changes into a shared repository frequently, often several times daily. This helps teams catch integration issues early and resolve them quickly.
Automated Reporting: Backlog management involves tracking progress toward goals and identifying areas for improvement. Automated reporting tools can help teams generate reports on backlog status, progress, and other metrics, allowing them to make data-driven decisions and identify areas for improvement.
By automating these tasks, teams can reduce the risk of errors, save time, and focus on more strategic work. Automation can also improve the consistency and accuracy of backlog management, leading to better results overall.
10. Traceability

Lastly, traceability is another crucial aspect of effective backlog management, as it helps ensure that all items are aligned with the project goals and are implemented as intended. By tracing the lineage of each backlog item from its initial definition to its implementation and release, teams can identify any gaps or inconsistencies in work and take corrective action.
One effective approach to traceability is using a traceability matrix, a table that maps the relationship between requirements and other artifacts in the project. This can help teams track the progress of each backlog item and ensure that all requirements have been met.
For example, a development team is working on a new e-commerce website. They use a traceability matrix to track each requirement in the backlog and map it to the relevant design documents, code changes, and test cases. This allows them to ensure each requirement is implemented as intended and that everything is clear in work.
By ensuring traceability, teams can maintain alignment with project goals and avoid any gaps or inconsistencies in work, which is critical for effective backlog management.
Implementing these tips and techniques can improve your backlog management process and ensure that your team works effectively and efficiently. However, to overcome the challenges of backlog management, you must have a comprehensive strategy that addresses the key areas of focus. Consider these strategies for overcoming common backlog management challenges:
Backlog Management Strategies
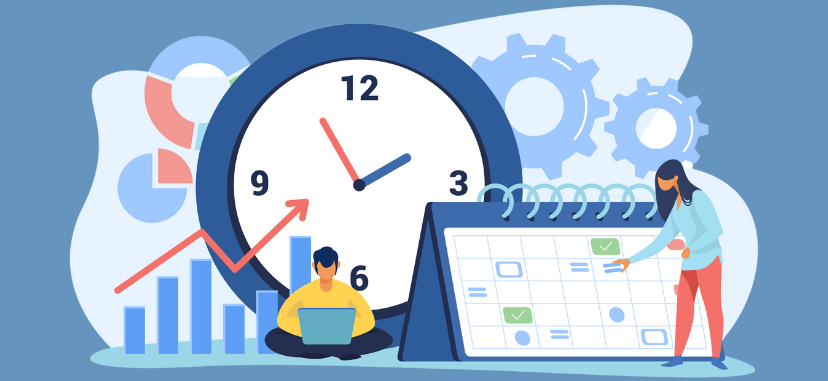
1. Time Management

Effective backlog management requires careful attention to time management, as it helps ensure that the team uses their time effectively and efficiently.
By implementing the following strategies, you can improve your time management skills and overcome common time management challenges:
Set clear goals and prioritize tasks accordingly.
Start by identifying the most important tasks in your backlog and prioritize them based on their level of importance and urgency. This will help you stay focused on what matters most and ensure that you’re making progress toward your goals.
Break down large tasks into smaller, more manageable ones.
Large, complex tasks can be overwhelming and difficult to manage. You can progress quickly and easily by breaking them into smaller, more manageable tasks. This approach can help you identify any dependencies or roadblocks hindering your progress.
Use time-tracking tools to monitor how much time you spend on each task.
Time-tracking tools can help you monitor how much time you’re spending on each task, which can help you identify any areas where you might be spending too much time or not enough. This information can be used to adjust your priorities and optimize your time management.
Set realistic deadlines and stick to them.
Realistic deadlines help you stay on track and motivate you to work towards your goals. It also allows you to allocate your time and resources effectively, ensuring that you can deliver high-quality work without feeling overwhelmed. Conversely, unrealistic deadlines can lead to stress, burnout, and poor-quality work. By setting realistic deadlines and sticking to them, you can improve your productivity, focus, and overall effectiveness in backlog management.
Identify and eliminate time-wasting activities.
Time-wasting activities, such as unnecessary meetings or distractions, can waste valuable time and hinder your productivity. Identifying and removing these activities can save time for important tasks and improve efficiency.
2. Stakeholder Management

Identifying and satisfying the needs of stakeholders invested in the project is crucial for successful backlog management, making a stakeholder manager essential. Here are some strategies to help you manage stakeholders effectively:
Clearly define project goals and communicate them to stakeholders.
To ensure alignment with project goals, you must determine them clearly and communicate them to all stakeholders through regular meetings, progress reports, and other communication channels.
Identify all stakeholders and their needs.
It’s important to identify all stakeholders involved in the project and their specific needs. This can be done by conducting stakeholder analysis and engaging with stakeholders to understand their expectations.
Regularly update stakeholders on project progress and any changes to the backlog.
The project team needs to keep stakeholders up-to-date on project progress, including changes to the backlog. They can achieve this by sharing progress reports and holding regular meetings.
Address stakeholder concerns promptly and effectively.
When stakeholders raise concerns or issues, it’s important to address them promptly and effectively. This can be done by having a well-defined process for stakeholder feedback and communication.
Use collaborative tools to involve stakeholders in the backlog management process.
Collaborative tools can be used to involve stakeholders in the backlog management process. This helps ensure that their needs are being met and that they are engaged in the project.
3. Change Requirements

Handling changing requirements can be a daunting challenge in backlog management, but it can also present an opportunity for growth and improvement. Here are some strategies to help you handle changing requirements:
Regularly review and update the backlog to reflect changing requirements.
It is important to periodically review and update the backlog to ensure it reflects any changes in conditions. This helps to keep the backlog aligned with the project goals and makes it easier to prioritize tasks.
Work with stakeholders to understand the impact of changing requirements on project goals and timelines.
You can better understand how changing needs impact project goals and timelines by working with stakeholders. This helps you make informed decisions about adjusting the backlog to accommodate changes.
Use prioritization techniques to ensure that the most important requirements are addressed first.
Prioritization is key when handling changing requirements. By prioritizing the most important requirements, you can ensure the project stays on track and delivers value to stakeholders.
Be flexible and willing to adjust your plans as needed.
Being flexible and adaptable is essential when handling changing requirements. By being open to change and ready to adapt your strategies as needed, you can keep the project moving forward and ensure that it meets the needs of stakeholders.
Use agile development methodologies to respond to changing requirements quickly and efficiently.
Agile methods are designed to help teams respond to change rapidly and efficiently. By using agile methodologies, you can stay nimble and adjust your plans to keep the project on track.
4. Risk Management

Effective risk management is critical for successful backlog management. Here are some strategies to help you manage risks effectively:
Identify potential risks and prioritize them based on their likelihood and impact.
To manage them effectively, it’s important to identify potential risks and prioritize them based on their likelihood of occurring and the impact they could have on the project. This will help you focus your efforts on the most critical risks first.
Develop contingency plans for high-risk items.
For high-risk items, it’s important to develop contingency plans to mitigate the risk or to have a plan in place to address it if it does occur. This will help you minimize the impact of the risk on the project and keep it on track.
Monitor risks throughout the project and adjust plans as needed.
Risks can change throughout the project, so monitoring them regularly and adjusting your goals as needed is important. This will help you stay on top of potential risks and ensure you take the necessary steps to mitigate them.
Use data and analytics to identify trends and potential risks.
Data and analytics can help you identify potential threats before they become major issues. By analyzing data from previous projects, you can identify trends and potential risks that may impact your current project.
Regularly communicate with stakeholders about potential risks and how they are being addressed.
It’s important to communicate regularly with stakeholders about potential risks and how they are being addressed. This will help you build trust and confidence with stakeholders and ensure everyone is on the same page.
5. Continuous Improvement

Continuous improvement is a crucial aspect of effective backlog management. You can deliver the best possible results for your stakeholders by continuously evaluating and improving your backlog management process. Here are some strategies to help you continually improve your backlog management process:
Regularly review and evaluate your backlog management process.
It’s important to periodically assess your backlog management process to identify any areas for improvement. This can involve conducting retrospective meetings with your team, analyzing stakeholder feedback, and reviewing performance metrics.
Identify areas for improvement and develop plans to address them.
Once you’ve identified them, creating a plan to manage them is important. This can involve setting specific goals, developing action plans, and assigning responsibilities to team members.
Solicit feedback from team members and stakeholders on ways to improve the process.
Feedback from team members and stakeholders can provide valuable insights into improving your backlog management process. Encourage open communication and actively seek feedback to identify areas for improvement.
Use metrics to track progress and identify areas for improvement.
Metrics such as cycle time, lead time, and backlog size can provide valuable insights into the performance of your backlog management process. Use these metrics to track progress and identify areas for improvement.
Stay up to date on industry best practices and new tools and technologies that can improve your backlog management process.
The field of backlog management is constantly evolving, and it’s important to stay up to date on the latest best practices, tools, and technologies. Attend conferences, read industry publications, and engage with other professionals in the field to stay informed and identify opportunities for improvement.
Conclusion
Effective backlog management is a crucial aspect of project success. With the fundamental principles, insider tips, and strategies discussed in this article, you can ensure that your team is always on track and delivering value to stakeholders. If you want to streamline your backlog management process, project management tools like Teamly offer customizable features to help prioritize tasks and manage stakeholder expectations. Remember, backlog management is an ongoing process that requires communication, collaboration, and adaptation. By following the tips and strategies outlined in this article and considering using tools like Teamly, you can achieve project success and maximize your team’s productivity.